].")

Previously, we have seen how to restore the classical volume controller in Windows 10, in following article:
How To Enable Or Disable Modern UI Volume Control In Windows 10
Today, we’re back with yet another customization article which will help you to restore old style battery level indicator in Windows 10. Windows 10 is shipped with Modern UI battery level fly-out in order to match it with other system icons.
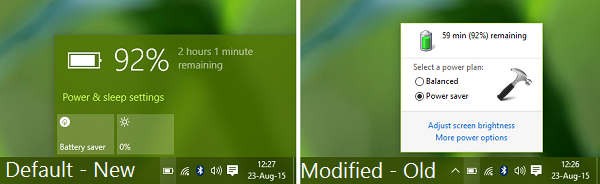
But if you don’t like this Modern UI battery level fly-out, and want to restore former one, you can easily do it with a registry manipulation. Here is how:
How To Bring Back Old Battery Level Indicator In Windows 10
Registry Disclaimer: The further steps will involve registry manipulation. Making mistakes while manipulating registry could affect your system adversely. So be careful while editing registry entries and create a System Restore point first.
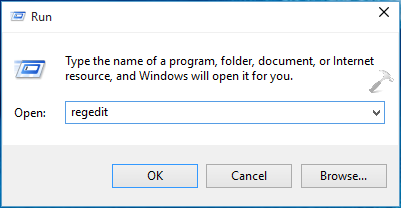
1. Press  + R and put regedit in Run dialog box to open Registry Editor (if you’re not familiar with Registry Editor, then click here). Click OK.
2. In the left pane of Registry Editor, navigate to following registry key:
HKEY_LOCAL_MACHINE\SOFTWARE\Microsoft\Windows\CurrentVersion\ImmersiveShell
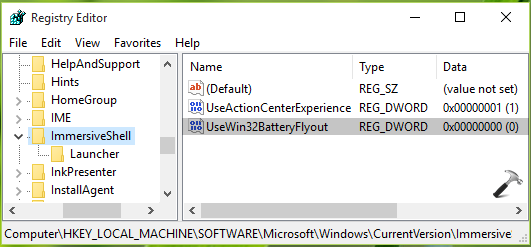
3. At this registry location, highlight the ImmersiveShell key in the left pane. Then in the corresponding right pane, right click in the blank space and select New -> DWORD Value. Rename the newly created DWORD to UseWin32BatteryFlyout from New Value #1. Double click on the same DWORD to modify its Value data:
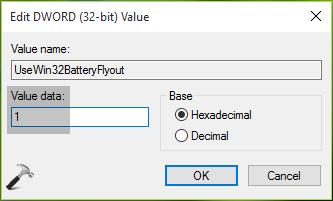
4. Finally, set the Value data to 1 to enable old battery level indicator in the above shown Edit DWORD Value box. Click OK. Close Registry Editor and restart File Explorer to make changes effective.
In case if you want to restore Modern UI or default battery level indicator, change the Value data back to 0 in step 4 or delete the DWORD we created in step 3.
That’s it! Also see how do you restore Windows Photo Viewer as default image viewer in Windows 10.


")


Leave a Reply