].")

Autoplay begins reading from a drive as soon as you insert media into the drive. Therefore, the setup file of programs and the music on audio media start immediately. Autoplay commands are generally stored in “autorun.inf” files. These commands enable applications to start, start installation programs, or start other routines.
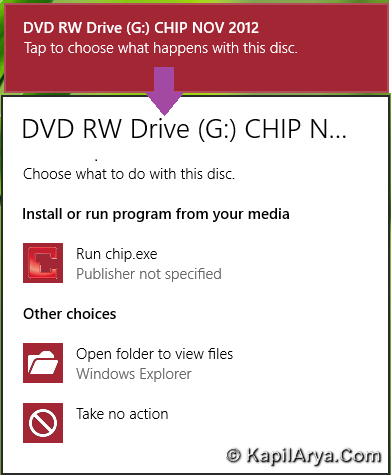
There may be certain scenarios when you are not able to get Autoplay options. Previously, I have posted the manual method to fix this issue. While there exists cases, when you do not want Autoplay options. If you’re irritated with Autoplay option, then read on. Here is the screenshot revealing Autoplay options for a DVD media in Windows 8:
In this article, I’ll tell you the way to completely disable Autoplay option. Many of you might want to know that why we’re doing that? Actually, users behavior is the need of such method. Some users might want to use Explorer to view the files inside an inserted media rather than opting for options inside Autoplay. Basically, Autoplay is enabled for removable drives. This includes ZIP drives and some USB mass storage devices. If you enable the settings to disable Autoplay (the procedure to do this is described in this article), you can disable Autoplay on a CD drive, on removable media drives, on all drives.
So without wasting any more time, let see the method:
How To Disable Autoplay In Windows 10/8/7
Registry Disclaimer: The further steps will involve registry manipulation. Making mistakes while manipulating registry could affect your system adversely. So be careful while editing registry entries and create a System Restore point first.
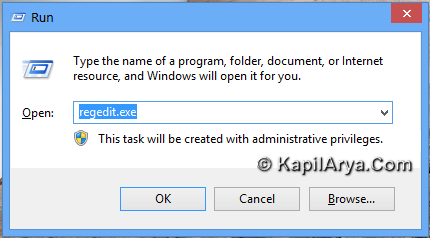
1. Press  + R and put regedit in Run dialog box to open Registry Editor (if you’re not familiar with Registry Editor, then click here). Click OK.
2. Navigate here:
HKEY_CURRENT_USER\Software\Microsoft\Windows\CurrentVersion\Policies\Explorer
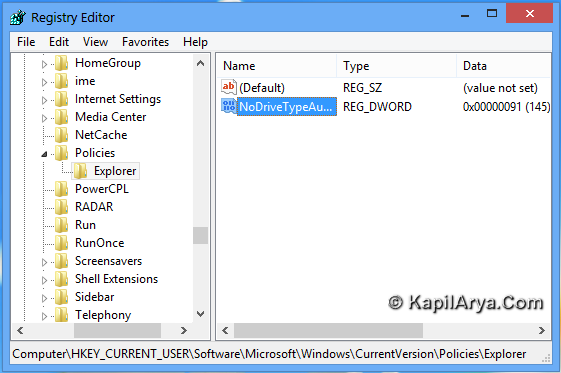
3. In the right pane of this location, you’ll find a DWORD named NoDriveTypeAutoRun. Double click this DWORD in order to modify it, you’ll got this:
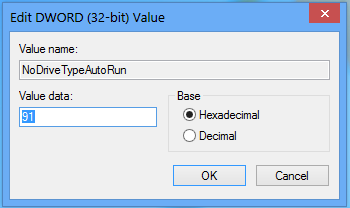
4. To disable AutoPlay for all drives, input 0xFF for the Value data section in above shown box. Aid to this, you can use following values for specifically disabling AutoPlay features :
0x1 or 0x80 – Disables AutoPlay On Drives Of Unknown Type
0x4 – Disables AutoPlay On Removable Drives
0x8 – Disables AutoPlay On Fixed Drives
0x10 – Disables AutoPlay On Network Drives
0x20 – Disables AutoPlay On CD-ROM Drives
0x40 – Disables AutoPlay On RAM Disks
After inputting your desired value, click OK. Exit Registry Editor. Reboot and insert a new media to verify the results.
That’s it!


2 Comments
Add your comment
it can be done via GPEDIT.MSC.
^^ Sure. You need to configure the policy at Computer Configuration\Administrative Templates\System (for computer) and User Configuration\Administrative Templates\System (for user).