The Blue Screen of Death (BSOD) is a highly troubling issue for Windows users, and one particular error that can be especially frustrating is the “dxgkrnl.sys” BSOD error. When this error occurs, your computer crashes, displaying a blue screen with the “dxgkrnl.sys” error message. This error is related to the DirectX graphics kernel subsystem and is usually triggered by issues with your graphics hardware, drivers, or software conflicts. In this guide, we’ll show you how to fix Dxgkrnl.sys BSOD Error in Windows 11/10, so your computer runs without any hiccups.
Page Contents
What is Dxgkrnl.sys BSOD Error?
The “dxgkrnl.sys” BSOD (Blue Screen of Death) error is a Windows system error related to the DirectX graphics kernel subsystem. DirectX is a collection of APIs (Application Programming Interfaces) developed by Microsoft for handling multimedia tasks, including graphics and gaming on Windows operating systems.
The “dxgkrnl.sys” file is a critical component of this system and is responsible for managing graphical functions, such as rendering graphics and handling communication between the graphics hardware and software.
Common causes of this error include:
- Outdated or corrupted graphics drivers.
- Hardware issues with the graphics card.
- Overclocking the GPU.
- Software conflicts, like third-party applications.
- Malware or virus infections.
- Operating system problems, such as missing or corrupted files.
Fix: Dxgkrnl.sys BSOD Error in Windows 11/10
Here are the top 5 solutions to fix the Dxgkrnl.sys BSOD Error problem.
Fix 1: Run System File Checker
To address this issue, you can use the System File Checker (SFC) tool. SFC scans your system for damaged or missing files and attempts to repair them. Here’s how to use this tool to help resolve the error.
1. Open the Command prompt and run as administrator.
2. Copy and paste the below command:
sfc /scannow

Press Enter.
3. Wait until the scanning is complete. This will scan and repair the corrupted system files.
After that, check whether the issue is resolved or not.
Fix 2: Run DISM Commands
Deployment Image Service and Management Tool (DISM) is a Windows utility that can help repair the Windows image and resolve issues related to system files. By following these steps, you can use DISM to check and repair your system’s health, potentially addressing the error.
1. Open the Command prompt and run as administrator.
2. Copy and paste the below commands one by one. Press Enter after each command to execute the command.
DISM /Online /Cleanup-Image /CheckHealth

DISM /Online /Cleanup-Image /ScanHealth

DISM /Online /Cleanup-Image /RestoreHealth

3. Wait until the scanning and preparation of the corrupted system files is done on your PC.
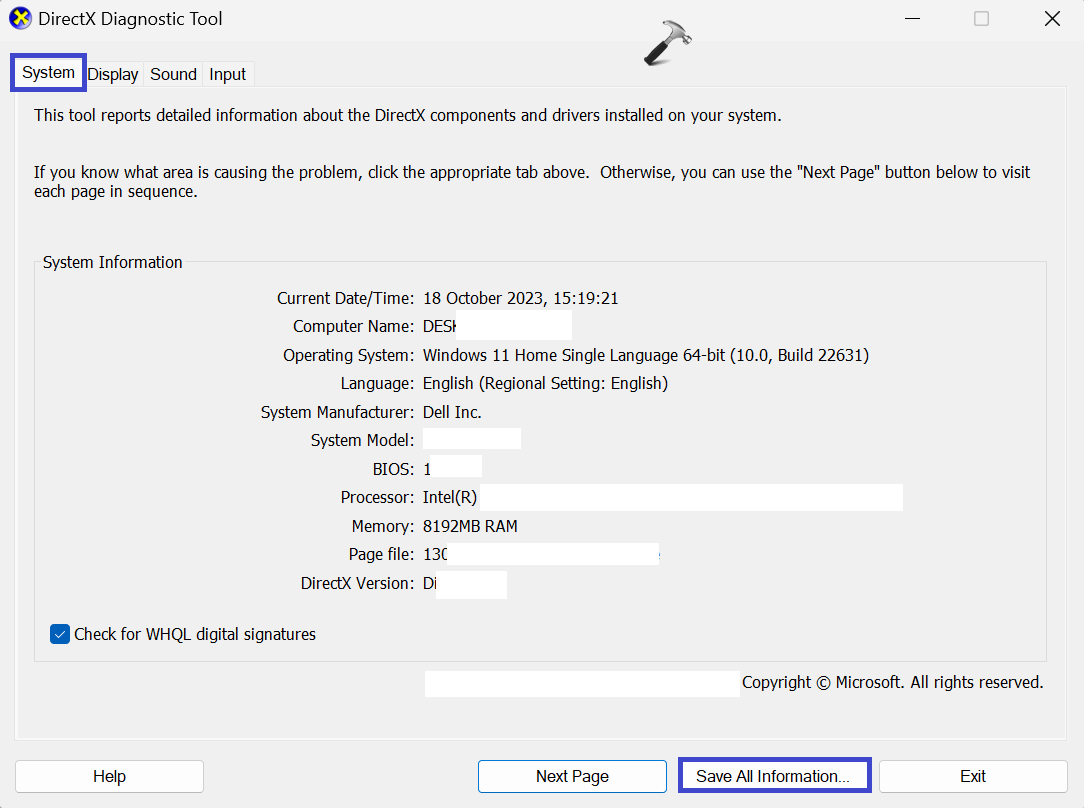
Fix 3: Run DirectX Diagnostic Tool
The DirectX Diagnostic Tool is a useful utility for diagnosing and troubleshooting graphics and sound-related issues. Follow the below steps to run DirectX Diagnostic Tool:
1. Press the Windows key + R. Type “dxdiag” and click OK.
Alternatively, you can use Windows PowerShell to open the tool. Open Windows PowerShell, type “dxdiag,” and press Enter.
2. Wait for the DirectX Diagnostic Tool to scan your system. When it’s finished, you’ll see the system information page, similar to the one shown in the image below.
4. Now, navigate to the Display, Sound, and Input tabs one by one to check for any problem detected by the DirectX Diagnostic tool.
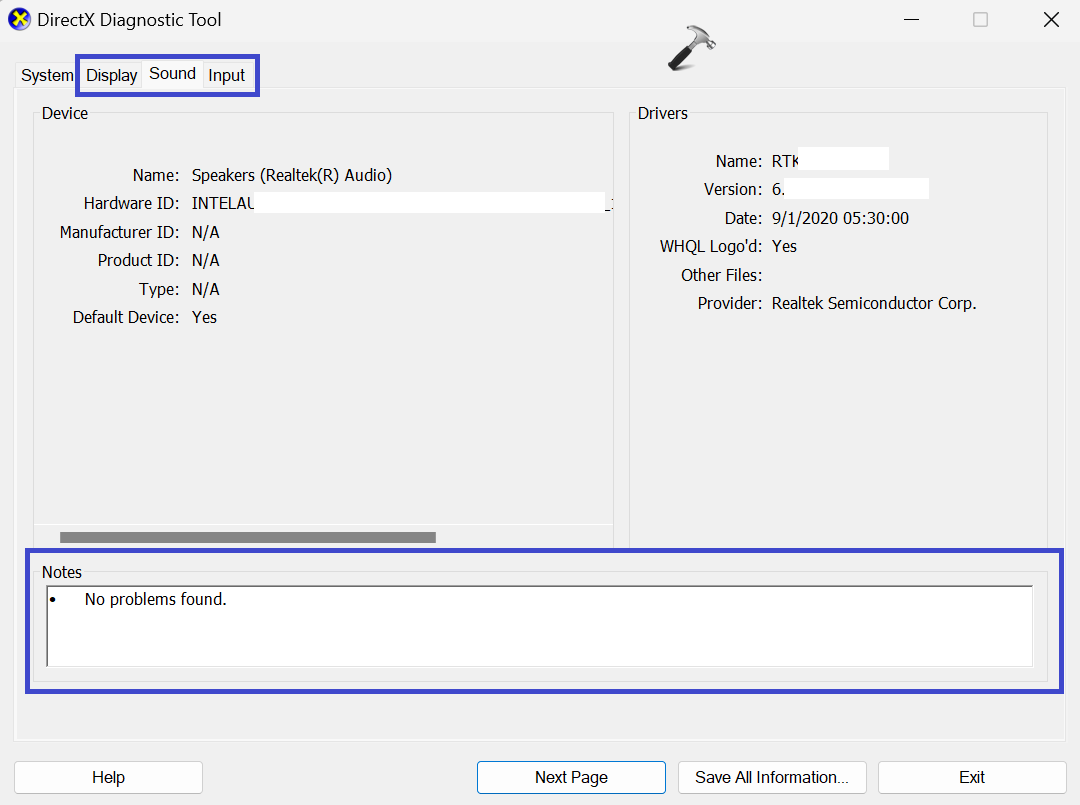
5. At the bottom of the tool, you’ll find “Notes” that provide detailed information about any problems identified.
Fix 4: Check Hardware Failure
The dxgkrnl.sys BSOD error may be attributed to potential hardware issues, such as a malfunctioning motherboard or faulty RAM module. If your computer is still within its warranty period, it is advisable to bring it to the store for a thorough hardware diagnostics check. If any hardware failures are identified during the inspection, it is recommended to have them replaced promptly.
Fix 5: Re-install Graphics Driver
Reinstalling the graphics driver can help resolve compatibility and corruption problems. Below are the steps to guide you through the process of uninstalling and reinstalling your graphics driver.
1. Press the Windows key + X and select “Device Manager“.
2. Expand the “Display adapters” option.

3. Now, right-click on the Graphics driver and click “Uninstall device“.
4. A prompt box will appear to confirm to uninstall the driver. Click OK.
5. After that, go to your graphics card driver download and install the latest graphics card driver.
That’s It!