
By default, user accounts in Windows 11 have no password expiry. This means, users can use same password for infinite amount of time. But if password expiry is enabled, by default, users password will expire in 42 days. This guide will show you how to configure password expiration and set a desired expiry time for password.

The password expiration is valid for local users accounts only. It is most crucial security aspect for domain connected systems, where users are usually required to change passwords on a regular basis. So if you’ve switched your local account to Microsoft account, password expiration is not applicable to it.
One must have administrative privileges to configure password expiration. If you’re on administrator account, here’s how you can configure password expiration for other accounts on your Windows 10.
Page Contents
How To Configure Password Expiration In Windows 11/10
Method 1: Using Command Prompt
1. Open administrative Command Prompt.
2. Type either of following command:
For enabling password expiration, use this command:
wmic UserAccount where Name="<USERNAME>" set PasswordExpires=True
For disabling password expiration, execute this command:
wmic UserAccount where Name="<USERNAME>" set PasswordExpires=False
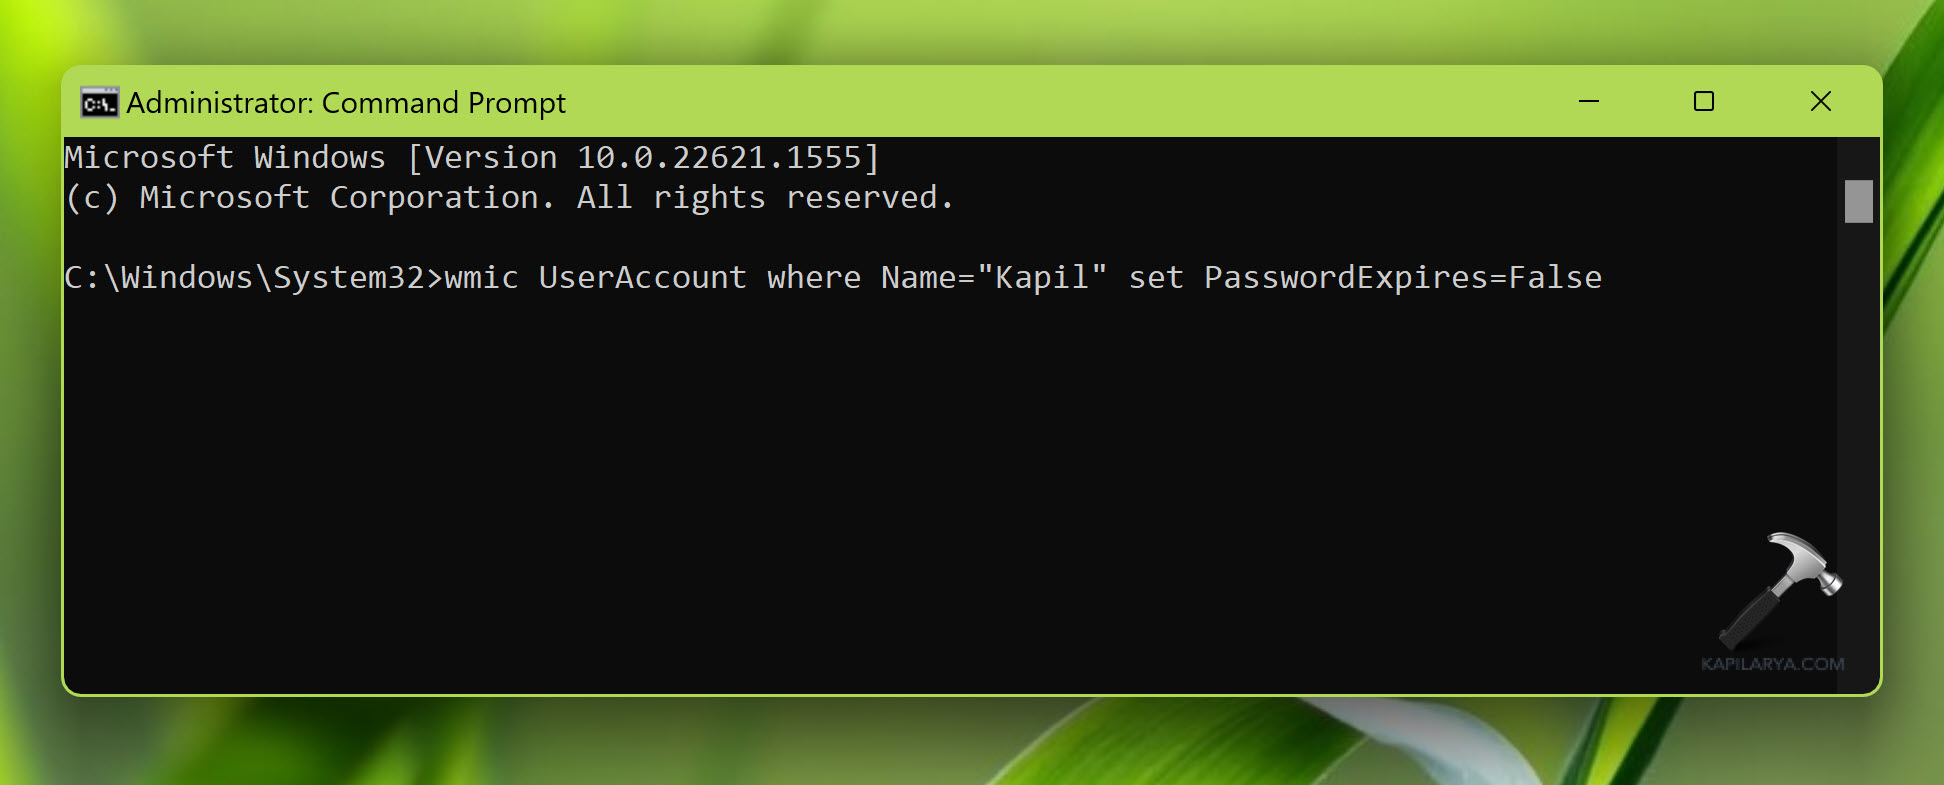
*Substitute <USERNAME> with actual user account name, for which you want to enable or disable password expiration.
Method 2: Using Group Policy
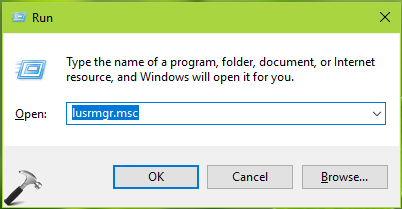
1. Press  + R and type lusrmgr.msc in Run dialog box to open Local Users and Groups snap-in. Click OK.
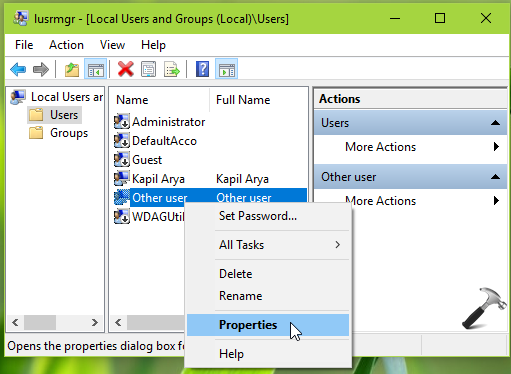
2. In the lusrmgr window, double click on Users. Now right click on the other user account, select Properties.
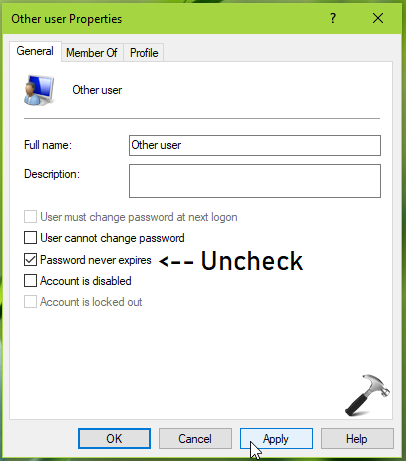
3. On the property sheet, uncheck Password never expires option. Click Apply, OK. Close Local Users and Groups snap-in.
4. Press + R and put secpol.msc in Run dialog box. Click OK to open Security Policy snap-in.
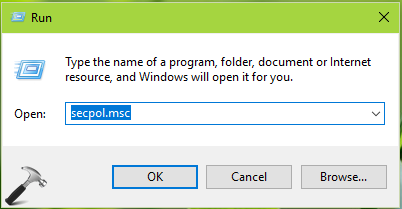
5. Then in Security Policy snap-in window, navigate here:
Security Settings > Account Policies > Password Policy
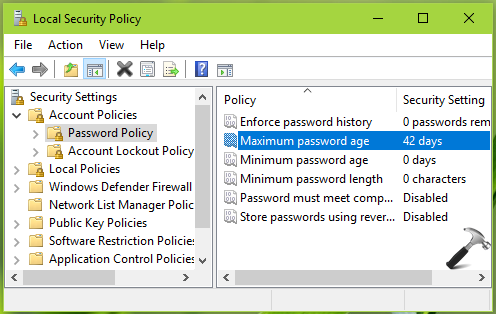
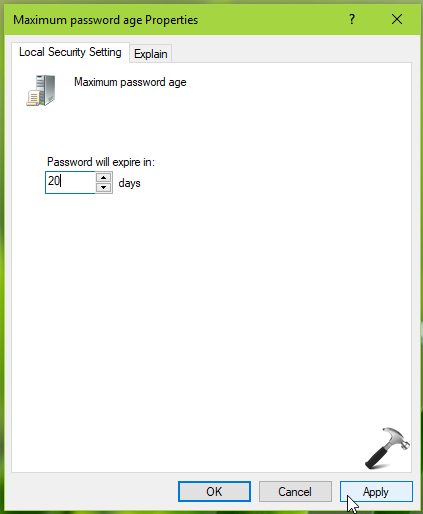
6. In the right pane of Password Policy, look for policy setting named Maximum password age. Double click on the policy and set it equal to number of days in which you want to let user password expire. Click Apply followed by OK.
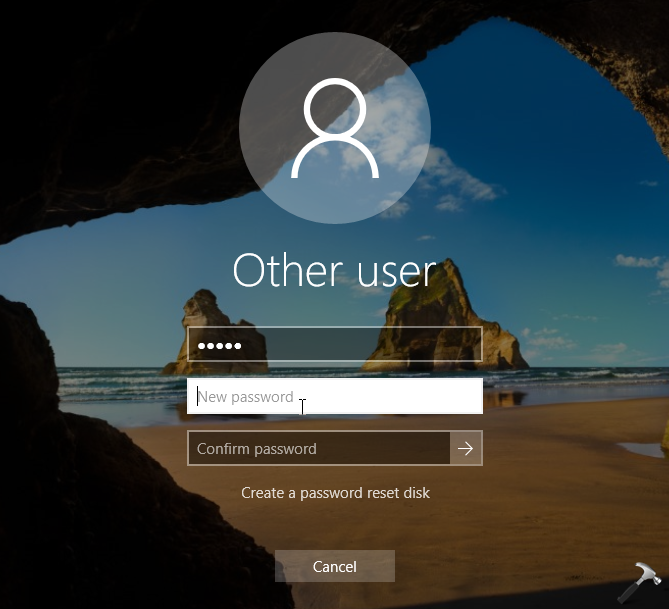
7. Now when users attempt to login after number of days you specified in the password policy, they’ll see following message:
Your password has expired and must be changed.

8. Clicking OK button will let users change the password:
So this is how you can configure password expiration for users accounts in Windows 10.
That’s it!
Read next: How To Enable PIN Expiration In Windows.
Originally written on Sep 11, 2018. Last updated for Windows 11.


wmic is deprecated in windows 11 (2h22/2h23?)
True, both methods don’t work anymore