Though we may use different printers with Windows but in most of cases, we’ve a printer that deserves to be default printer. Generally, Windows marks that printer as default one whose name comes first in alphabetical order, among available printers.
However, when you add new printer to Windows 10, the wizard will give you the option to set it as default printer. With the help of this option you can easily set newly added printer as default one but this doesn’t happens all the time. Sometimes you may receive Default printer cannot be set warning for this operation as shown below.
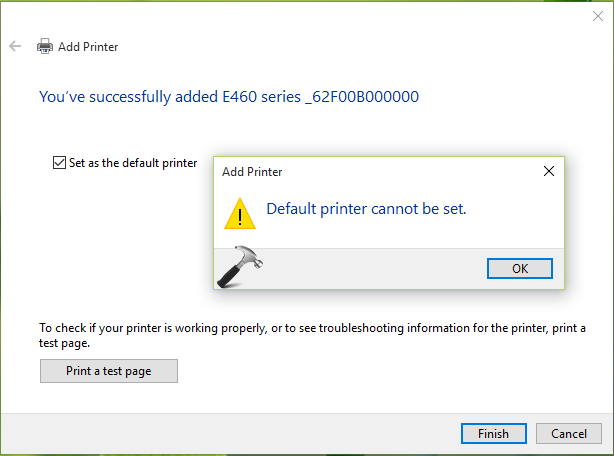
As an alternative approach, you can open Settings app and go to Devices > Printers & scanners and set your desired printer as default one from there. But if even that doesn’t works, you can try setting default printer in registry as mentioned below.
FIX : Default Printer Cannot Be Set In Windows 10/8.1/8/7
Registry Disclaimer: The further steps will involve registry manipulation. Making mistakes while manipulating registry could affect your system adversely. So be careful while editing registry entries and create a System Restore point first.
1. Press  + R and put regedit in Run dialog box to open Registry Editor (if you’re not familiar with Registry Editor, then click here). Click OK.
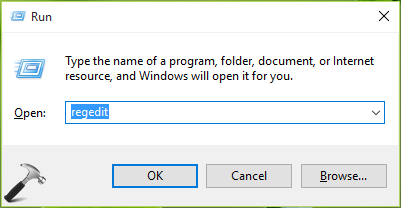
2. In the Registry Editor window, navigate to following registry key:
HKEY_CURRENT_USER\Software\Microsoft\Windows NT\CurrentVersion\Windows
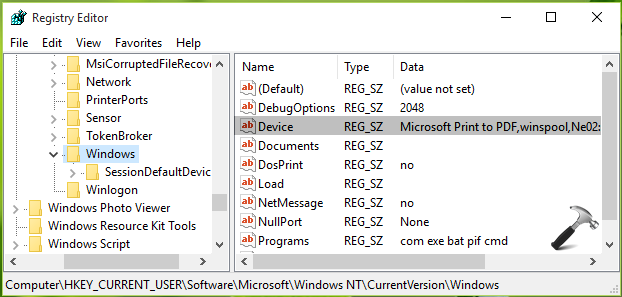
3. In the right pane of Windows registry key, you should find Devices registry string (REG_SZ). Its Value data contains three terms, out of which first one sets default printer for your Windows OS. Second and third term contains spooler (relating Print Spooler service) and the connection information, respectively. So double click on this registry string to modify its Value data:
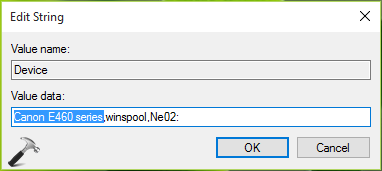
4. Finally, in Edit String box, modify first term with the printer name which you want to set as default. This name should be exactly same as appeared in list of printers available at Control Panel > All Control Panel Items > Devices and Printers or Settings app > Devices > Printers & scanners. Click OK and close Registry Editor.
You can then check in Control Panel and you’ll find that registry manipulation has now updated your default printer:
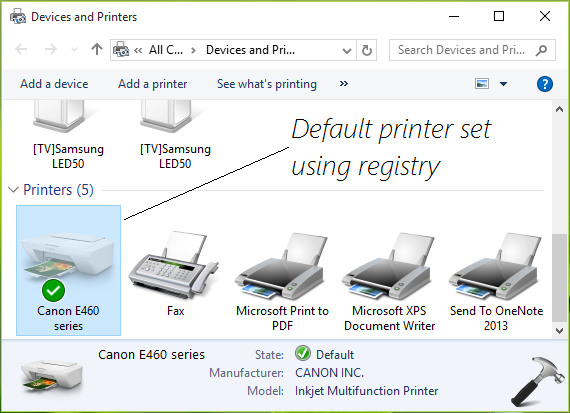
That’s it! Go here, to learn how to turn off Windows 10 default print management.