Windows Protected Print Mode helps users to exclusively print their documents in secure mode. This means, if a document is having a chance to information about your organization, Windows handles its printing in a secure way. Windows print team worked with Microsoft Offensive Research & Security Engineering (MORSE) to modernize the Windows Print System. This collaboration developed a new largest change to the Windows Print stack in more than 20 years. It developed a more secure algorithm which is known as Windows Protected Print (WPP) Mode today. In this article, we’ll see how you can enable or disable Windows Protected Print Mode (WPP) in Windows 11.

Starting with Windows 11 Insider Preview build 26016, Microsoft added the Windows Protected Print Mode feature. This feature is designed to work with Mopria certified printers (https://mopria.org/certified-products) only. With Mopria certified printers, users no longer must depend on third-party software installers as well as get additional security benefits. Now users can enable this feature easily using Group Policy or registry. Since Insiders are currently testing this feature, they’ll send feedback to Microsoft. If all goes well, the WPP feature would be finally implemented to Windows 11 stable release.
Here’s how you can enable in on Windows 11 build 26016 or later.
Page Contents
Enable or disable Windows Protected Print Mode (WPP) in Windows 11
Method 1: Settings app
1. Open Settings.
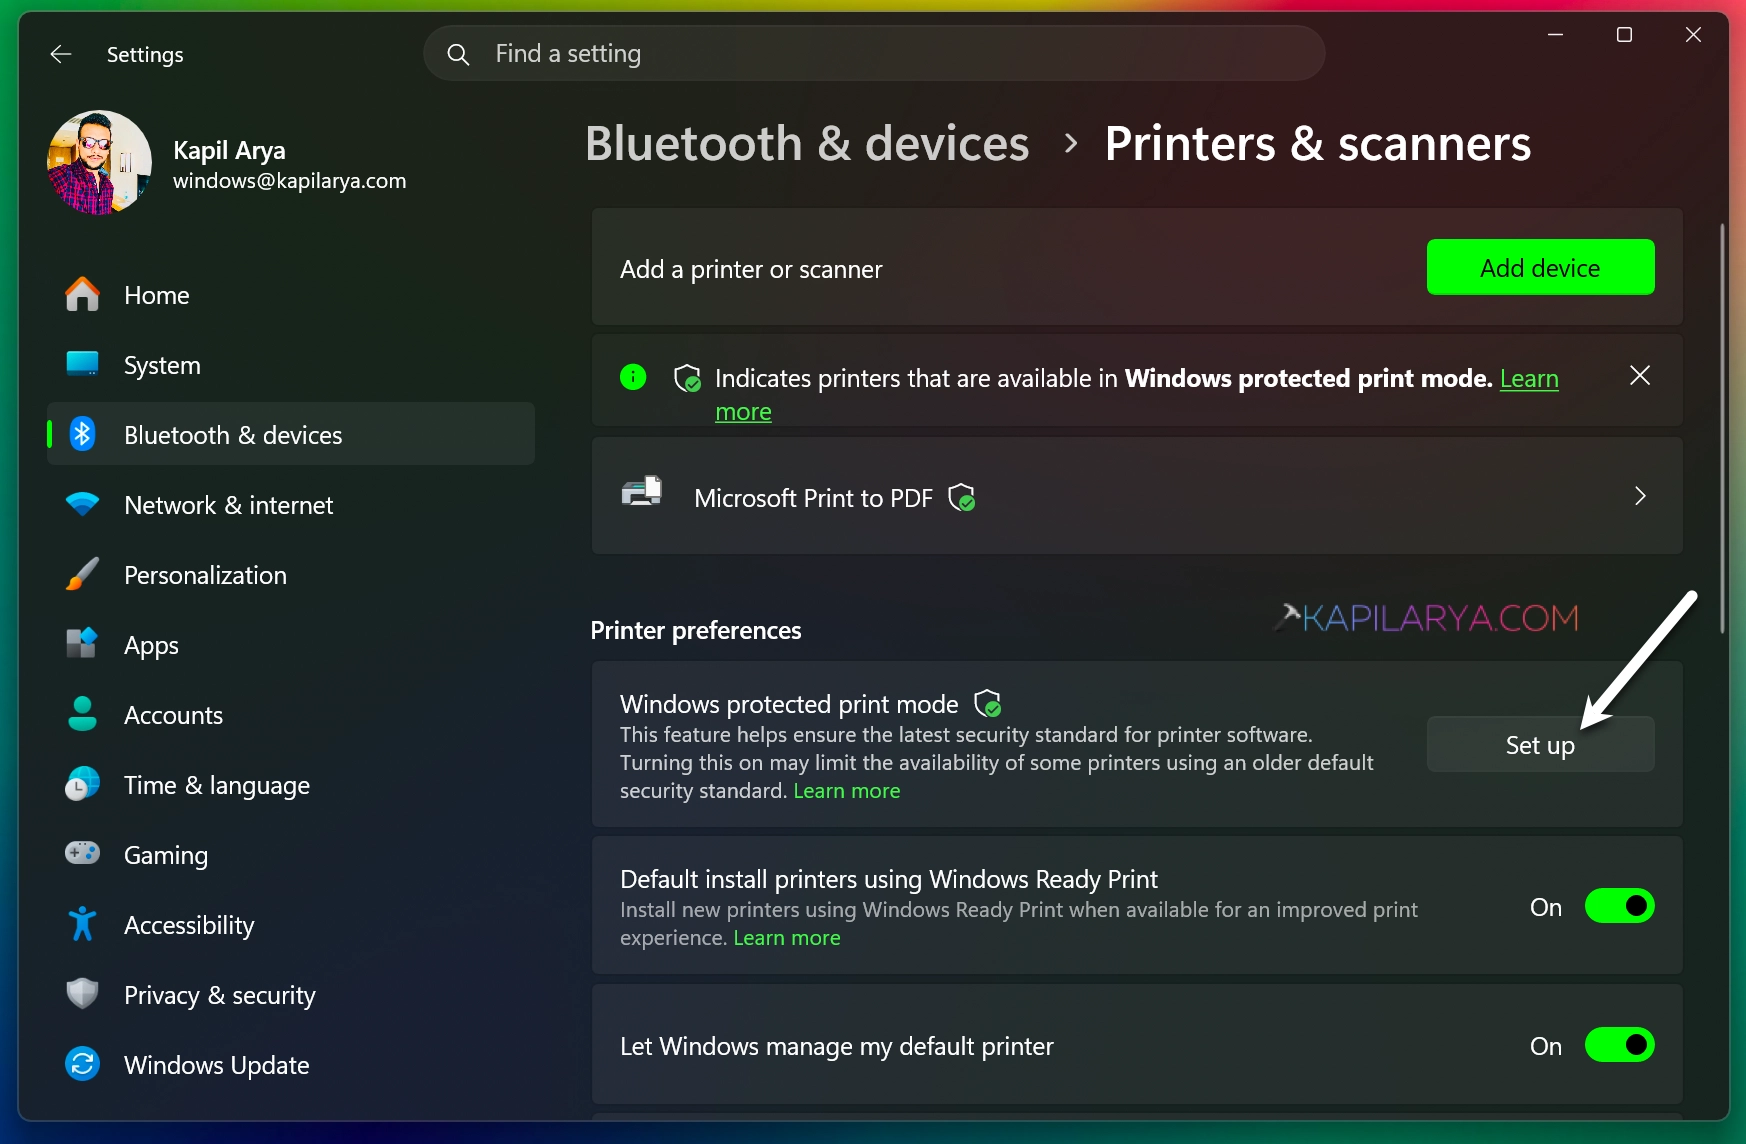
2. Go to Bluetooth & devices > Printers & scanners.
3. Under Printer preferences, click on Set up button next to Windows protected print mode.
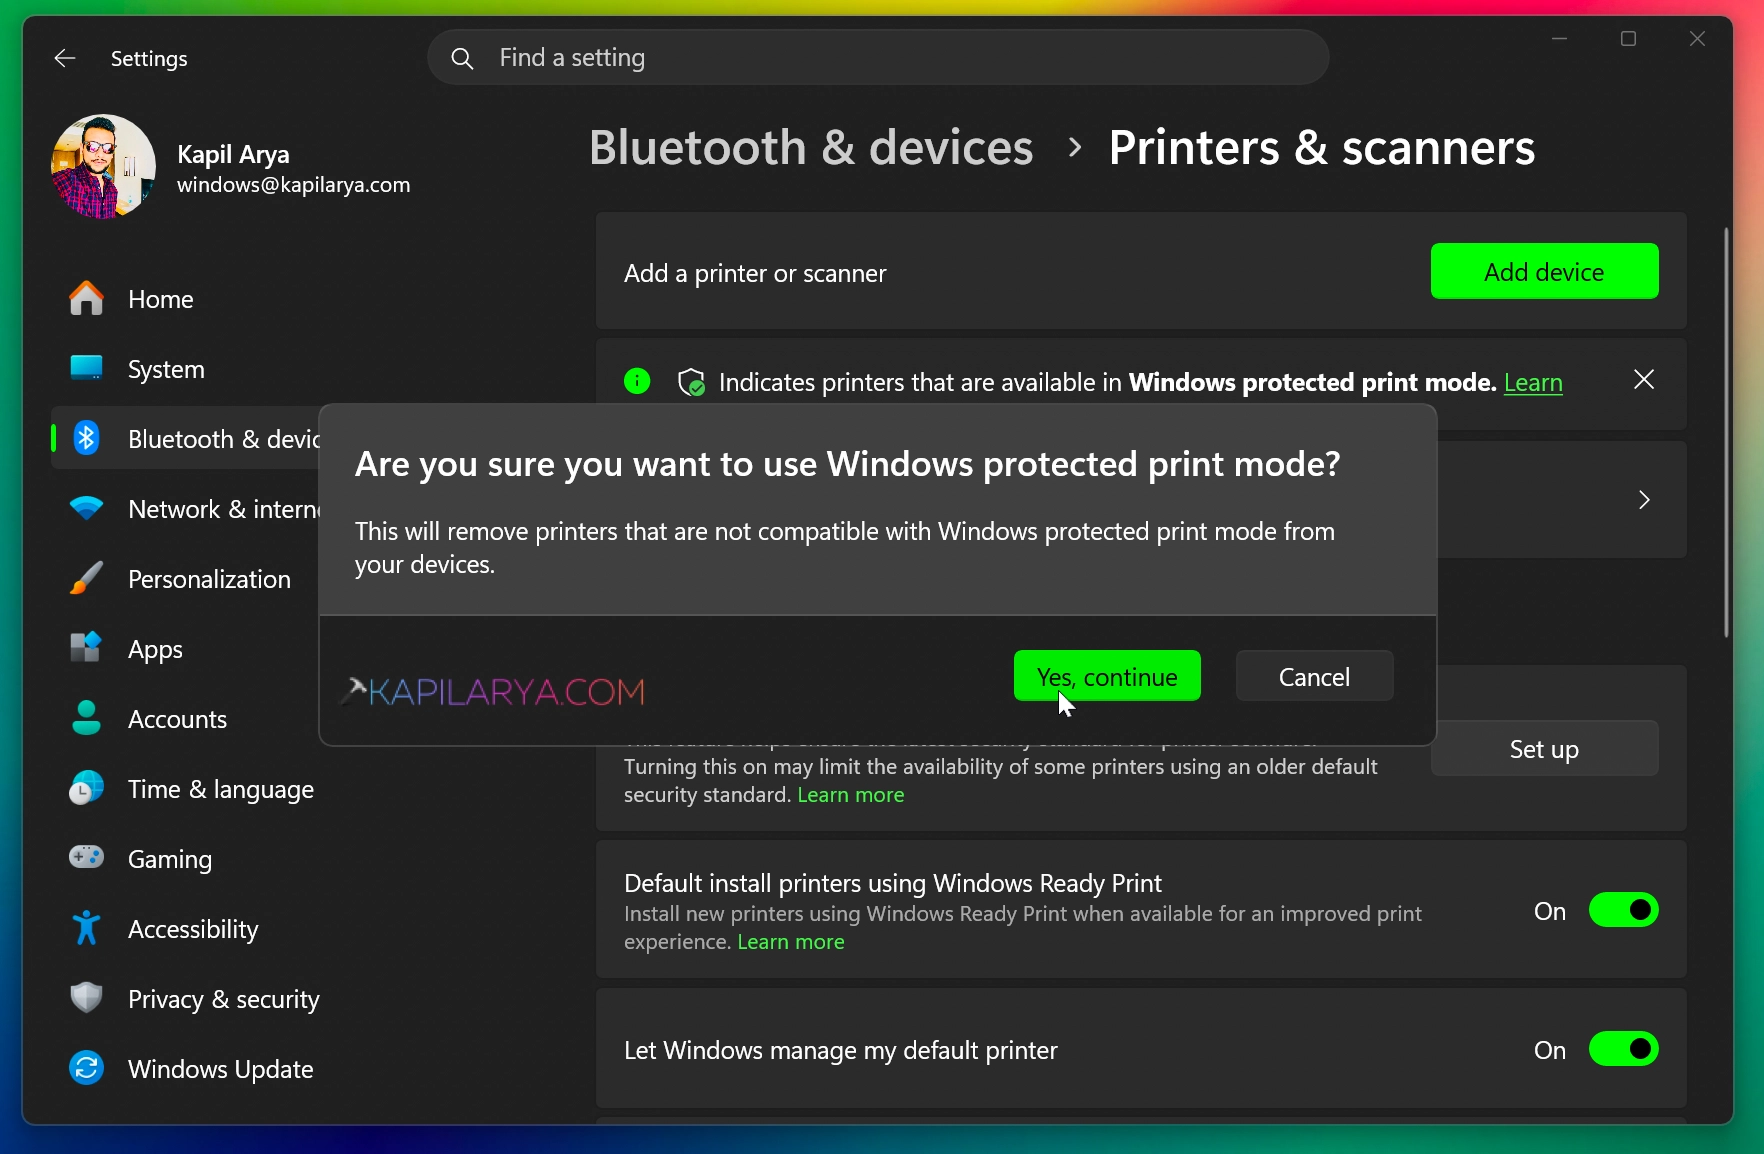
4. Click Yes, continue in the confirmation prompt. Feature should be enabled after this.
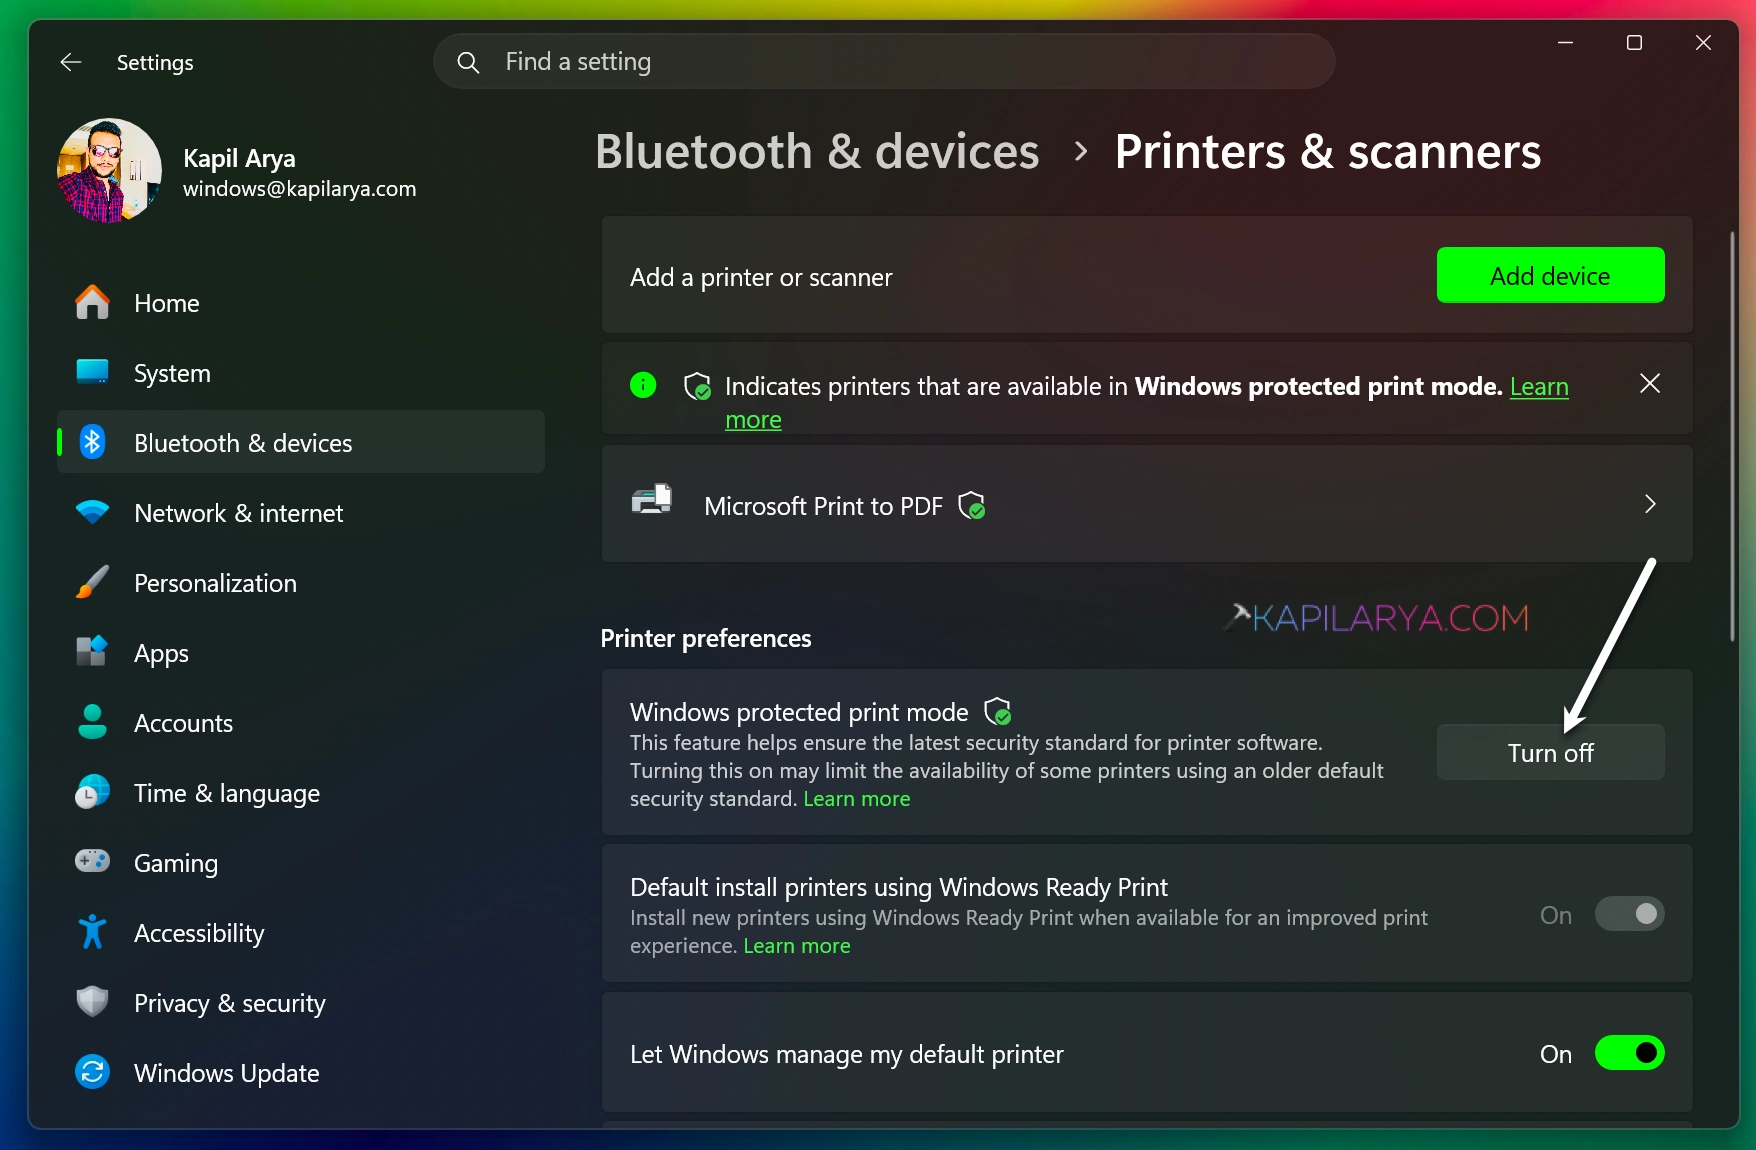
To disable the feature later, you can hit Turn off button and click Yes in confirmation prompt.
Method 2: Using Registry
1. Open Registry Editor using regedit command.
2. Go to this registry location:
HKEY_LOCAL_MACHINE\SOFTWARE\Policies\Microsoft\Windows NT\Printers\WPP
3. Make sure following registry values exist in the right pane WPP registry key to enable Windows Protected Print Mode feature:
EnabledByvalue as REG_DWORD with data 2WindowsProtectedPrintGroupPolicyStatevalue as REG_DWORD with data 1WindowsProtectedPrintModevalue as REG_DWORD with data 1WindowsProtectedPrintOobeConfigCompletevalue as REG_DWORD with data 1

To disable Windows Protected Print Mode feature, only set WindowsProtectedPrintMode to 0 and delete other registry DWORDs mentioned in above list.
4. Close Registry Editor.
Method 2: Using Group Policy
1. Open Local Group Policy Editor using gpedit.msc command.
2. Go to following location:
Computer Configuration > Administrative Templates > Printers
3. Locate the policy setting named Configure Windows protected print. Double click to edit it.
4. In the policy configuration window, set to Enabled or Disabled, to enable or disable Windows Protected Print Mode feature, respectively. Click Apply, OK.

5. Close Group Policy Editor and restart system to make changes effective.
That’s it!