Start Screen introduced in Windows 8 is intended to provide dynamic stuff for users, via live tiles of apps pinned to it. Apps pinned to Start Screen provides you real time updates and helps you to stay notified and updated. Well, privacy is the important concern which users are always worried about. Especially, when you have a multiple users system, just like in a case of system shared by whole family.
![]()
Thus there comes many times the situation when you do not want to let other users on system get notified about your updates. In other words, if you want to clear all your live app tiles data when you leave the system, this article will help you to do so. There exists two ways to do this, pick the best way in which you’re convenient.
Page Contents
How To Clear Live Tiles Notifications At Sign Out In Windows 8 Or Later
WAY 1 – Manually Clear Live Tiles Notifications At Sign Out
1. Go to Start Screen, press  + I and select Tiles option from Settings charm.
![]()
2. Next, in the Tiles section, you need to hit Clear option for Clear personal info from my tiles label. Once your live app tiles data has been cleared, you’ll be notified with Done! message.
![]()
This was the simplest approach to flush personal data from tiles, however you need to do these steps when you have to leave the system. Hence we need an automation for this; such that when you leave, system automatically clears out your data.
For this to make possible, follow the registry method mentioned below:
WAY 2 – Automatically Clear Live Tiles Data At Sign Out Via Registry
Registry Disclaimer: The further steps will involve registry manipulation. Making mistakes while manipulating registry could affect your system adversely. So be careful while editing registry entries and create a System Restore point first.
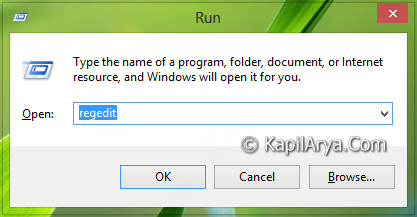
1. Press + R and put regedit in Run dialog box to open Registry Editor (if you’re not familiar with Registry Editor, then click here). Click OK.
2. In the left pane of Registry Editor, navigate here:
HKEY_CURRENT_USER\Software\Policies\Microsoft\Windows
![]()
3. At the above mentioned registry location, right click on Windows key and select New -> Key. Name this newly created key as Explorer. If the Explorer key already exists, then highlight it and come to its right pane. Right click in the blank space and select New -> DWORD Value. Name the DWORD so created as ClearTilesOnExit. Now double click the same DWORD to modify its Value data:
![]()
4. In the above shown box, put the Value data equals to 1 and click OK. You can now close Registry Editor and reboot the system to make changes effective.
That’s it!