While opening an application, the users of Windows 11/10 sometimes come across the error message of No such interface supported. This error is a result of various reasons such as, damaged system files, missing or damaged DLL files, malwares, etc. This issue effects the overall working of the application which consists of the error. Hence, this comprehensive guide will allow the users to solve this serious dilemma.
Page Contents
Fix ‘No such interface supported’ in Windows 11/10
Further, let us now check all the fixes which will help in solving the issue of No such interface supported in Windows 11/10.
Fix 1: Creating a new User Account
Problems with the user account can act as a reason for the issue. Thus, creating a new user profile can help the users in solving the above issue. Follow the steps below for creating a new user profile.
Step 1- At first, login with an admin account or another account.
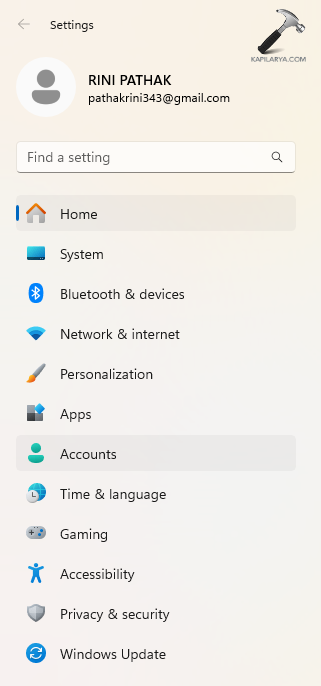
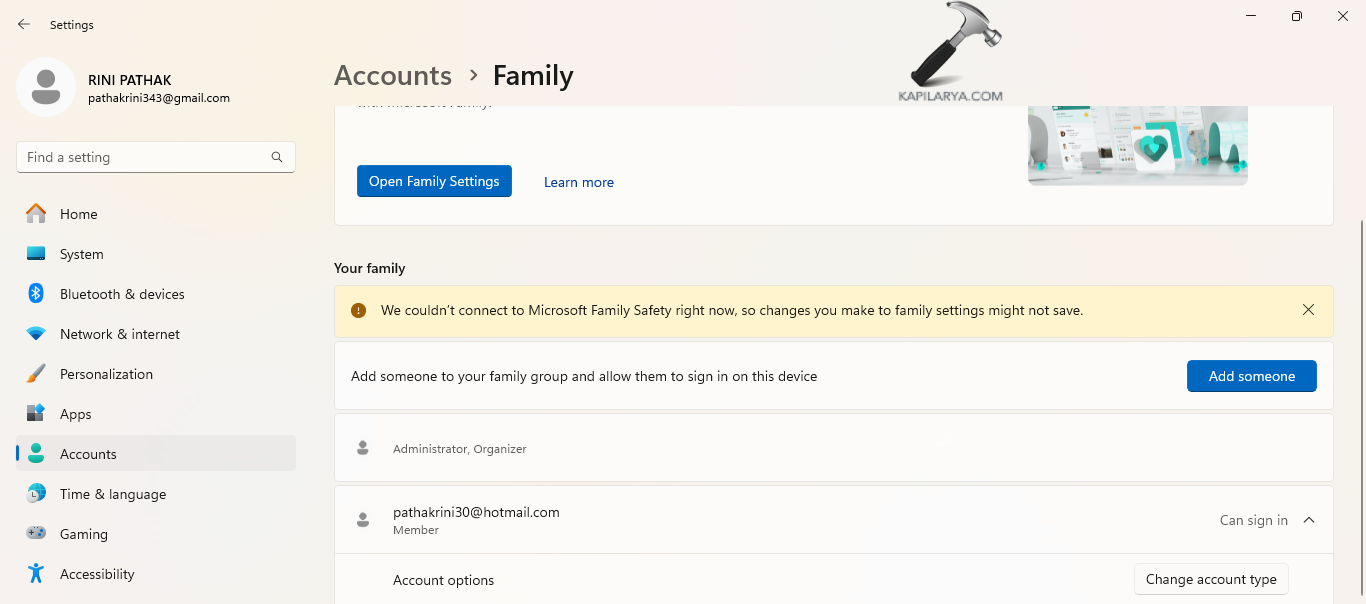
Step 2- Next, go to Settings > Accounts > Family & other users.
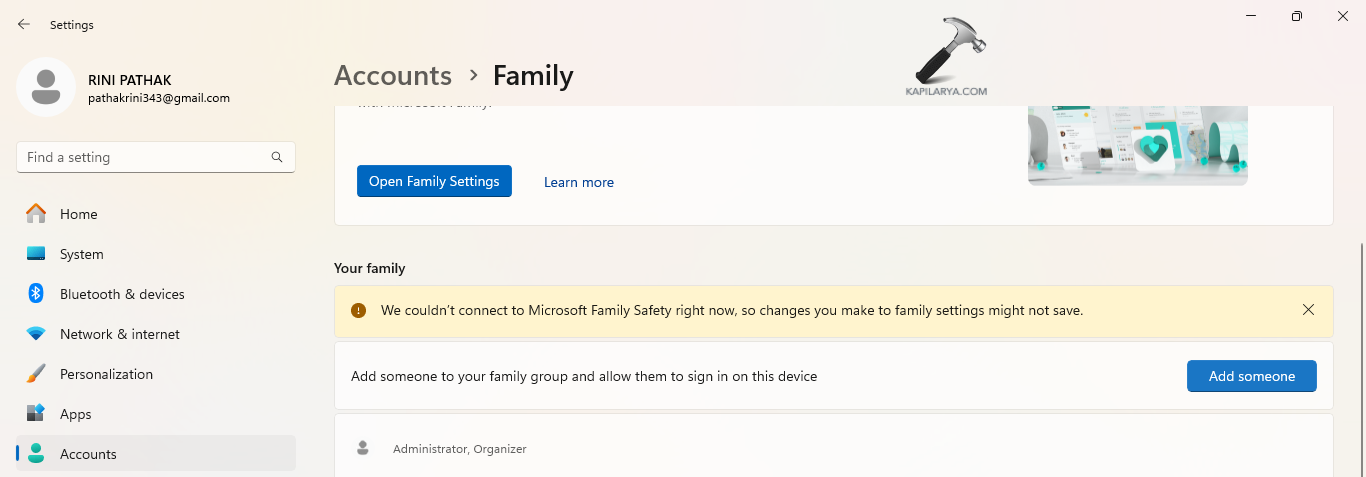
Step 3- Now, in the section of Other users, click Add account / Add someone else to this PC.
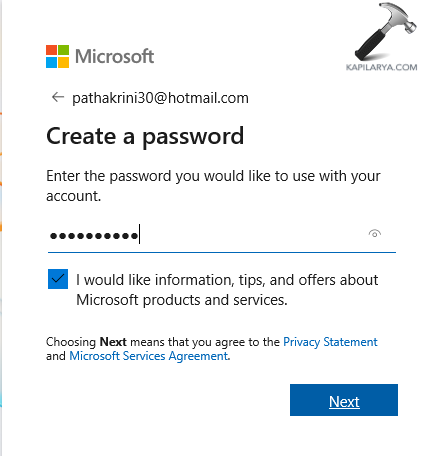
Step 4- Further, follow the prompts for setting up a new user account. However, in absence of Microsoft account details, select I don’t have this person’s sign-in information > Add a user without a Microsoft account.
Step 5- Now, select a username and password for the new account and finish the process.
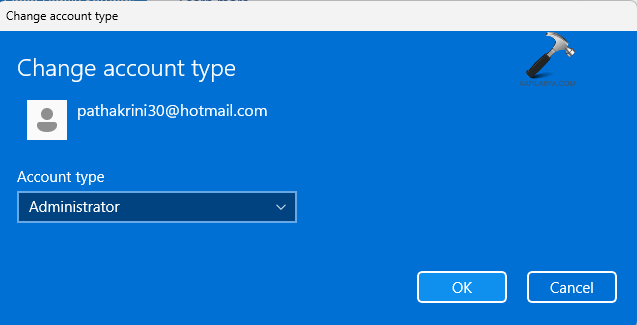
Step 6- Again, go to Accounts > Family & other users. Then, select the new account and select Change account type.
Step 7- Lastly, under Account type, press Administrator > OK.
Fix 2: Resetting/Repairing the Application
The application consisting of the error itself might be corrupted or outdated, hence facing the issue. In such cases, one can easily resolve this problem by repairing/resetting or reinstalling the required application. To do the same, follow these steps-
Step 1- Open Settings. From the left sidebar, select Apps and the select the Installed Apps from the right pane.
Step 2- From the list of downloaded applications, find the problematic program. Thereafter, select the three dots next to it and click on the Advanced Options.
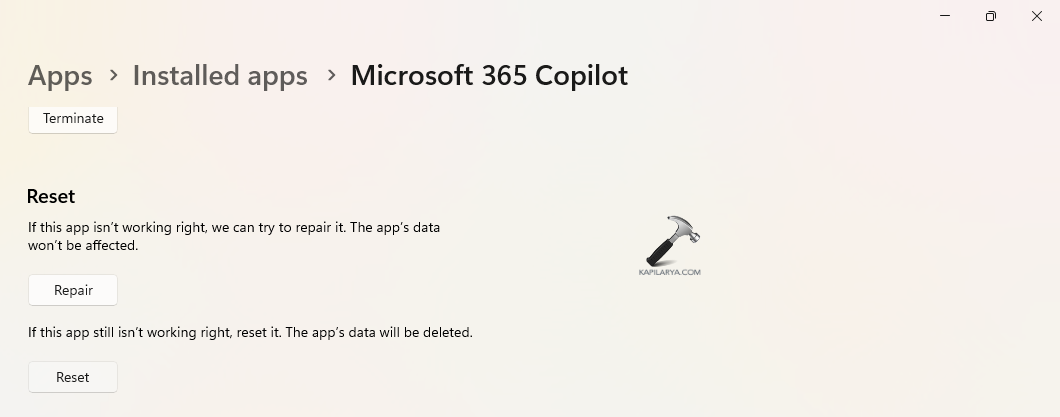
Step 3– Browse down and select any of the options including Repair, Reset or even Uninstall as per requirement. If wanted, all of the three can too be selected. After the completion of the process, check if the error is fixed.
Apart from repairing or resetting the application, the users can also try updating the program. This should help too.
Fix 3: Disabling Startup Apps
Various ongoing startup apps can lead to the occurrence of the mentioned issue. Thus, the users should disable any startup app that is enabled. Follow the steps below for doing that.
Step 1- Navigate to Task Manager > Startup > Startup apps. Thereafter, disable all the startup items.

Step 2- Lastly, select Apply > OK and save all the changes. Also, reboot the PC if necessary.
Fix 4: Moving the files to the Desktop
Another quick fix which the users can try for fixing the issue is moving the files to the desktop and accessing them from there. However, this will work only for a handful of files as too many files will clutter the desktop. Thus, if the issue exists only with a handful of files, the users can try this quick fix.

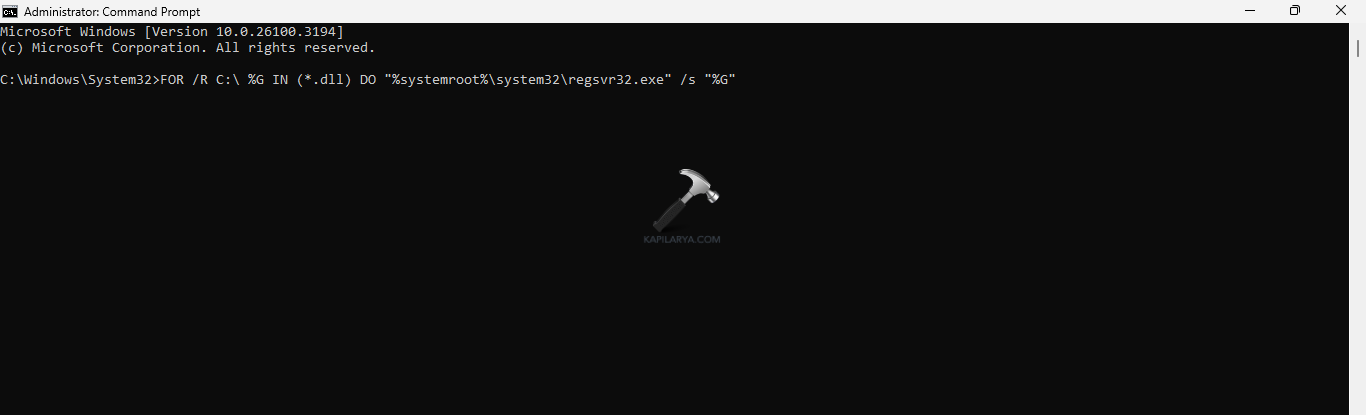
Fix 5: Re-Registering DLL Files
Corrupted or missing DLL files of the respective application is one of the main causes for occurrence of the error. Now, for re-registering the files, follow the steps.
Step 1- Run command prompt as an administrator.
Step 2- Now, copy and paste the prompt below and press Enter.
regsvr32 c:\windows\system32\actxprxy.dll

Step 3- If somehow, the problem still persists, run the prompt given below and press Enter.
FOR /R C:\ %G IN (*.dll) DO “%systemroot%\system32\regsvr32.exe” /s “%G”
Fix 6: Running SFC and CHKDSK scan
If the above fixes do not work, then running a system file scan and can help the users in solving the aforementioned issue easily. Therefore, follow the steps given below to run the SFC solve the issue.
Step 1- At first, open Command Prompt and run it as an administrator.
Step 2- Next, copy and paste the prompt given below for running a SFC scan and select Enter.
sfc /scannow

Damaged disks may too cause the issue. Thus, for checking and repairing the errors of the drive, we need to run the CHKDSK command. Follow the steps given below to do the same-
Step 1- Primarily, run the Command Prompt as an administrator.
Step 2- Now, copy and paste the prompt given below to run the CHKDSK command and press Enter.
chkdsk /f /r /D:

Step 3- Now, the CHKDSK command will scan any error in the system and repair it. Again, if it asks for scheduling a disk check next time, press Y on the keyboard. Thereafter, press Enter and reboot the PC to allow the CHKDSK command to run.
Hoping this helps!