In Windows operating system, we all use different type of networks. Some of you might connect to a wireless network while some use the Ethernet connection. While there are some others using dial-up connection. But if you use the most common, wireless connections in your Windows 11/10, then this article for you. In this article, we will see how you can enable auto switch for WiFi network in Windows 11.
Page Contents
What is auto-switch for WiFi network?
Let’s start with the scratch. You connected to a wireless network for the first time on your Windows operating system. Now, when you securely connected to this wireless network, all its entries are registered in the Windows operating system. Particularly these are stored under the registry database. The important entities in this data are Wi-fi network name, Wi-fi network security key password (if network isn’t open), Wi-fi network properties etc. You can follow this guide to manually remove WiFi network from registry database.
At the time when you connect or add the wireless network, if you selected to connect automatically, The operating system will automatically connect to your Wi-fi network when it is range. Now being connected to this auto connecting WiFi network, Windows can still look for other auto connecting WiFi networks. In the series of events, if Windows determines another auto connecting WiFi network with higher priority, then it will switch to it. To make this possible, you need to enable auto-switch for WiFi network. As per Microsoft, The autoSwitch (WLANProfile) element determines the roaming behavior of an auto-connected network when a more preferred network is in range.
Here’s you how you can enable auto-switch for WiFi network in your Windows 11.
Enable auto-switch for WiFi network in Windows 11/10
Method 1 – Using Control Panel
1. Open Control Panel.
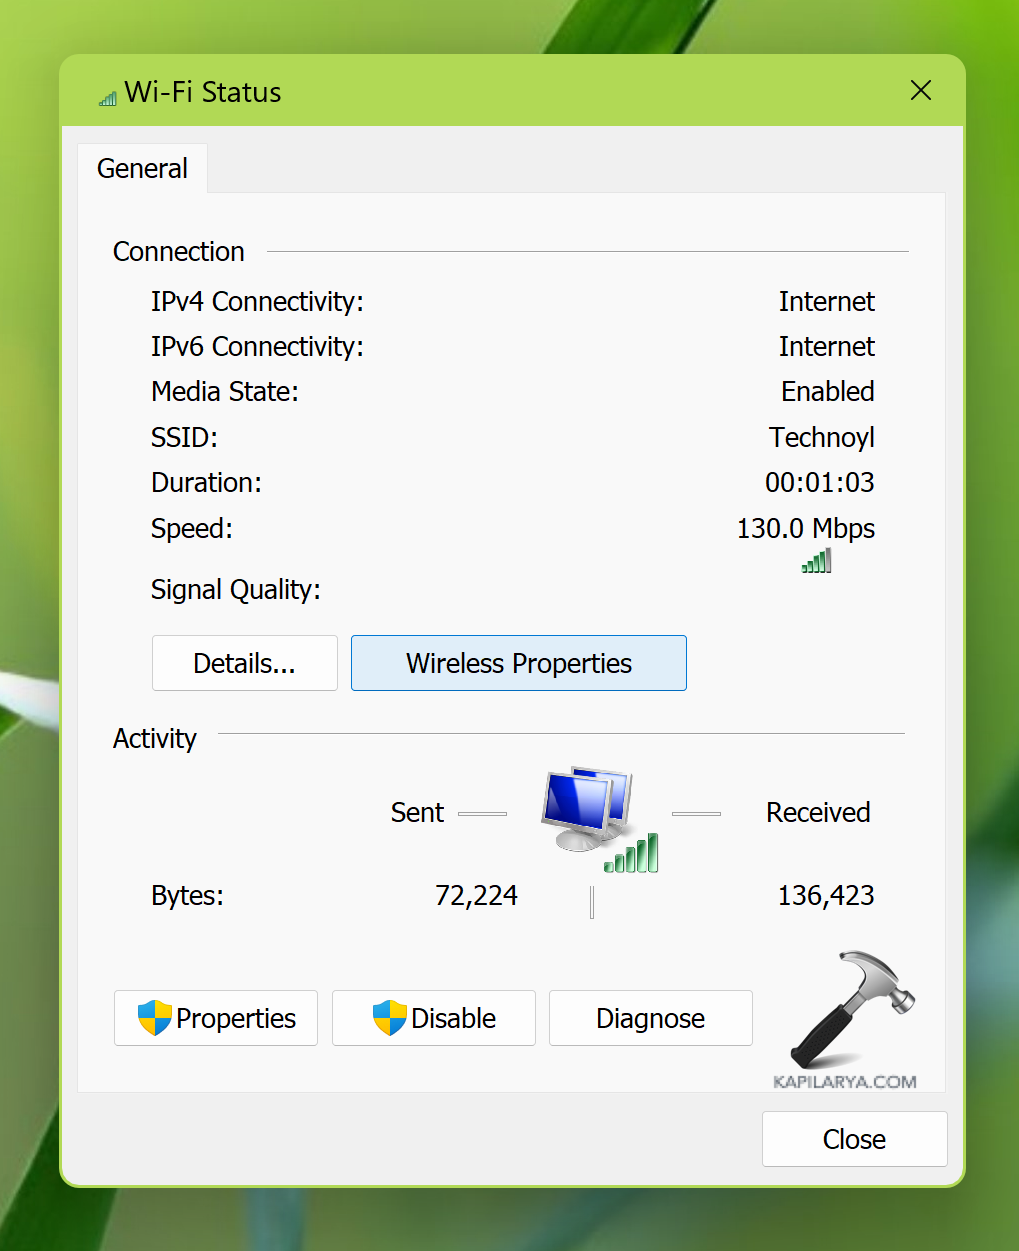
2. Go to Network and internet > Network and Sharing Center.
3. Click on the connection name you’re currently connected to.

4. Then click Wireless properties.
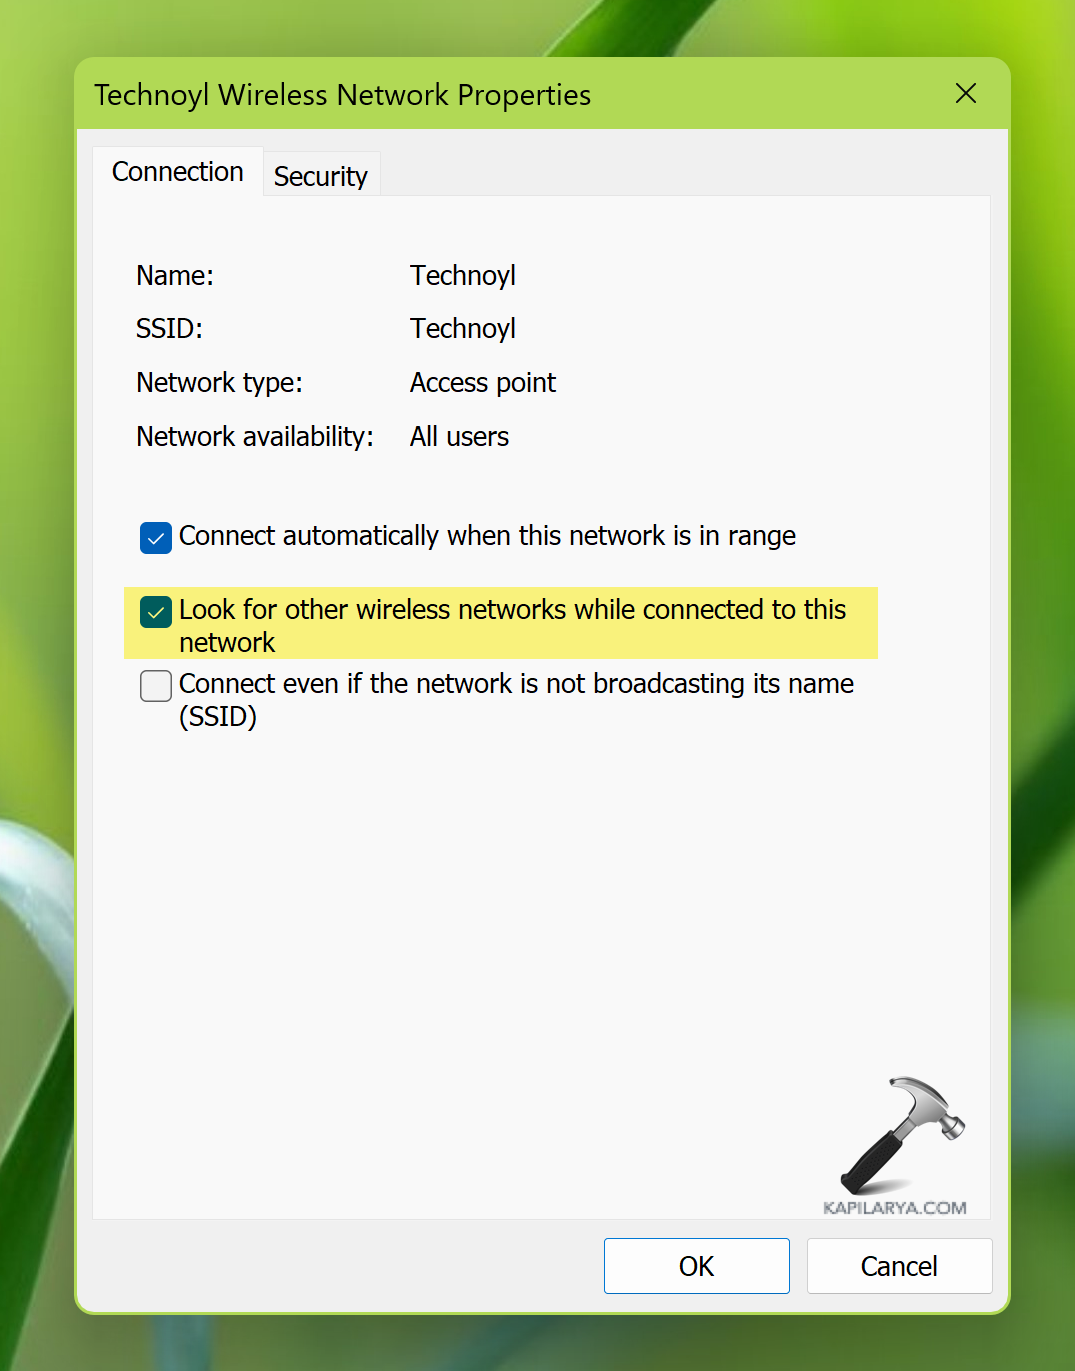
5. On the network property sheet, check Look for other wireless networks while connected to this network. Click Apply, OK.
Method 2 – Using Command Prompt
1. Open Command Prompt.
2. Type following command to retrieve list of connected network profiles or WiFi network.
netsh wlan show profiles
3. Then type following command substituting the WiFi network you want to enable autoswitch.
netsh wlan set profileparameter name="<WIFI NETWORK>" connectionmode=auto autoswitch=Yes
Once this command has been executed successfully, you can close Command Prompt window, and you will find that auto-switch for your Wi-fi network is enabled.
To disable auto-switch for your Wi-fi network, you can use this command:
netsh wlan set profileparameter name="<WIFI NETWORK>" autoswitch=No
That’s it!