
In Windows 11, you have the power to control the ‘Check for Windows Updates‘ feature to suit your preferences. This article will show you how to Enable/disable ‘Check for Windows Updates’ in Windows 11, giving you more control over when and how updates are checked and installed on your system.
Windows Update is an important service that helps to keep your Windows system secure and up-to-date. It automatically downloads and installs security patches, bug fixes, and new features for your operating system. By default, Windows Update is enabled and set to check for updates automatically. However, you can also manually check for updates, or disable Windows Update altogether.
There are a few reasons why you might want to disable Windows Update:
- If you are on a limited data connection, you may want to disable Windows Update to prevent it from using up all of your data.
- If you are experiencing problems with your system after installing a Windows update, you may want to disable Windows Update temporarily until the problem is fixed.
- If you are using a third-party patching solution, you may want to disable Windows Update to avoid conflicts.
Page Contents
Enable/disable ‘Check for Windows Updates’ in Windows 11
Here are two solutions that can resolve your issue:
- Using the Local Group Policy Editor
- Using the Registry Editor
Method 1: Enable/disable ‘Check for Windows Updates’ in Windows 11 using Local Group Policy Editor
Using the Local Group Policy Editor to enable/disable the “Check for Windows Updates” setting is a good way to ensure that the setting is applied to all users on the computer.
Follow the below steps to enable or disable “check for Windows Updates” using group policy:
1. Press the Windows key + R. Type “gpedit.msc” and click OK.
2. Navigate to the following path:
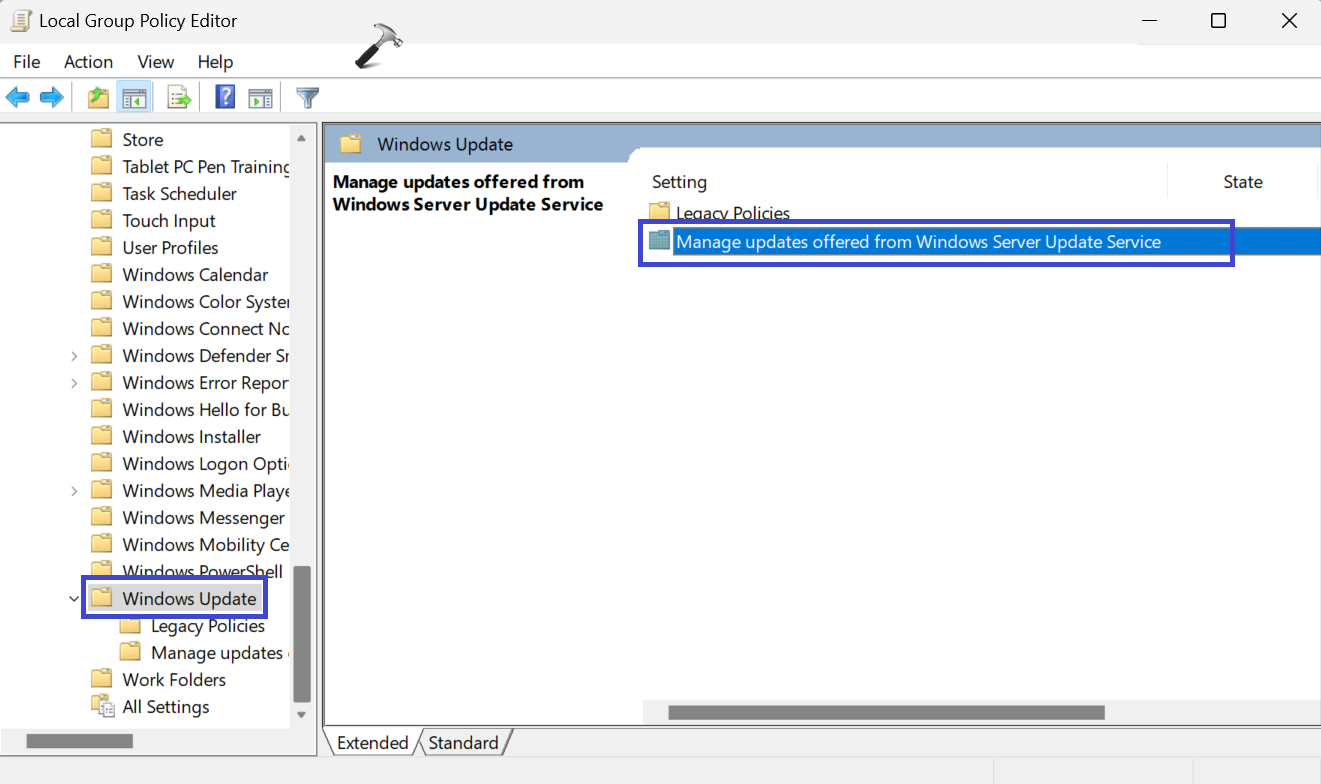
Computer Configuration/Administrative Templates/Windows Update
3. Click on the “Manage updates offered from Windows Server Update Service” option.
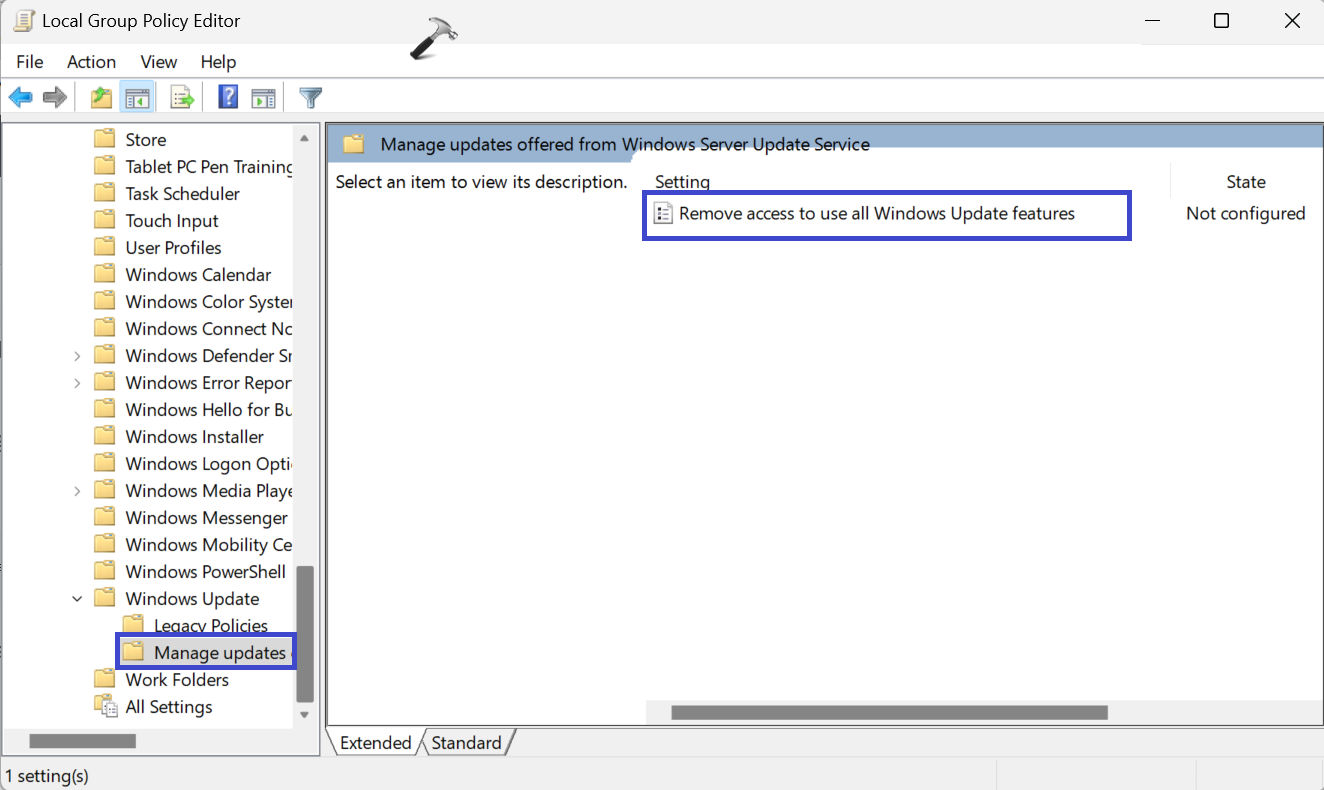
4. Now, double-click on the “Remove access to use all Windows Update features” policy.
5. A prompt box will appear.
Select “Enable” to enable the check for Windows Update on Windows 11.
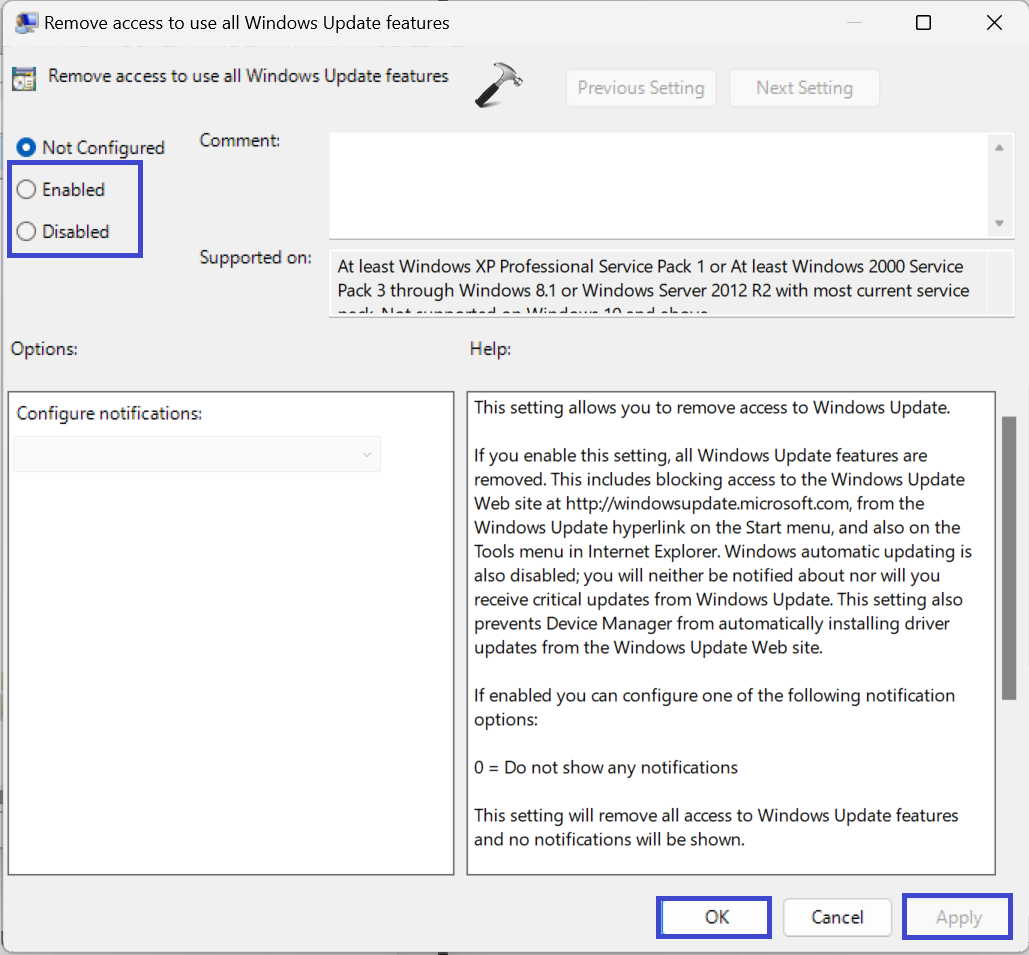
Select “Disable” to disable the check for Windows Update on Windows 11.
6. Close all the windows and restart the PC to save the changes.
Method 2: Enable or Disable using Registry Editor
If the Local Group Policy Editor is not working properly or not available on your version of Windows, or if you need to enable/disable the setting for a specific user account, you can use the Registry Editor.
Here are the steps:
1. Press the Windows key + R. Type “regedit.exe” and click OK.
2. Navigate to the following path:
HKEY_LOCAL_MACHINE\Software\Policies\Microsoft\Windows\WindowsUpdate
3. Now, right-click on the “WindowsUpdate” registry key and select “New => DWORD (32-bit) value“.

Type “SetDisableUXWAccess” and click OK.
4. Now, right-click on the newly created registry key “SetDisableUXWAccess” and select “Modify“.
Set the value to 1 to disable the check for Windows Update on Windows 11.

or Set the value to 0 to enable it.
5. Close all the registry windows and restart the PC to save the changes.
That’s It!


![[Latest Windows 11 Update] What’s new in KB5089549?](https://www.kapilarya.com/assets/Windows11-Update-768x651.png)