When you are in a new place and you need to get somewhere or you want to find something, you can rely on Offline Map which is stored on your device. You use the Maps to search and get directions even when you are offline. By default, Windows will automatically update maps when plugged in or when not on a metered connection. Here we will show you how to Enable or Disable Offline Maps Update in Windows 11.
Page Contents
Enable or Disable Offline Maps Update in Windows 11
Offline Maps Update can be turned off and on with 4 different methods:
Method 1: Using Local Group Policy Editor
1. Press the Windows key + R. Type gpedit.msc and click OK.
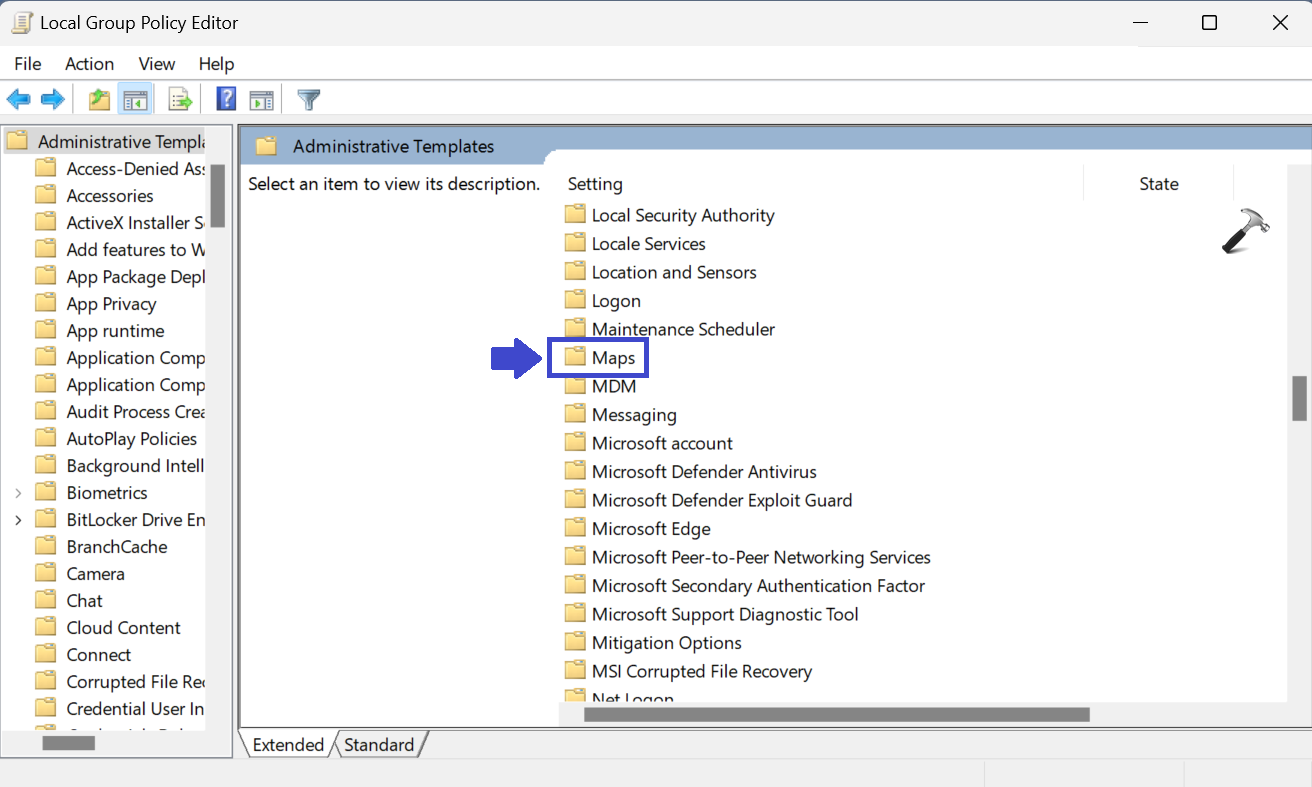
2. Navigate the path:
Computer Configuration\Administrative Template\Maps
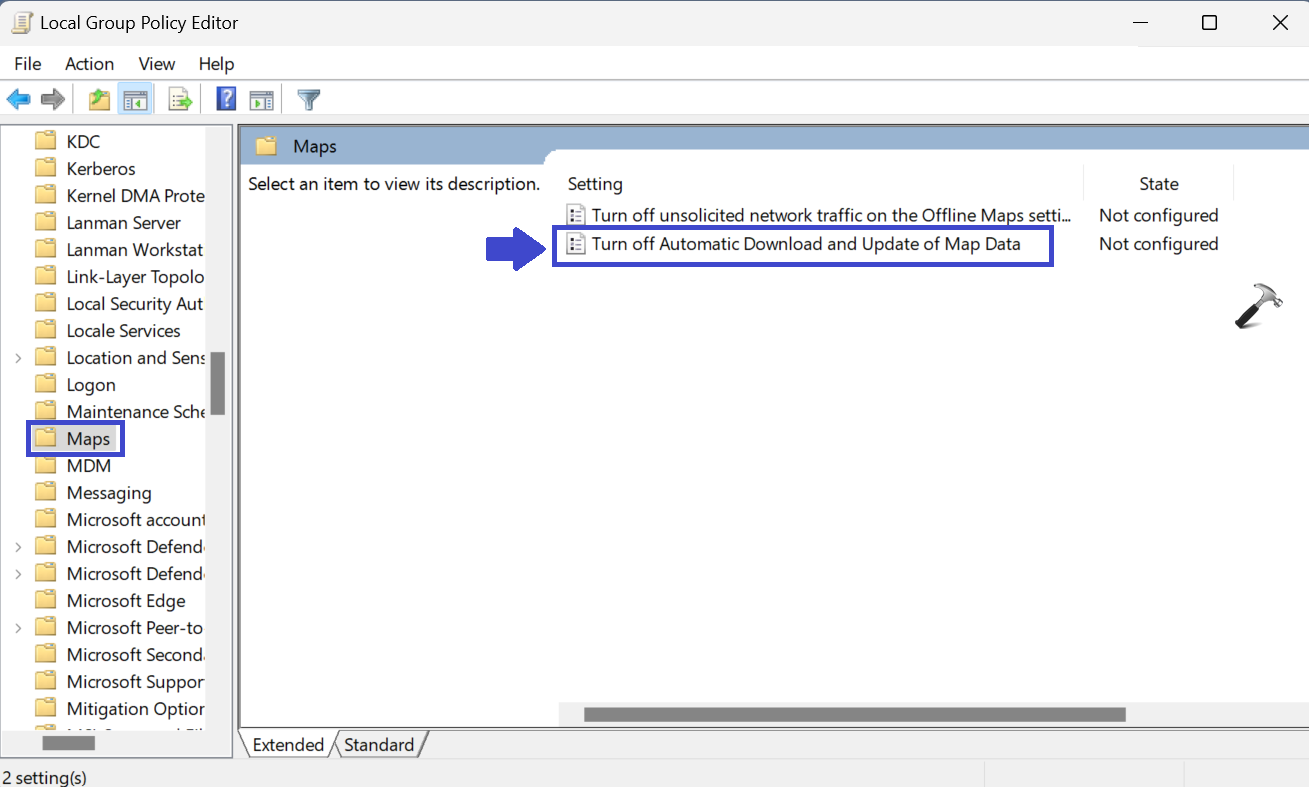
3. Double click on “Turn off Automatic Download and Update of Map Data”.
4. Prompt Box will appear.
5. Select Enables to Enable Offline Maps Update.

6. Select Disabled to Disable Offline Maps Update.
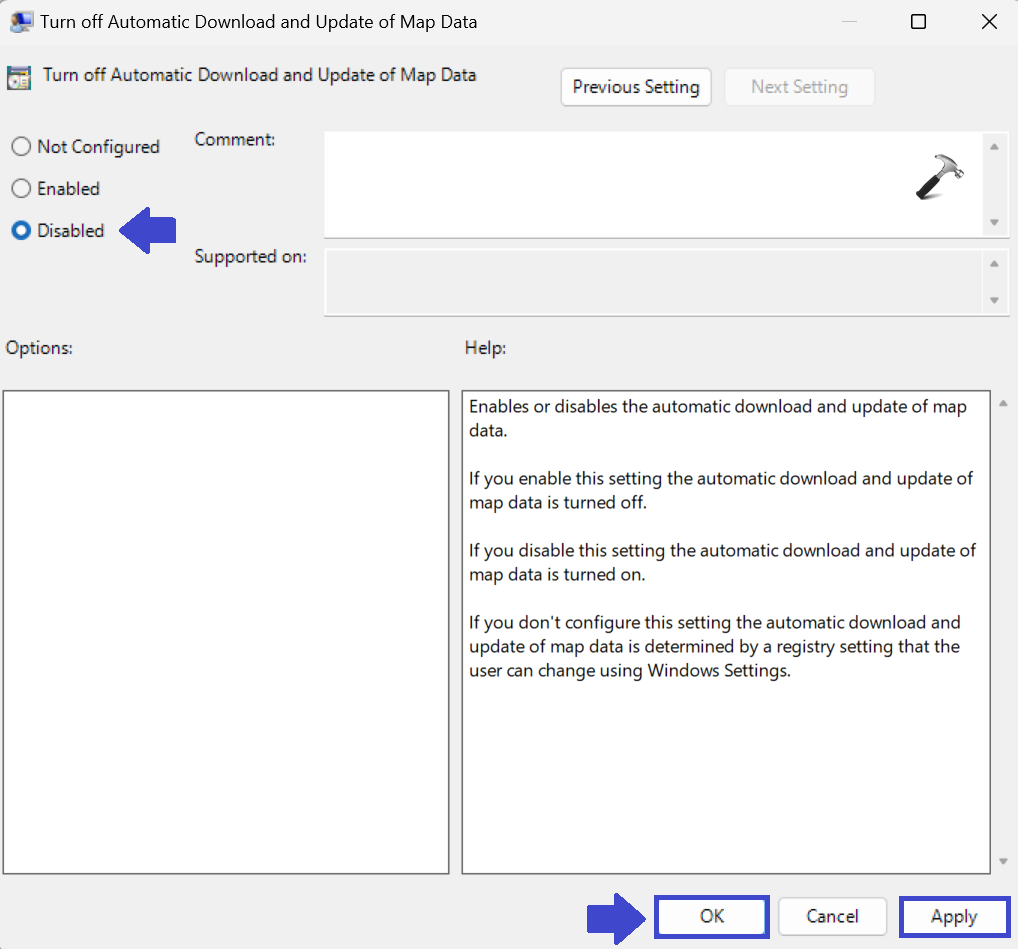
7. Click OK followed by Apply.
8. Close the Local Group Policy Editor Window and restart the computer.
Method 2: Using Registry Editor
1. Press the Windows key + R. Type regedit.exe and click OK.
2. Navigate the following path:
Computer\HKEY_LOCAL_MACHINE\SYSTEM\Maps
3. Create the registry key.
To create the registry key, right-click on Maps => New => DWORD (32-bit) value. Type “AutoUpdateEnabled” and click OK.

4. Your key is created.
5. Now, right-click on “AutoUpdateEnabled”. Prompt box will appear.

6. Set the value 1 to Turn Off the Offline Maps Update
Set the value 0 to Turn On the Offline Maps Update.
7. Close the Registry Editor Window and restart the computer to apply the settings.
Method 3: Using Registry Editor Alternative Solution
1. Press the Windows key + R. Type regedit.exe and click OK.
2. Navigate the following path:
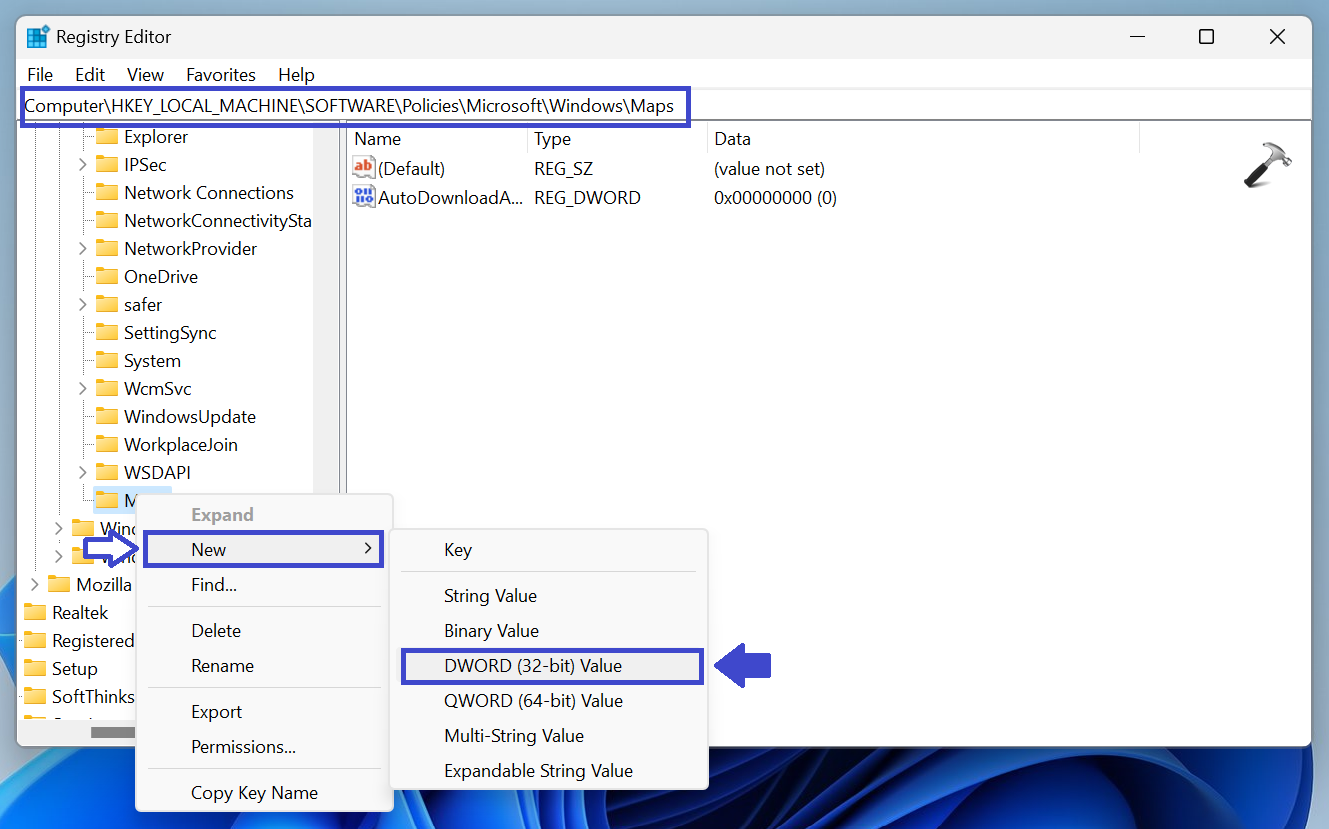
Computer\HKEY_LOCAL_MACHINE\SOFTWARE\Policies\Microsoft\Windows\Maps
3. Create the registry key “AutoDownloadAndUpdateMapData”.
To create the key, right-click on Maps => New => DWORD (32-bit) value. Type “AutoDownloadAndUpdateMapData” and click OK.
4. Your key is created.
5. Now, double click on the “AutoDownloadAndUpdateMapData” registry key.
6. Prompt box will appear. (see the below image)
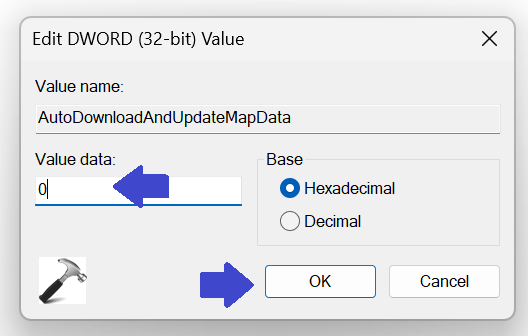
7. Set 1 to Enable and 0 to Disable Offline Maps Update. Click OK.
6. Close the Registry Editor Window and restart your computer.
Method 4: Enable or Disable Offline Maps Update using Settings App
This method is the easiest method. Follow the below steps:
1. Open Settings App.
2. In the left pane, click on Apps.
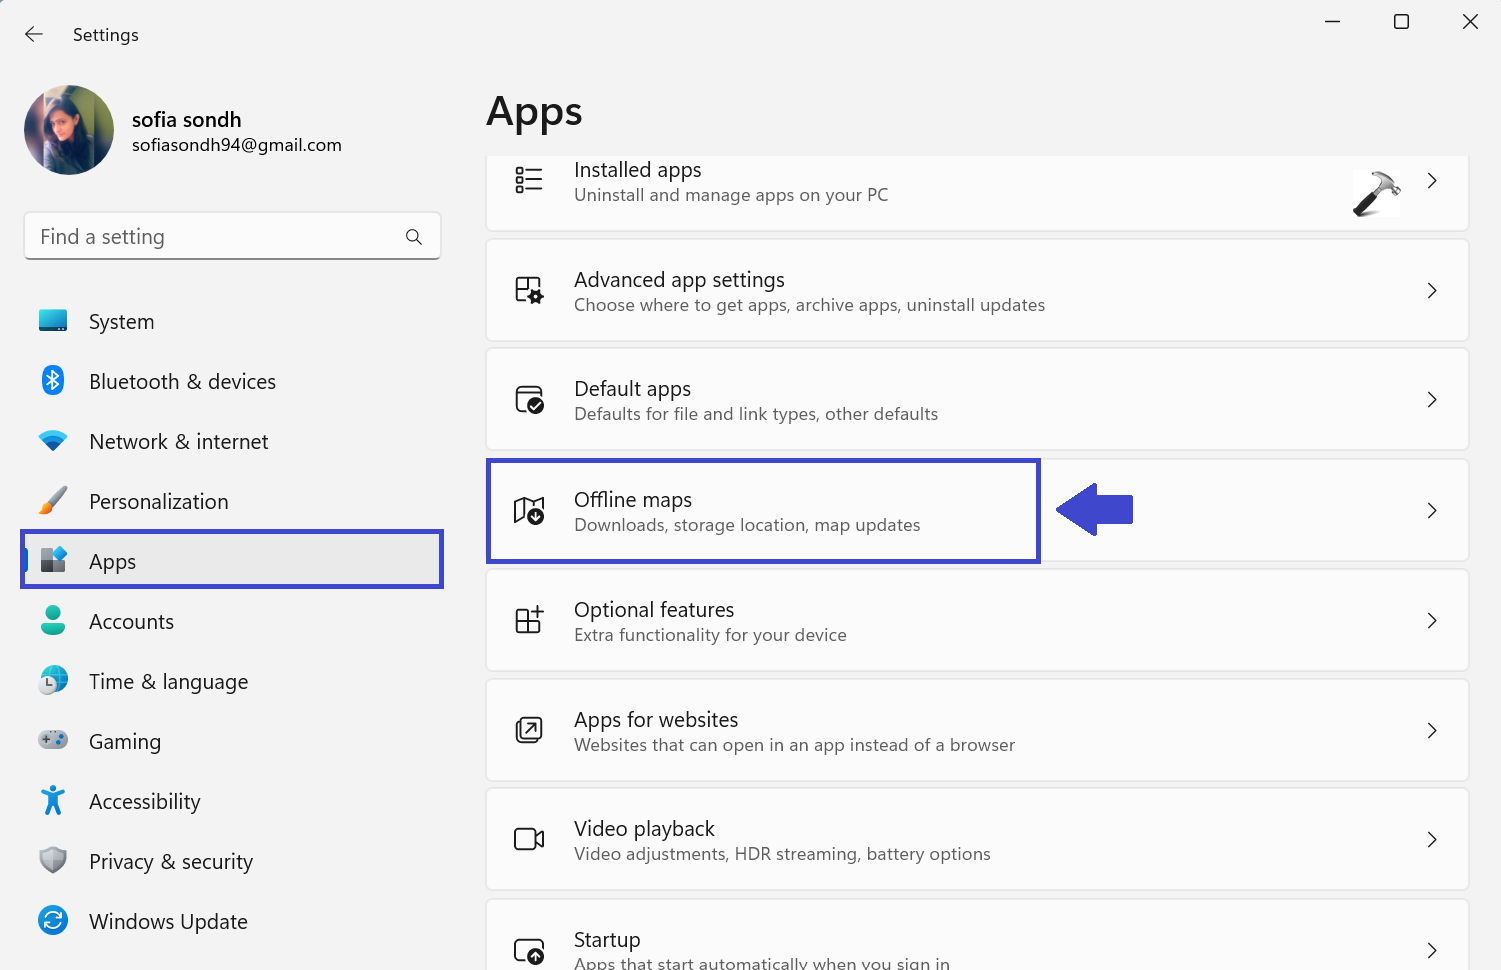
3. Now, click on Offline Maps.

4. Now click on Maps Update. Below that check the “Update automatically when plugged in and on Wi-Fi”.
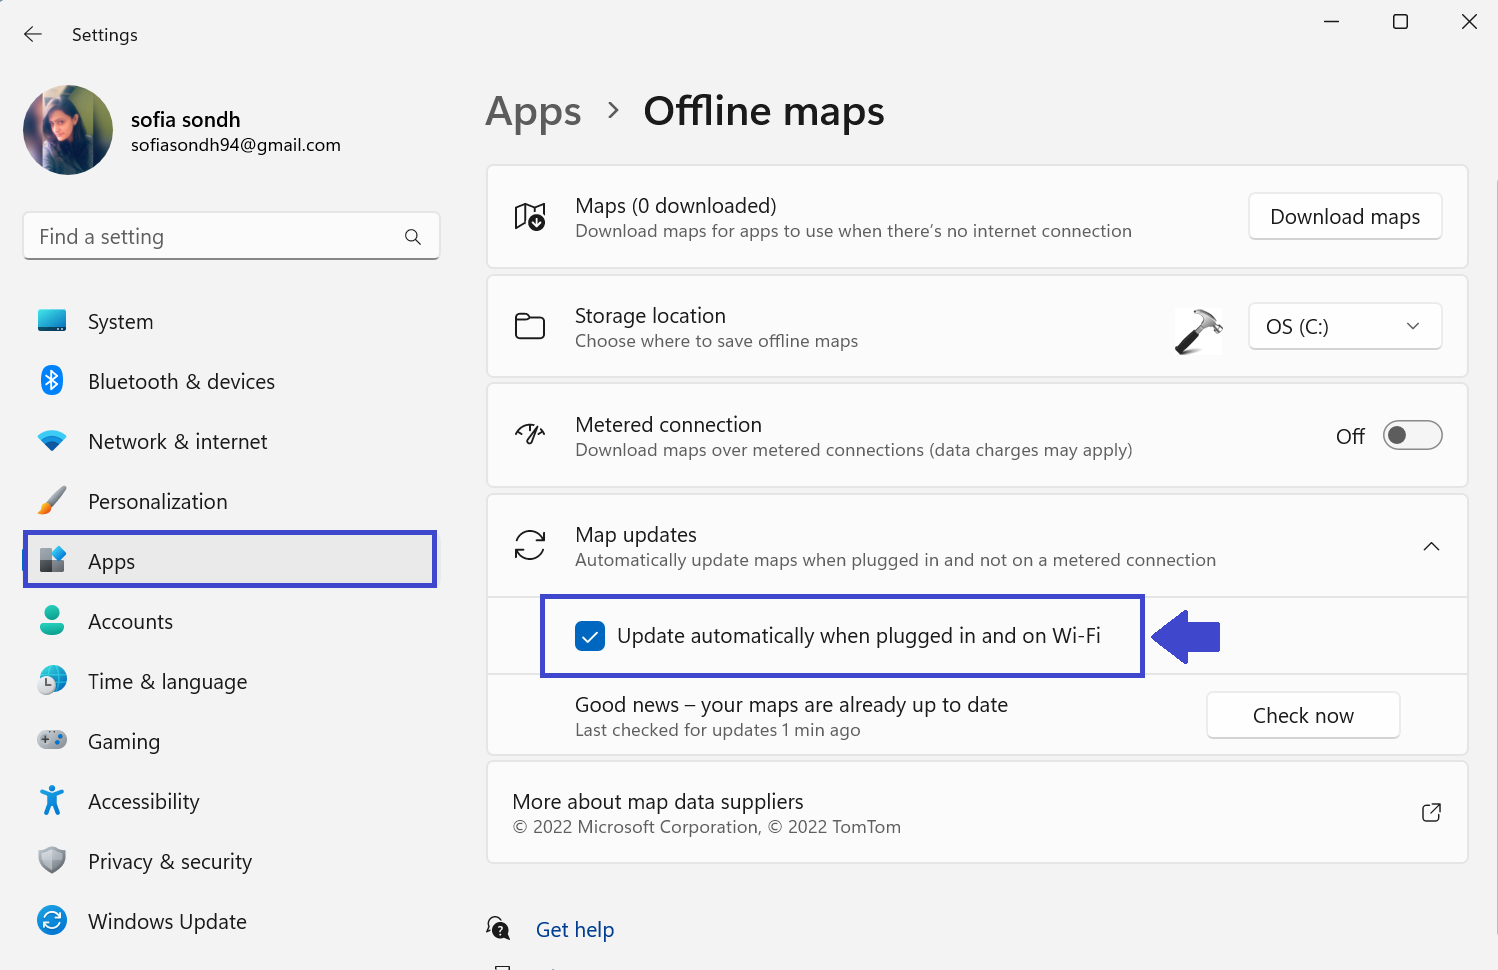
5. Close the Settings App and restart your computer to apply the settings.
That’s It!