The lock screen in Windows 11 serves a critical role in system security and user experience. However, malfunctions can occasionally prevent it from functioning as intended. This technical guide outlines causes and methods to fix the Lock screen not working on Windows 11, resolving lock screen issues.
Page Contents
What Causes Lock Screen Bugs?
Lock screen bugs can arise from a variety of culprits. Here are some common causes:
- Software glitches: Minor bugs in the operating system or lock screen software can cause unexpected behavior. These can often be resolved with system updates or restarts.
- Conflicting programs or drivers: Recently installed applications or outdated drivers might interfere with the lock screen functionality. This can happen if they try to interact with the lock screen process or access sensitive resources.
- Corrupted system files: Damaged system files related to the lock screen can lead to malfunctions. Windows offers a System File Checker (SFC) to scan for and potentially repair such corruption.
- Incorrect settings: Inadvertently changed lock screen settings could cause unexpected behavior. This might include issues with timeouts, backgrounds, or security features.
- Third-party lock screen apps: If you’re using a custom lock screen app downloaded from the internet, it might have bugs or compatibility issues with your system.
Fix: The lock screen not working on Windows 11
Solution 1: Temporarily Disable the Lock Screen
1. Navigate to Settings => Personalization => Lock Screen.

2. Under Related settings, click the “Screen timeout” option.

3. Now, click on “Screen and sleep” settings.

4. There are four options available.
- On battery power, turn off my screen after
- When plugged in, turn off my screen after
- On battery power, put my device to sleep after
- When plugged in, put my my device to sleep after
For each option, click the dropdown menu and select “Never“.
Solution 2: Repair System Files
System File Checker (SFC) scans your Windows system for corruption in critical files. If it finds any issues, it attempts to repair them using cached copies. This process can take some time as it checks files.
Follow the below steps:
1. Open the Command prompt and run as administrator.
2. Copy and paste the below command:
sfc /scannow

Press Enter.
Solution 3: Check for Updates
1. Open the Settings App and go to “Windows Update“.
2. Now, click on “Check for updates“.

If updates are found, they will be listed on the screen. You can typically choose to review details about each update before installing them.
Solution 4: Uncheck Turn on Fast Startup Option
1. Open the Control Panel and click on “Power Options“.

2. Click “Choose what the power buttons do” in the left panel.
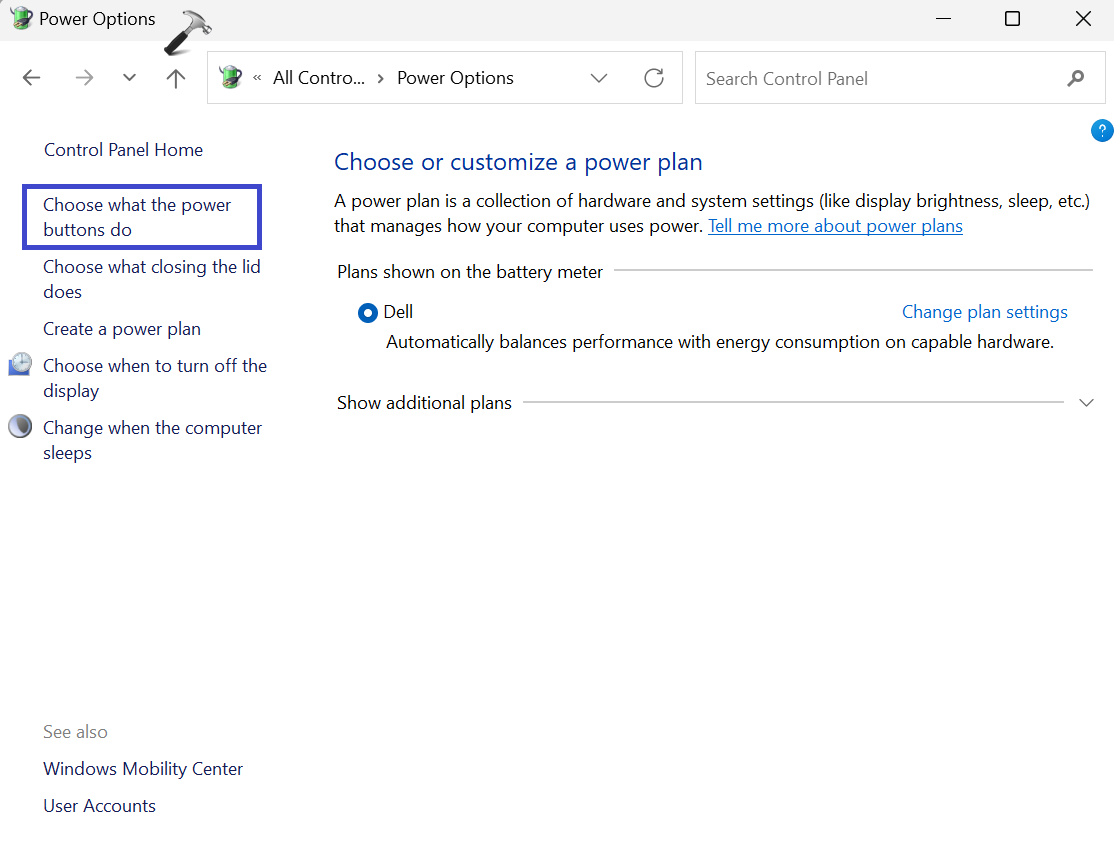
3. Click the “Change settings that are currently unavailable” option.
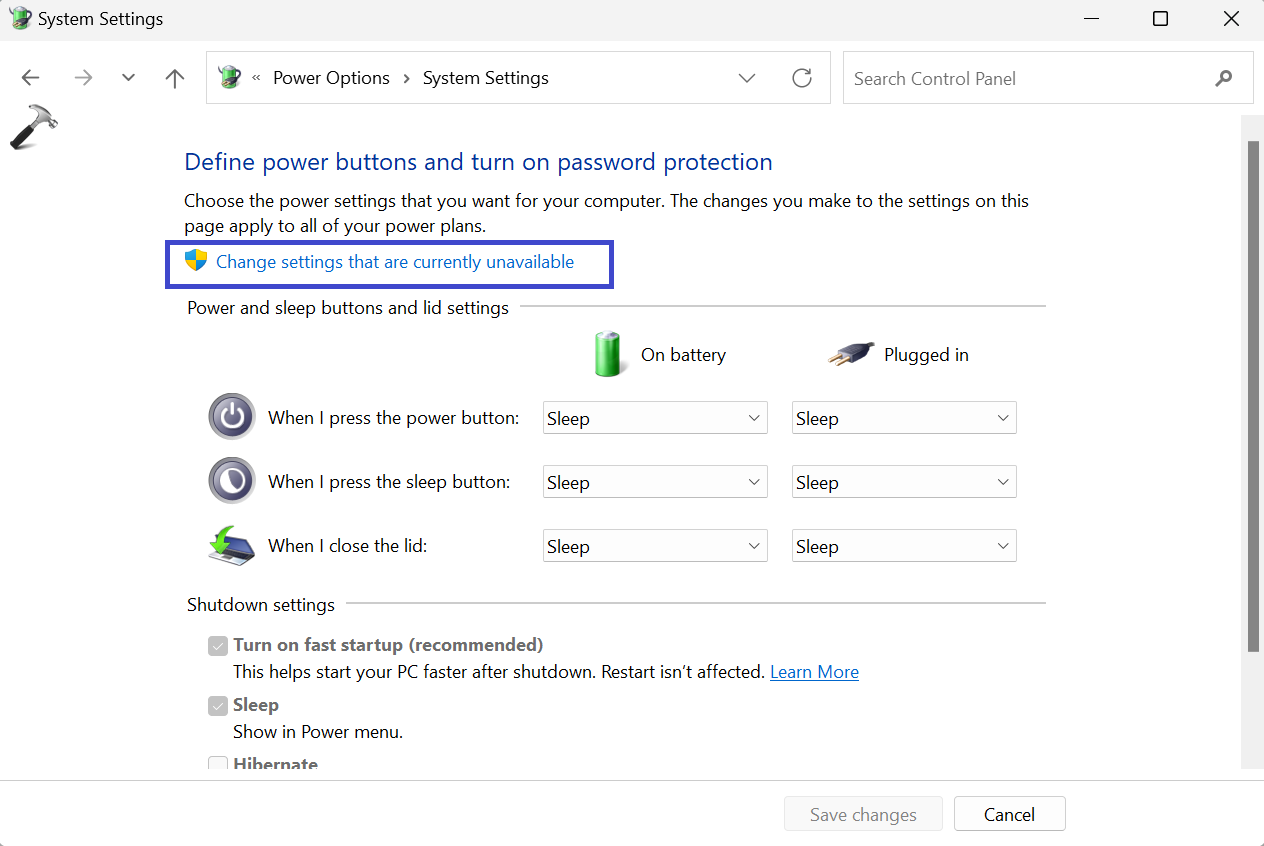
4. Under the Shutdown settings section, uncheck the “Turn on fast startup (recommended)” box.

5. Click “Save Changes“.
Related: Should I Enable/Disable Fast Startup Mode?
Solution 5: Enable Safe Mode
1. Navigate to Settings => System => Recovery.

2. Under the Advanced Startup section, click on “Restart now”.

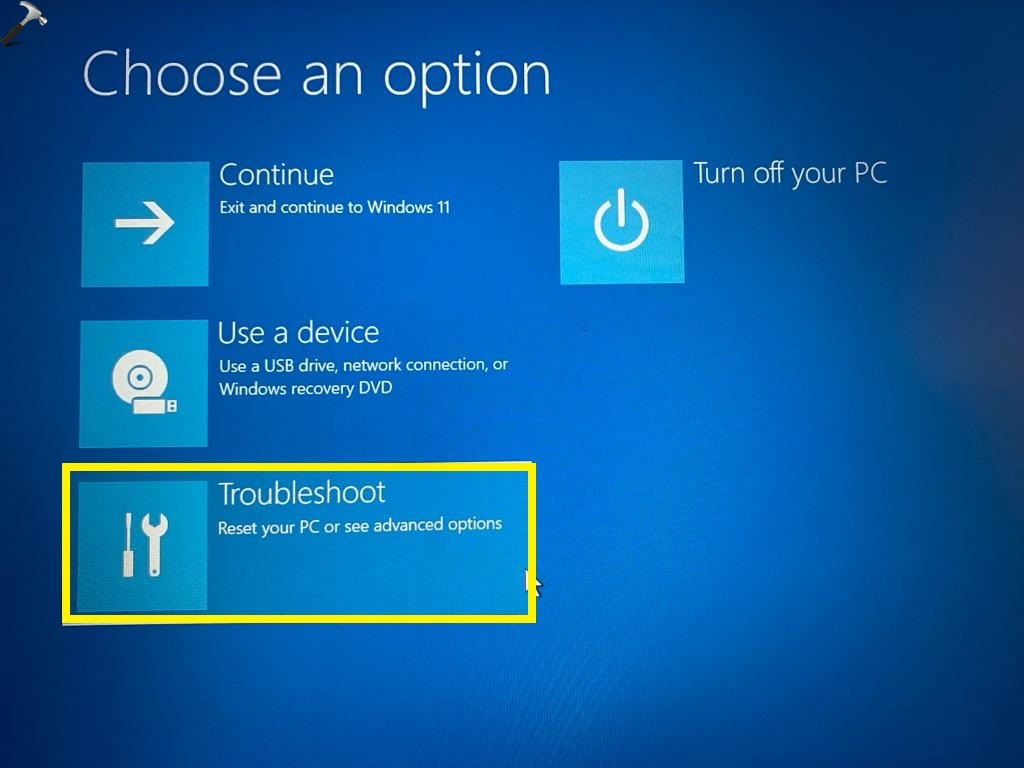
3. After your PC restart, you will see a “Choose an option” blue screen.
4. Choose the “Troubleshoot” option.
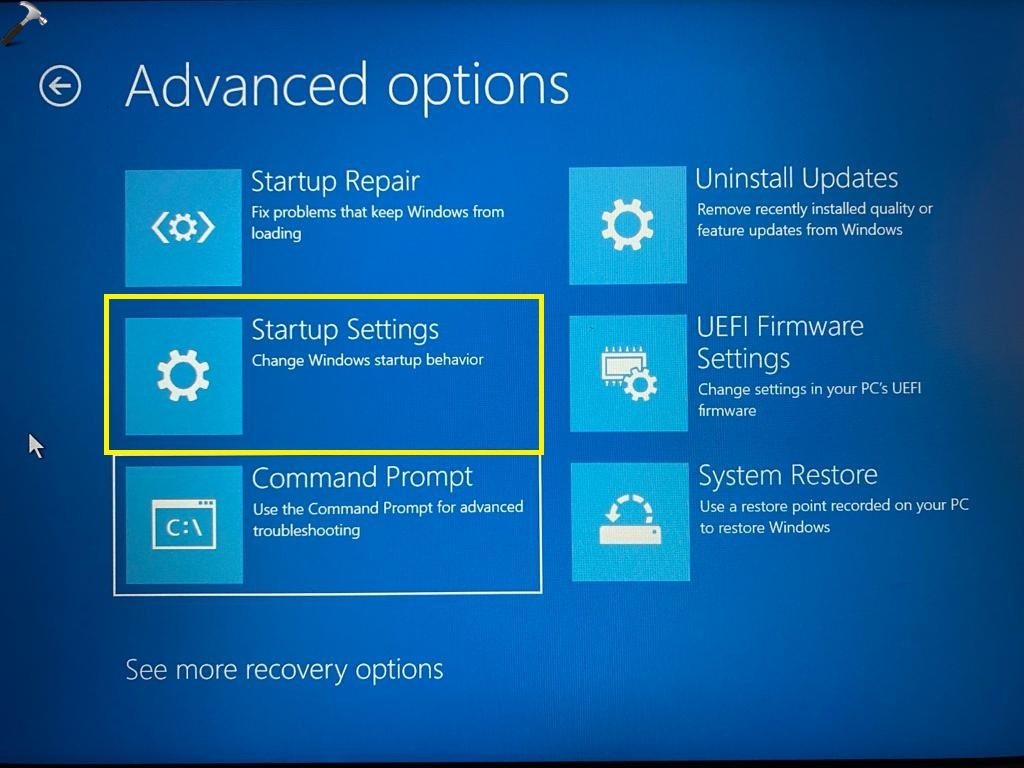
4. After that, click on “Advanced Options“.
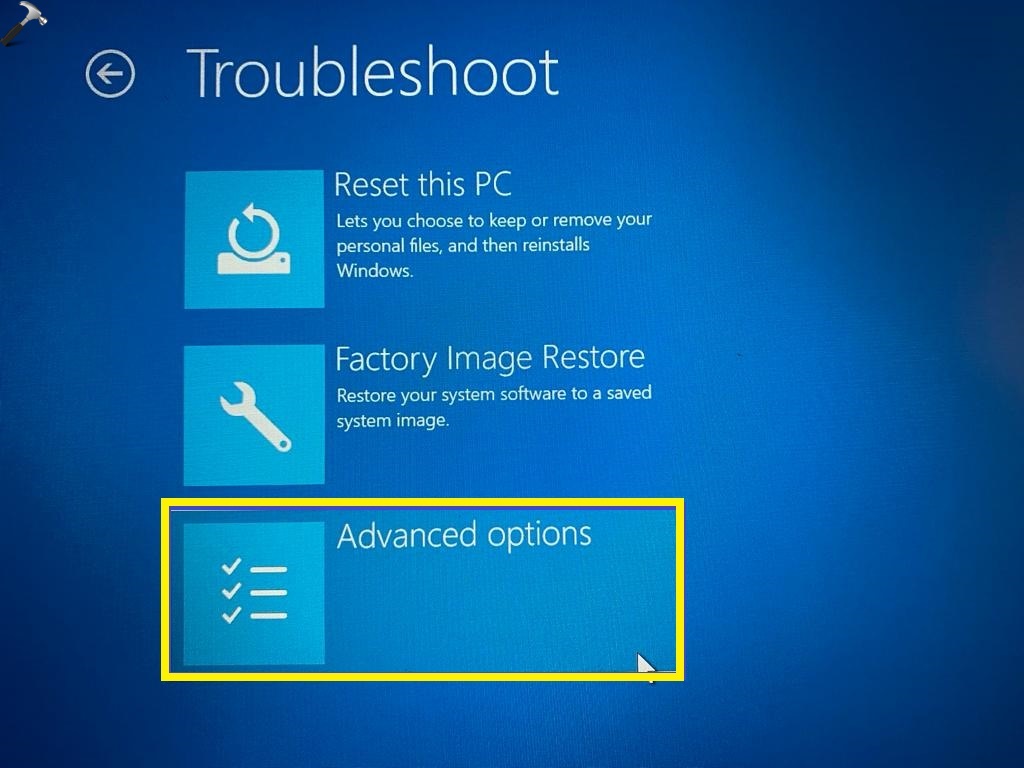
5. Then, click the “Startup Settings” option.
6. Click the “Restart” button. Your PC will restart again and will present a list of startup options.
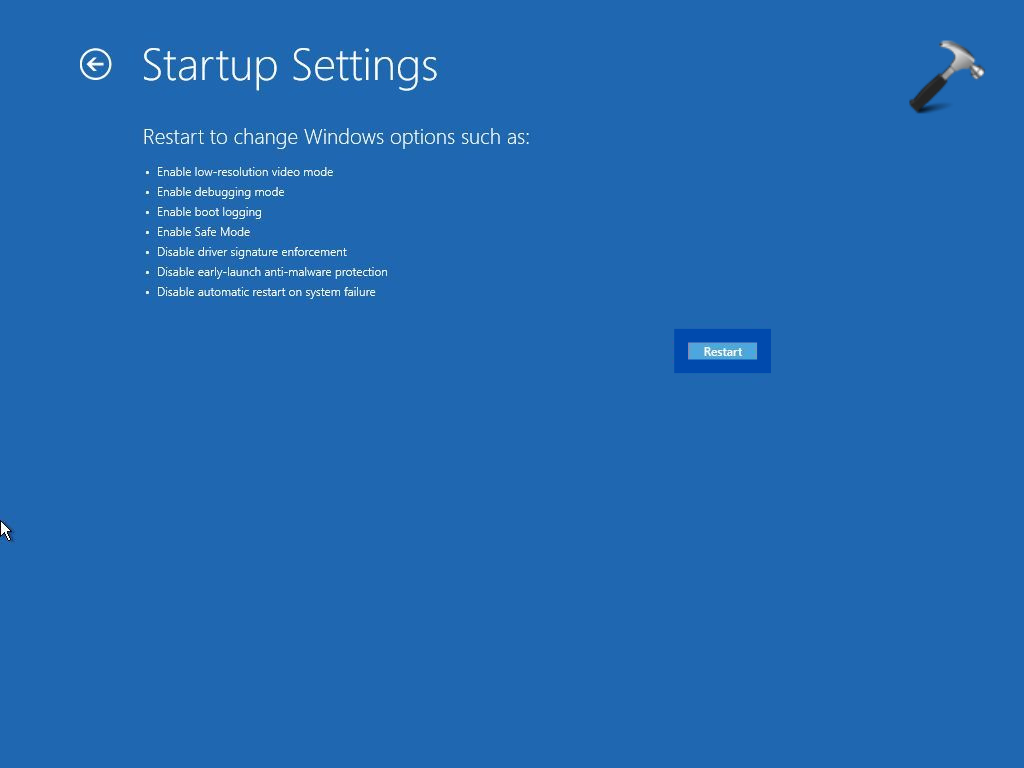
7. Once your PC restarts and displays the startup options list, press the number 5 on your keyboard or the F5 key to enable Safe Mode with Networking.

Solution 6: Prevent the Screen from Turning Off
1. Navigate to Settings => Accounts => Sign-in options.

2. Under the Additional Settings section, change the settings for “If you’ve been away, when should Windows require you to sign in again?“.

3. Select “Never“.
Solution 7: Create a New User Account
1. Navigate to “Settings => Accounts => Other users”.

2. Click on “Add account“.

3. Click on “I don’t have this person’s sign-in information“.

4. After that, click the “Add a user without Microsoft Account” option.

5. Enter the Username, password, and security questions. Click Next

Restart your PC. At the login screen, you should now see the new user account listed along with your existing account. Log in to the newly created account and check if the lock screen functions properly.
That’s It!