
Encountering the disappearance of the ‘Sign in with a local account instead’ option on your Windows 11 or 10 system can be a source of frustration. This particular feature is valuable for users who prefer the simplicity and independence of using a local account rather than a Microsoft account. This article is designed to address this common issue and provide clear, step-by-step instructions to fix the ‘Sign in with a local account instead’ missing on Windows 11/10 to help you restore the missing option.
Page Contents
Fix: ‘Sign in with a local account instead’ missing on Windows 11/10
Outlined below are the steps you need to follow to resolve this issue:
STEP 1: Create a New Local Admin Account
1. Open the Settings App and go to “Accounts“.
2. Scroll down and select “Other users “.

3. Next, click on “Add account“. to create a new admin account.

4. If you don’t have a Microsoft account, click on “I don’t have this person’s sign-in information“.

5. Now, click on “Add a user without a Microsoft account.”

5. Enter the credentials and then click “Next“.

5. To change this local user account to an administrator account, under Other users, select the account owner name (you should see “Local account” below the name), then select “Change account type“.

6. Under Account type, select Administrator, and then select OK.

7. Sign in with the new administrator account.
STEP 2: Sign in with a New Account
Here, you need to sign out from the Microsoft account and then sign in to the new Microsoft account. Follow the below steps to do so:
1. Press the Windows key + X. Go to “Shut down or Sign out” and select “Sign out“.

2. Now, click on “New account“.
STEP 3: Transfer all the files from Microsoft Account to the New Account
1. Open File Explorer and navigate to the C:/Users folder.

2. Open the Microsoft account profile, for example, user1.
3. Now, transfer all the personal files to the new user profile which you have created in STEP 1.
STEP 4: Turn off the BitLocker Encryption
1. Open the Search menu and type “Device Encryption settings“.
2. Click “Open“.

3. Next to Device encryption, turn off the toggle.

STEP 5: Discount Microsoft Account
1. Open the Settings App and go to “Accounts“.
2. Now, click on the “Access Work or School” option.

3. Click “Disconnect” on the Microsoft Account.

STEP 6: Remove the Microsoft Account
1. Open the Settings App and go to Accounts.
2. Select “Other users“.
3. Select the Microsoft Account and click the “Remove” button.
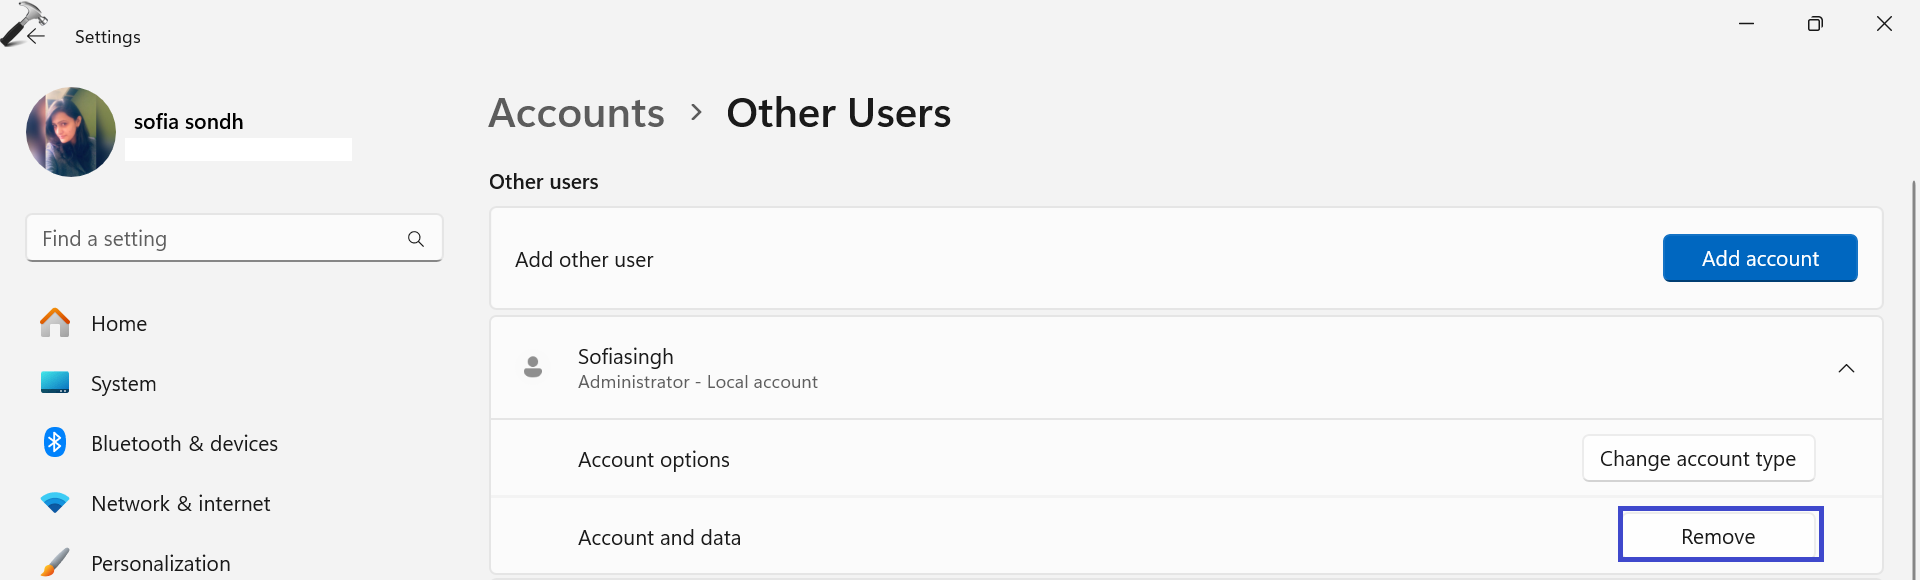
4. A prompt box will appear. Click “Delete account and data“.

That’s It!


Hello – I have a problem – I cannot log in to my Microsoft account on Windows 10 and Edge browser – because the login window does not appear -Can you help me solve the problem?-in Edge browser Error code: 15، 22، 1001 — in Windows 10 Settings – Accounts – When clicking on Sign In, the sign-in window does not appear – Error code: 0x80070057