Sleep mode is the feature that helps users to save power for their electronic devices such as laptops. Sometimes, you might find that your PC fails to enter sleep mode and remains on. This issue occurs when you have disabled sleep mode or have other PC’s power settings problems. This tutorial will help you to Sleep mode not working in Windows 11.
Page Contents
Fix: Sleep Mode not working in Windows 11
We have listed different solutions that can fix the problem:
Solution 1: Remove External Peripherals
You might face the issue because of the corrupt external devices that are interrupting the system’s processes. Remove all the external peripherals that are not essentials for the PC.
Remove the USB or Joystick, if attached. After removing, check if the system can got to sleep mode successfully or not.
If you are still facing the issue, below solutions will help you to solve your problem.
Solution 2: Check Sleep Settings
Sometimes, power and sleep buttons can be affected by hardware, power options and configuration. Follow the below steps to check the sleep settings:
1. Open the Control Panel. Click on “Hardware and sound”.

2. Now, click on “Power Options”.

3. Click on “Choose when to turn off the display”.

4. Next, set the value properly next to “Put the computer to sleep”.
5. Now, click on “Change advanced power settings”.

6. Prompt box will appear.
Expand the sleep option and set it accordingly.

7. Click OK followed by Apply.
8. Restart your PC to apply the settings. Check whether issue is resolved or not. If not, try the next solution.
Solution 3: Uninstall the Update
This issue occurs after installing KB5019509 update. Uninstall the update to resolve this issue. Here are the steps to uninstall the update:
1. Open Control Panel. Click on “Uninstall a Program”.

2. Now, select “View installed updates”.
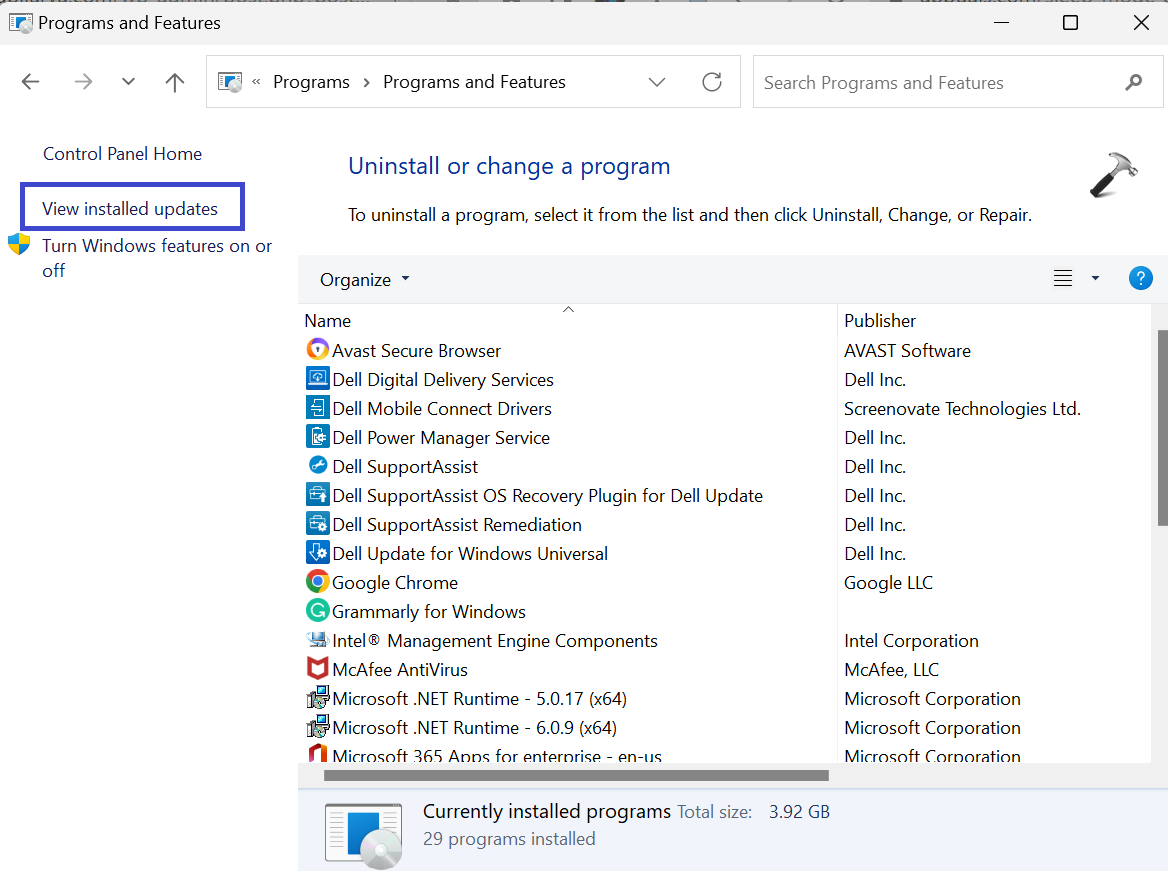
3. Locate the KB5019509 update.
Right-click on it and select Uninstall.
4. Follow the on-screen instructions.
5. Restart the PC. Check whether the issue is resolved or not.
Solution 4: Run Powercfg Command
Command Prompt allow you to control every configurable power system settings including hardware-specific settings. Follow the steps to run powercfg command:
1. Open Command Prompt and select “Run as administrator”.
2. Copy and paste the below command:
powercfg -requests

3. The fields should all read None. Any active power requests that have been made by applications or drivers can be cancelled to allow the computer to fall asleep. Replace the CALLER_TYPE as PROCESS, NAME as the application name under execution, and the REQUEST to EXECUTION.
powercfg -requestsoverride <CALLER_TYPE>“<NAME>”<REQUEST>
4. Close the Command Prompt and restart the PC.
Solution 5: Run the Power Troubleshooter
Easy way to fix the issue is by running the power troubleshooter. Follow the below steps to run the power troubleshooter:
1. Open the Settings App and go to System.
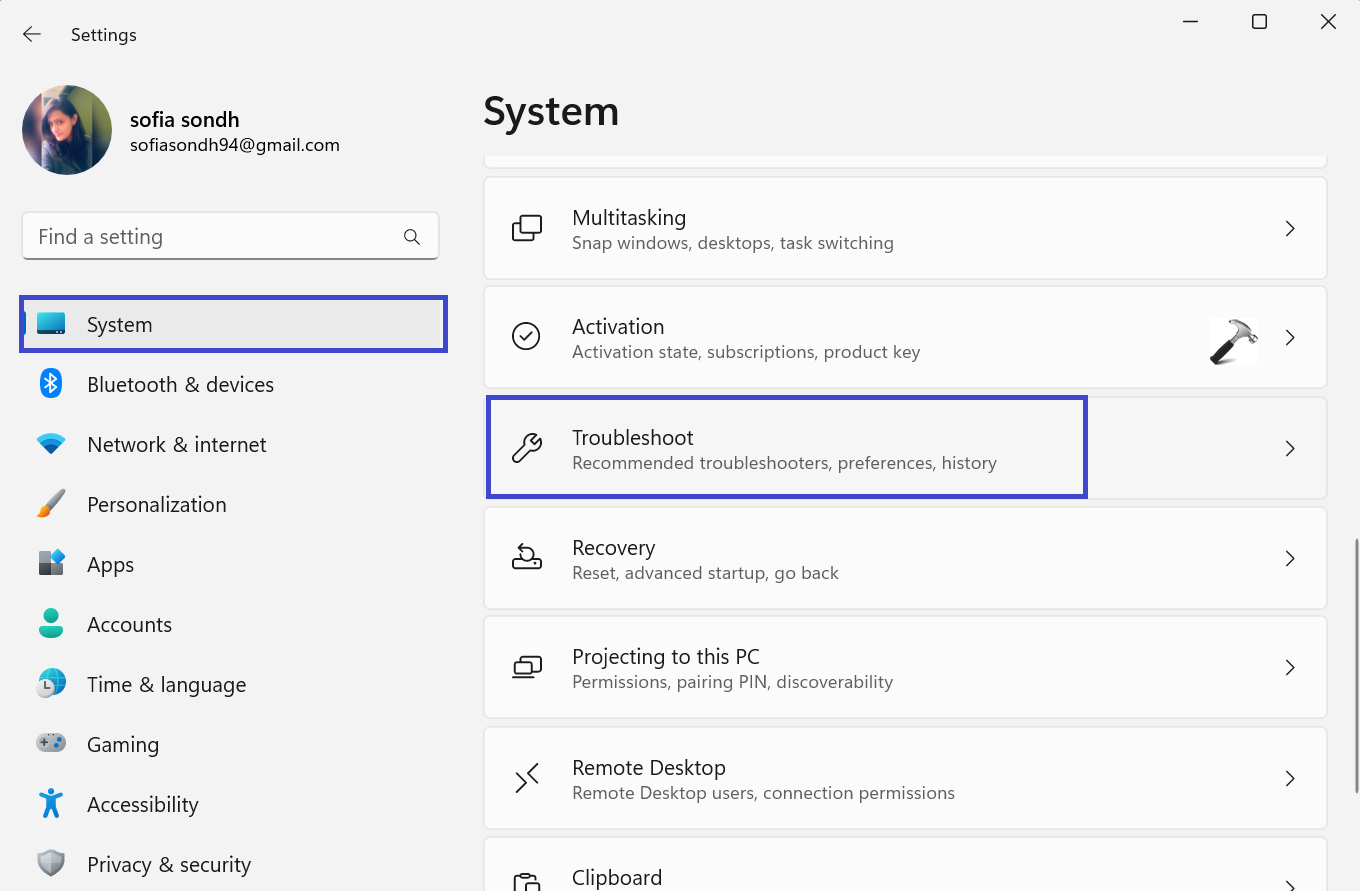
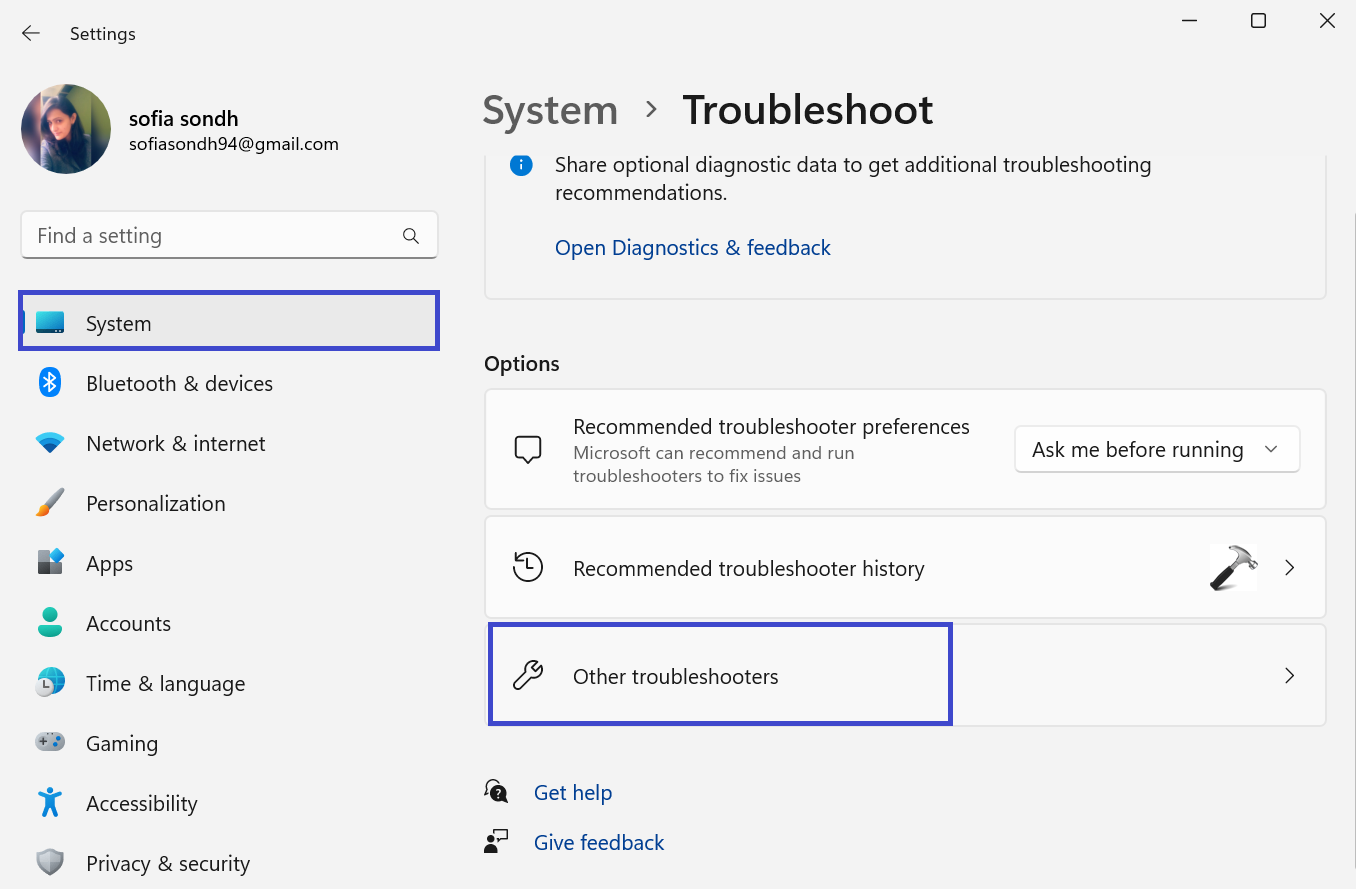
2. Now, click on Troubleshoot.
3. After that, click on “Other troubleshooters”.
4. Click on “Run” next to the Power troubleshooter.
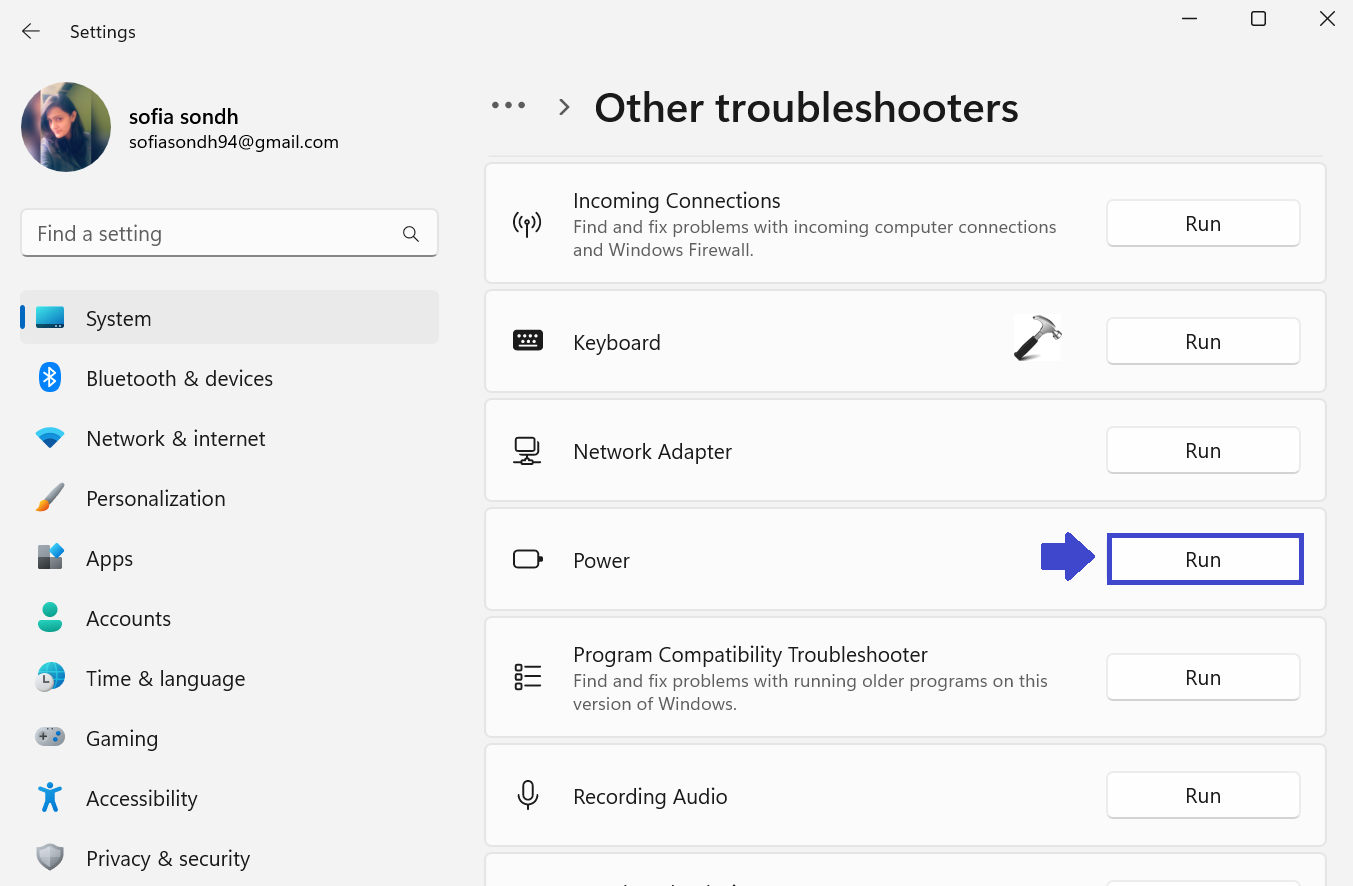
5. Troubleshooter will complete its work. Restart the PC and check whether the issue is resolved or not.
Solution 6: Update Driver
In many cases, this issue is faced because of incompatible software or outdated drivers. Here are the steps to update the Driver.
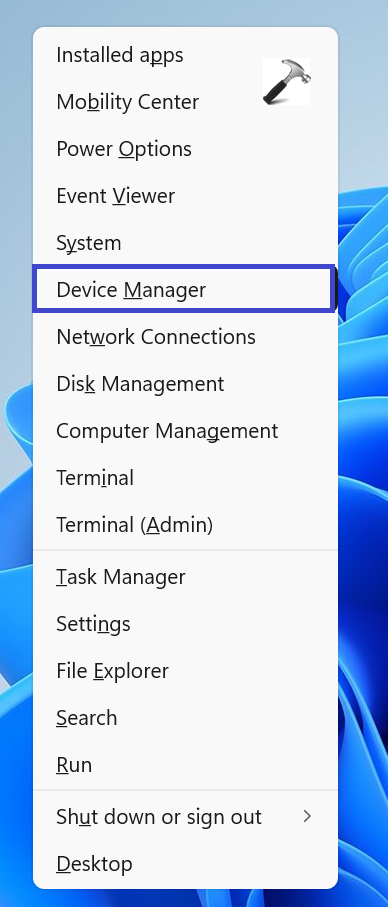
1. Press the Windows Key + X. Select “Device Manager”.
2. Find the Driver having a yellow sign. Yellow sign indicates that either driver is outdated or corrupt.
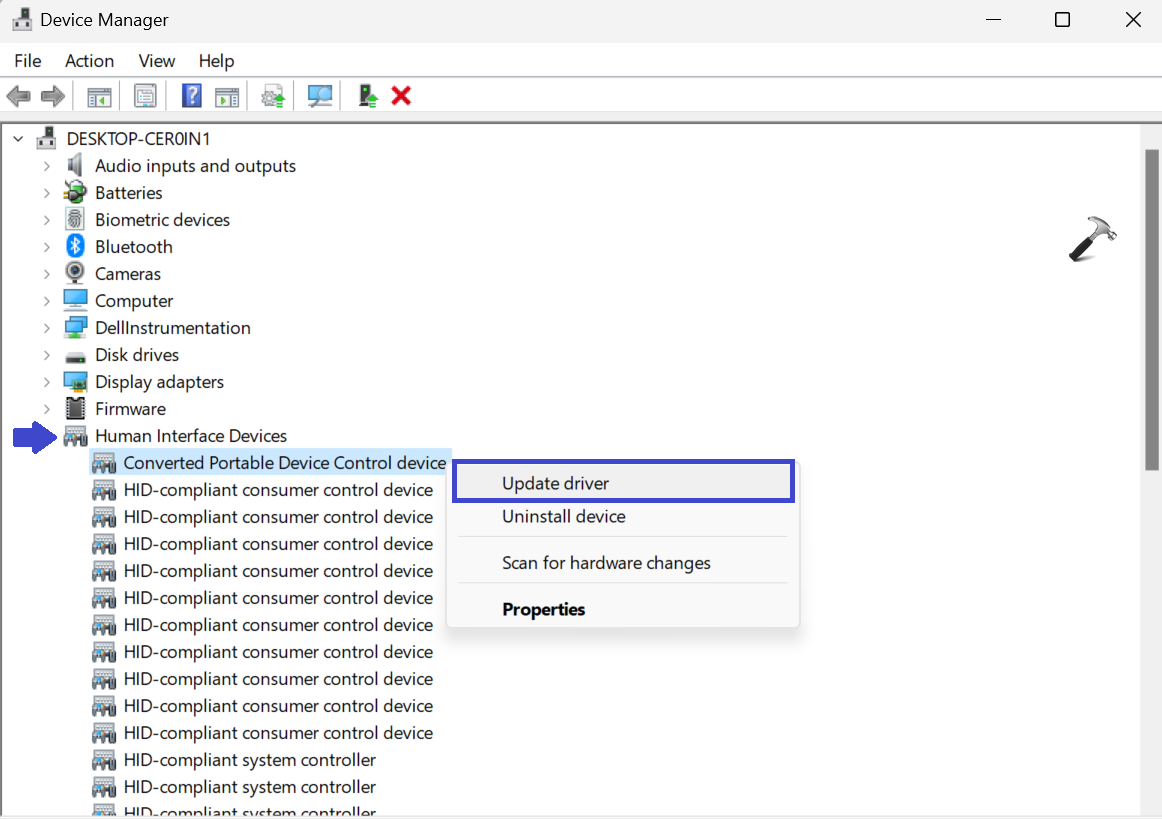
3. Expand Human Interface Devices. A list of drivers will appear.
Right-click on the driver and select “Update driver”.
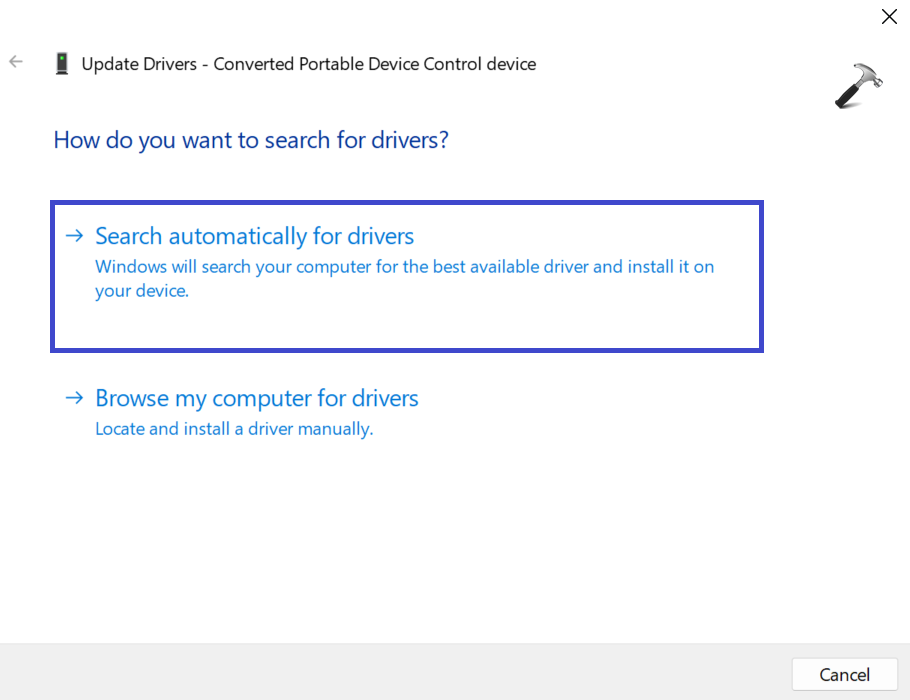
4. Prompt box will appear.
Select “Search automatically for drivers”. System will get the latest version of the driver.
5. Follow the on-screen instructions.
You can also download and install the latest version from the manufacture’s website.
6. Close the Window and restart the PC. Check if the issue is resolved once all the drivers are updates.
That’s It!