When you join Microsoft Teams meeting as an external user, before the organisers joins, you might face a known issue. If you try to enable video sharing, then you may see Video sharing is disabled by the administrator message.

If you follow these steps, you can easily reproduce the problem:
- Create a meeting and then invite an external user.
- Let the external user join the meeting using invitation link using web interface from a supported browser.
- Join the meeting as an organiser.
At the second step when external user joins, they cannot enable video sharing and the camera icon is greyed out. Hovering over video icon gives Video sharing is disabled by the administrator message. In case, if the organiser joins meeting before the external user, the problem does not occur and the external user can enable video sharing as expected.
To avoid this problem, the two simple solution are as follows. Either the external user should join after organiser. Or the external user can leave the meeting and then rejoin. But this may not a wise choice, so how to resolve this issue? Well, as of now you can try below mentioned workarounds to fix the problem.
Fix: Video Sharing Is Disabled By The Administrator In Microsoft Teams
1. Go to Microsoft teams Admin Centre at https://admin.teams.microsoft.com and sign in with your Microsoft/Office 365 account.
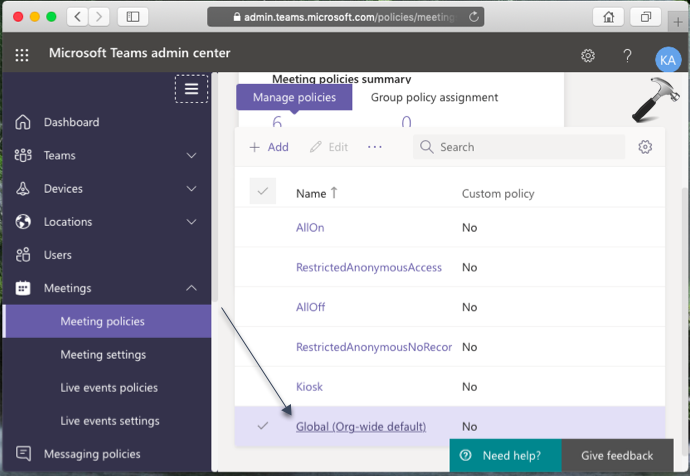
2. In Microsoft teams Admin Centre, go to Meetings > Meeting policies. Click on Global (Org-wide default) link.
3. In the next page, under Audio & Video, turn On the Allow IP video option.
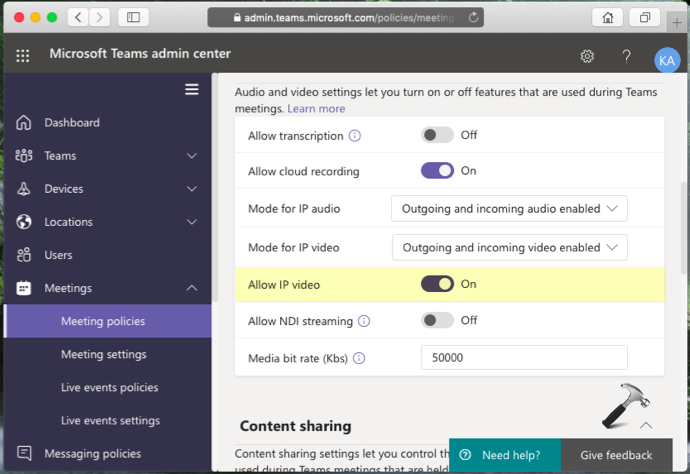
4. Scroll down in the same page and set Let anonymous people start a meeting option to On. The option is particularly helpful to clients dialling in and join the meeting before the presenter.

5. Save your settings and allow some time to reflect these to your client.
After some time, you will notice that the issue no longer happens.
Check this video for live demonstration of steps mentioned above:
Hope this helps!