Microsoft introduced User Account Control (UAC) settings with Windows Vista. The UAC continues to be part of Windows family with Windows 7, 8, 8.1, 10 operating systems (OSes). UAC settings allows you to choose the best security level for your Windows OS. UAC settings can be used to block unauthorized or malicious activities from apps or software you install.
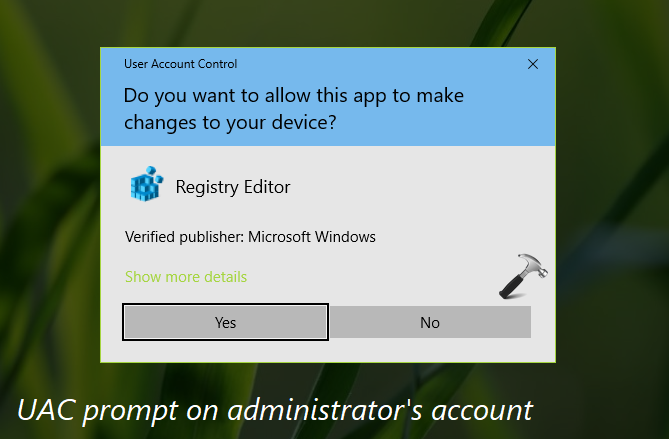
UAC settings are actually enabled by default. You’ll see following UAC prompt (on administrator account) while you trying to open MMC snap-ins, or installing software, or authorizing operations for apps.
On standard user account, similar prompt appears but instead it asks for administrator password to authorize the change:

By configuring UAC settings, you can change how the above mentioned UAC prompts appears.
How To Configure User Account Control Settings In Windows 10
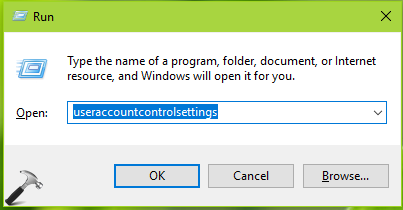
1. Press  + R to open Run, type
 useraccountcontrolsettings and click OK to open User Account Control Settings window.
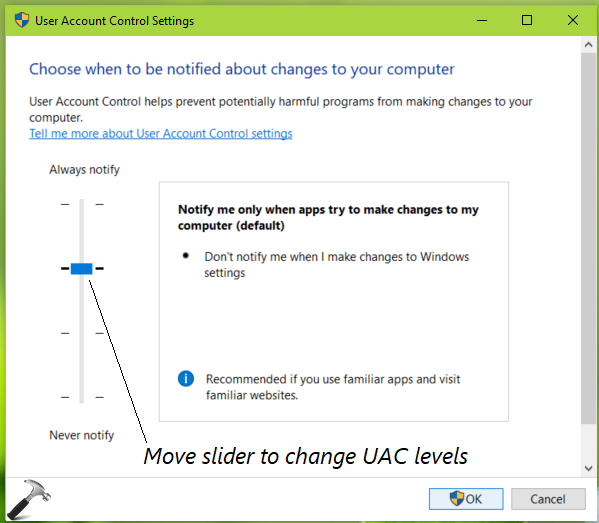
2. In User Account Control Settings window, you can change slider to up or down to change UAC levels (refer screenshot below):
Here’s the information about different UAC levels and their impact. Using this info, you can configure the best UAC level for you:
| UAC Level | Level Information | Importance |
|---|---|---|
| Always notify | The UAC prompt appears when software/apps try to make a change to the system or when you make changes Windows settings. The screen will be dimmed and you need to read the content of the prompt and provide your approval/denial, if you are an administrator. If you are standard user, you need to enter the administrator’s password. | This is most secure UAC level. If you install a lot of 3rd-party software/apps etc., this is the UAC level recommended for you. |
| Notify only when apps try to make changes to the system | Get notified only when apps/programs try to make changes to your system and you accept/reject these operations. The desktop will be dimmed when the UAC prompt appears. No notification/prompt will be sent when you’re changing settings. If you are standard user, you need to enter the administrator’s password. | This is default UAC level. If you never alter UAC settings, you will stay always on this level. |
| Notify only when apps try to make changes to system (but don’t dim desktop) | This level has the same effect as the previous one. The only difference is that the desktop is not dimmed when the UAC prompt appears. | Opt for this level, if you don’t like dimmed desktop while UAC prompt appears. |
| Never notify |
This level disables UAC, and no notification/prompt appears when either you or any app makes changes to the system. | This is least secure UAC level. This UAC setting is not recommended due to the reduced security. When on this level, if you don’t care about 3rd-party apps/software you’re installing, your system is more vulnerable to security threats. |
3. Once you selected UAC level of your choice, click OK. You might be prompted for credentials, so provide them to save the settings.
So this is how you can configure UAC levels in Windows OS.
That’s it!