Is your printer refusing to cooperate, showing the dreaded “offline” status when you need it the most? Whether you’re using Windows 11 or Windows 10, printer connectivity issues can be a common headache. Fortunately, there are several methods to tackle this problem and bring your printer back online. In this guide, we’ll walk you through a series of methods on how to set Printer online in Windows 11/10.
Whether it’s a simple restart, reinstallation, or adjusting printer settings, we’ve got you covered. Say goodbye to printer offline issues and hello to hassle-free printing.
Let’s get started!
Page Contents
How to set Printer online in Windows 11/10
Below are the simple methods using which you can set the Printer online in Windows 11/10:
Method 1: Restart the Printer and Computer
Sometimes, the simplest solutions work best.
1. Begin by powering off your printer. Wait for about 60 seconds.
2. Power on the printer again.
3. Now, restart your PC.
4. Try to print the page once more.
Method 2: Remove and Re-install Printer
If restarting the printer and computer didn’t resolve the issue, you can try removing and re-installing the printer.
Here’s how:
1. Open the Settings App and go to “Bluetooth & Devices“.
2. Now, click on the “Printer & Scanners” option.

2. Select your Printer and click on the “Remove Printer” button.
3. Now, click on the “+ Add a printer or scanner” option.
4. Once the printer is discovered, select the printer and click “Add device“.
Method 3: Disable Offline Mode
If your printer is stuck in offline mode, you can try disabling this mode to bring it back online.
Here’s how:
1. Open the Settings App and go to “Bluetooth & Devices“.
2. Click on the “Printer & Scanners” option.
3. Now, select your printer and click on “Open Queue“.
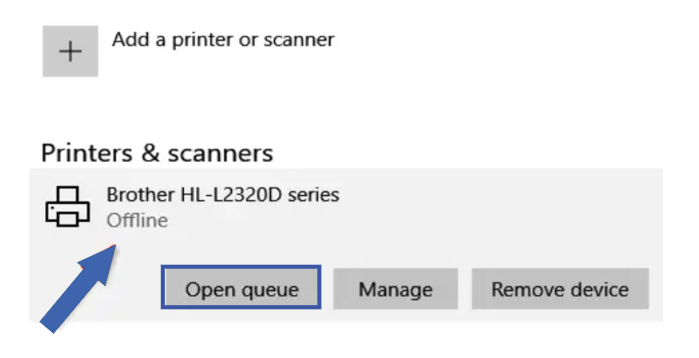
4. Under the Printer section, click on “Use Printer Offline“.

Once you’ve disabled offline mode, your printer should come back online and be ready for use.
Method 4: Restart Print Spooler Service
The Print Spooler service manages print jobs in Windows. If it’s not running correctly, it can cause printer offline issues. Here’s how to restart it:
1. Press the Windows Key + R. Type “services.msc” and click OK.
2. From the list, double-click on “Print Spooler“.
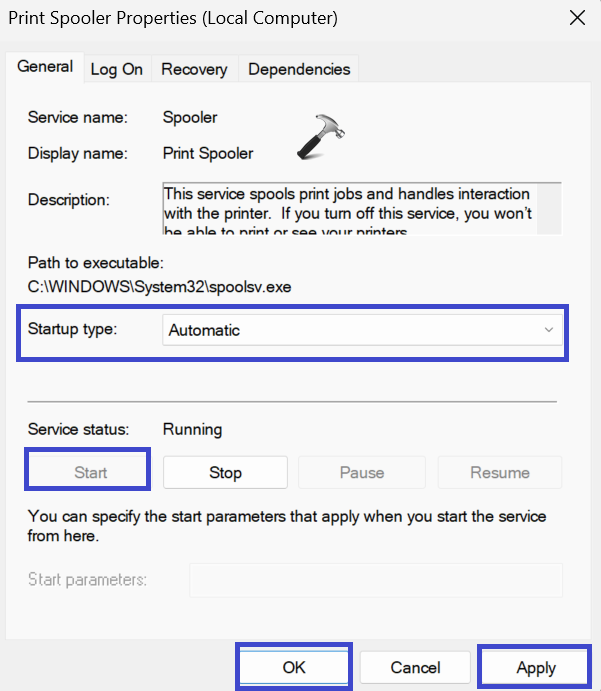
Under the Startup type, set it to “Automatic“.
3. Click OK followed by Apply.
4. After that, right-click on “Print Spooler” and click “Restart“.
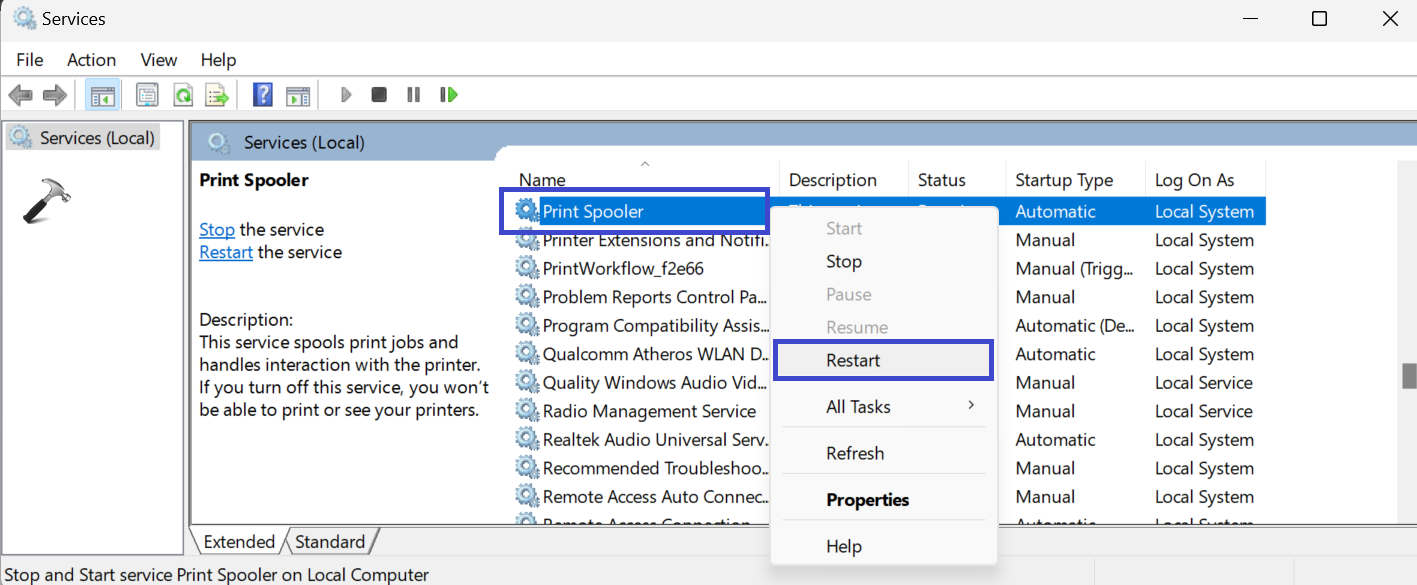
Restarting the Print Spooler service can often resolve printer offline issues by refreshing the print queue and ensuring that print jobs are processed correctly.
Method 5: Clear Print Queue
Clearing the print queue can help resolve issues when print jobs are stuck or causing your printer to go offline.
Follow the steps to do so:
1. Open the Settings App and go to “Bluetooth & Devices“.
2. Click on the “Printer & Scanners” option.
3. Now, select your Printer and click on “Open queue“.
4. A prompt box will appear. If there is any document that is in a queue, cancel it.
Right-click on the document, click “Cancel“.
Method 6: Run Printer Troubleshooter
Running the Printer Troubleshooter in Windows can automatically diagnose and resolve common printer issues.
The troubleshooter will then scan for printer-related issues and attempt to fix them automatically. This can be a quick and effective way to resolve printer offline problems.
Here’s how to do it:
1. In the Settings app, go to System.
2. Click on “Troubleshoot“.
3. Then, click on “Other troubleshooter“.
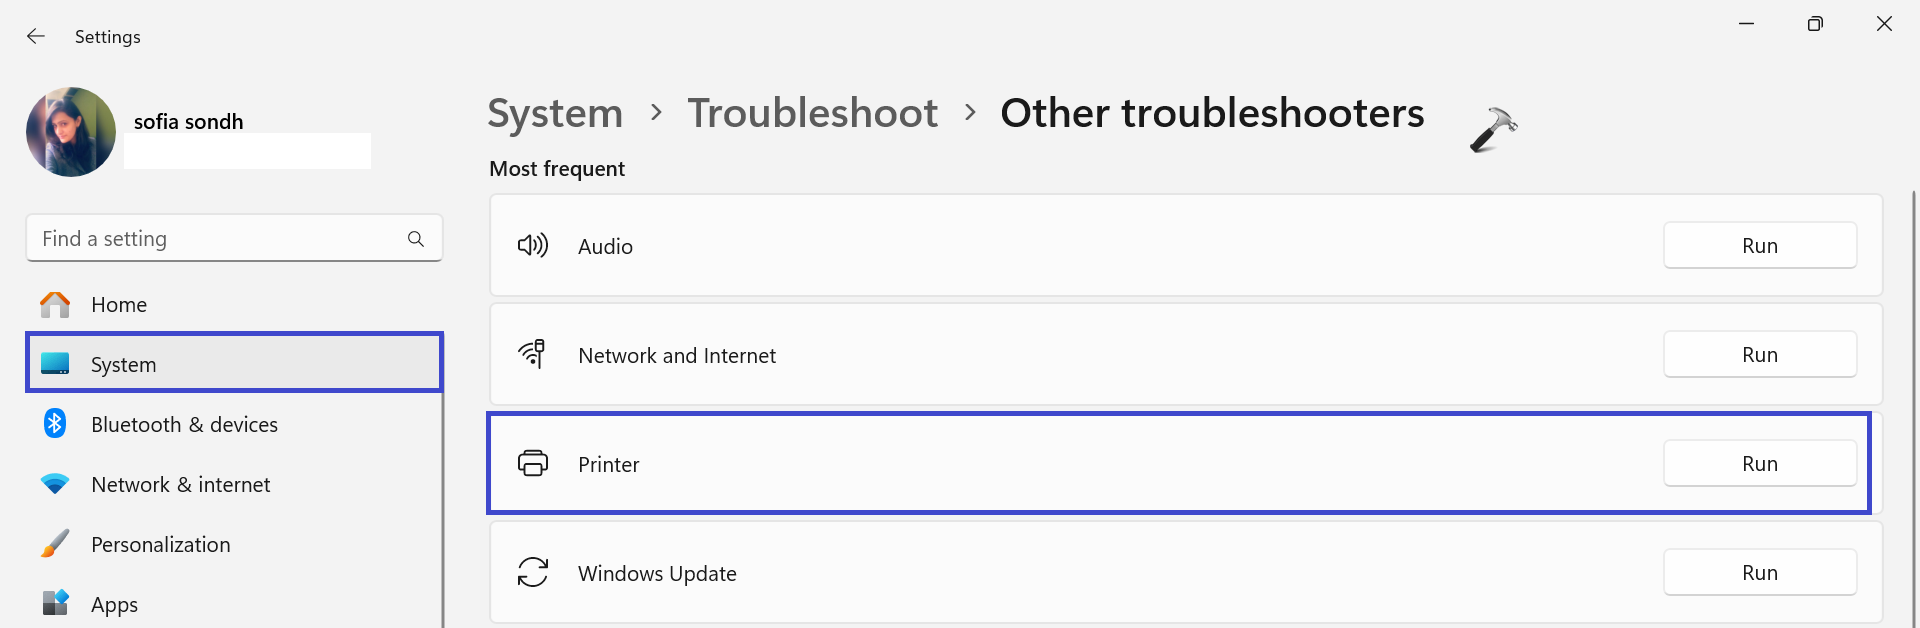
3. Click on “Run” next to the Printer.
Method 7: Set as Default Printer
Setting your printer as the default printer can help ensure that print jobs are sent to the correct device.
By setting your printer as the default, any print jobs from your applications will automatically be directed to this printer. This can help avoid confusion and ensure your printer is ready when you need it.
Here’s how to set your printer as the default:
1. Open the Settings App and go to “Bluetooth & Devices“.
2. Now, click on the “Printer & Scanners” option.
3. Select your printer and click “Open Queue“.

4. A prompt box will appear. Under the Printer tab, click on “Set As Default Printer“.
That’s It!