Whenever, a program goes through some issue in Windows 11/10, then the Error Reporting Service starts looking for a solution to the problem. However, it never actually finds a solution to the issue but gets stuck with the error message of Windows is checking for a solution to the problem. In such scenarios, the users should close the application. For stopping this, the users have to disable the Error Reporting Service.
Page Contents
Windows is checking for a solution to the problem
For disabling and fixing the Windows is checking for a solution to the problem, refer to the fixes mentioned below.
Fix 1: Disabling Windows Error Reporting
The first fix which the users should try is disabling Windows Error Reporting in Group Policy Editor. Follow the steps below for doing that.
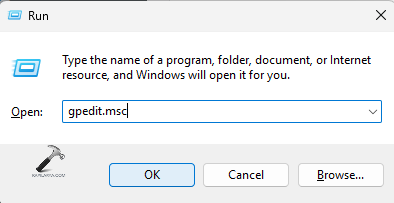
Step 1- Firstly, press Win + R. In the Run dialog box, copy and paste the command below and press Enter.
gpedit.msc
Step 2- Next, in the Group Policy Editor window, go to User Configuration > Administrative Templates > Windows Components > Windows Error Reporting.

Step 3- Now, in the right pane, double click Disable Windows Error Reporting.

Step 4- In the Properties window, press Enabled. Then, click Apply > OK for saving all the changes.
Fix 2: Disabling User Mode Dump Creations
Another fix which the users should try is disabling the Local Dumps of Windows Error Reporting service. Let us now look at the steps for doing the same.
Step 1- Open Registry Editor.
Step 2- Next, go to the path given below.
HKEY_LOCAL_MACHINE\SOFTWARE\Microsoft\Windows\Windows Error Reporting\LocalDumps
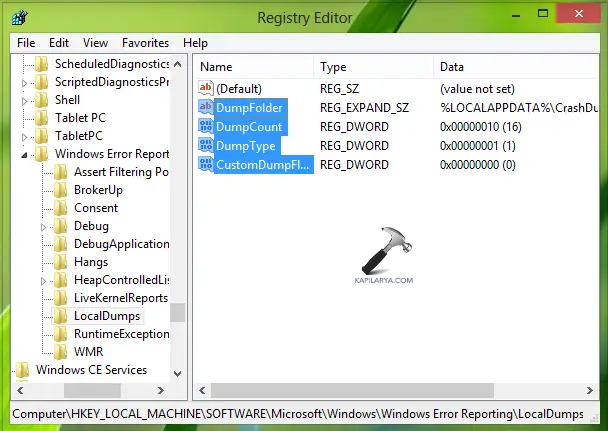
Step 3- Now, delete the Local Dumps registry key for deleting the User Mode Dumps.
Fix 3: Editing the Registry
If the other two fixes are not working, then try editing the registry for fixing the issue with the following steps.
Step 1- At first, press Win + R. Then, enter the command given below in the Run dialog box and press Enter.
regedit
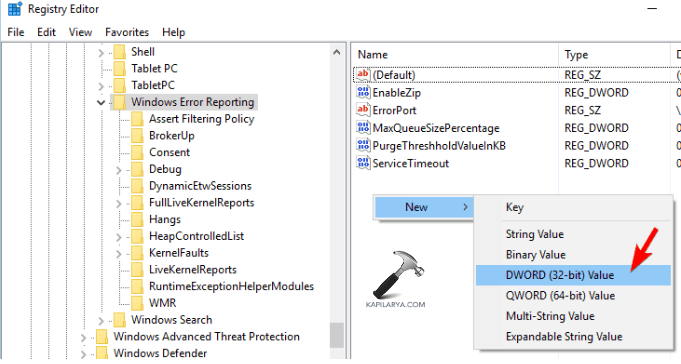
Step 2- Next, in the Registry Editor window, go to the path given below-
HKEY_LOCAL_MACHINE\SOFTWARE\Policies\Microsoft\Windows\Windows Error Reporting

Step 3- Now, in the right pane of the Windows Error Reporting key, search for the Disable DWORD. However, if the DWORD is not present, then create it manually. But, if it is already present, directly skip to Step 5.
Step 4- For creating the DWORD, right-click the blank space. Thereafter, select New > DWORD (32-bit) Value.
Step 5- Next, name the new DWORD as Disabled and double click it for opening Properties.
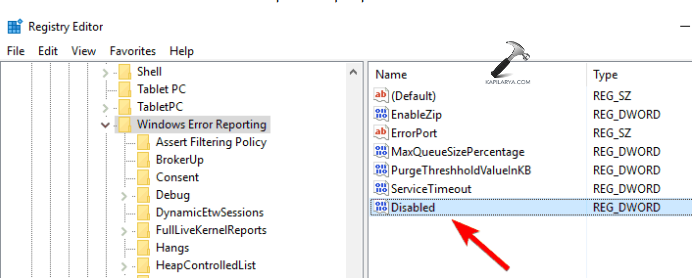
Step 6- In the Properties window, change the Value data to 1. Press OK for saving the changes and close the Registry.
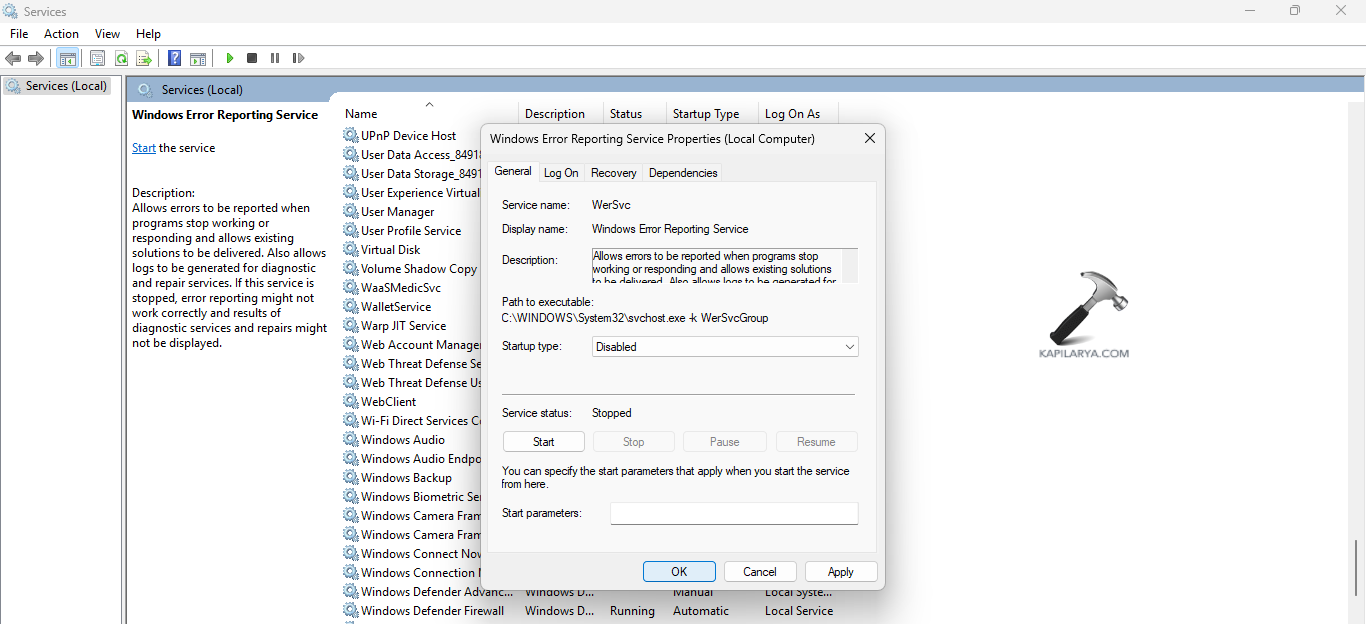
Fix 4: Disabling Windows Error Reporting Service
The users can also fix the issue by disabling Windows Error Reporting Services in Services window using the steps given below.
Step 1- Open Run dialog box. Then, enter the prompt below and press Enter.
services.msc
Step 2- Now, in the services window, double-click Windows Error Reporting Service. This will open its properties.

Step 3- Lastly, in the Properties window, set the Startup type to Disabled and press Apply > OK and close the Services window.
Hoping this helps!