
BitLocker is one of the thousand good features introduced in Windows 8. Using BitLocker feature you can easily encrypt a drive with a strong combination password and avoid the data in it being attacked by hackers or crackers. BitLocker is a special feature concerning security priority in Windows 8. It is really advantageous for those ones, who are really worried about their data to be protected.
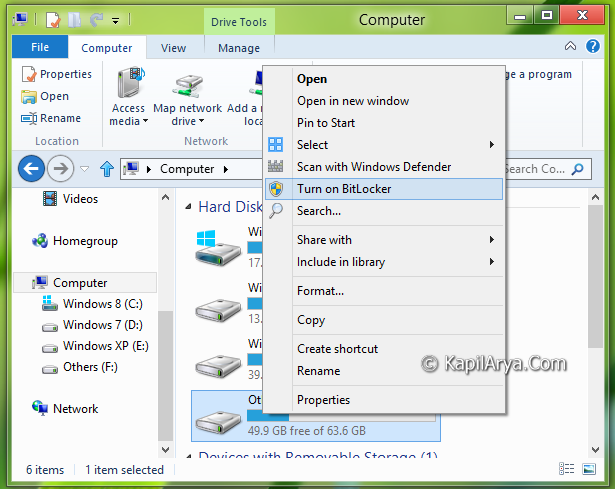
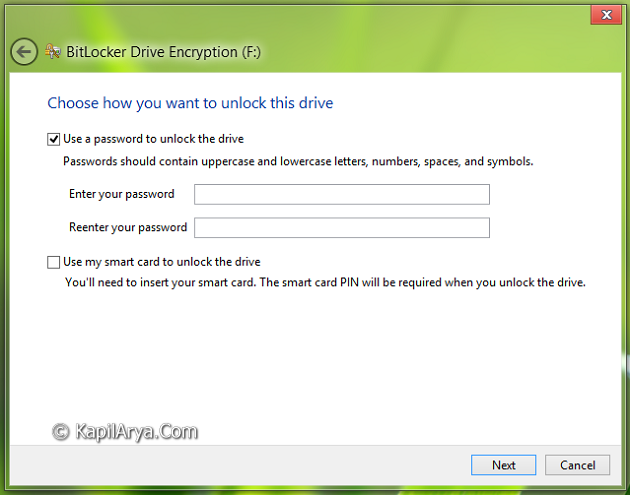
You can turn on BitLocker for a drive in the way above image illustrates. After clicking on Turn On BitLocker , you will be taken to following window, where you can choose the password for the drive to lock:
In this article, I’ll tell you how to use a more strong encryption to encrypt your password inputted above so that attackers using brute-forces to unlock the drive may be unsuccessful. By default, Windows provide you 128-bit encryption, but using the method of this article, you will be able to have 256-bit encryption. So here we go to the method…
Before proceeding, make sure your are running Windows as administrator. Also note the changing encryption for the drive already encrypted won’t effect it.
Page Contents
Use 256-Bit Drive Encryption & Cipher Strength For BitLocker Using REGEDIT
1. Press  + R and put regedit in Run dialog box to open Registry Editor (if you’re not familiar with Registry Editor, then click here). Click OK.
![]()
2. Navigate here:
HKEY_LOCAL_MACHINE\SOFTWARE\Policies\Microsoft
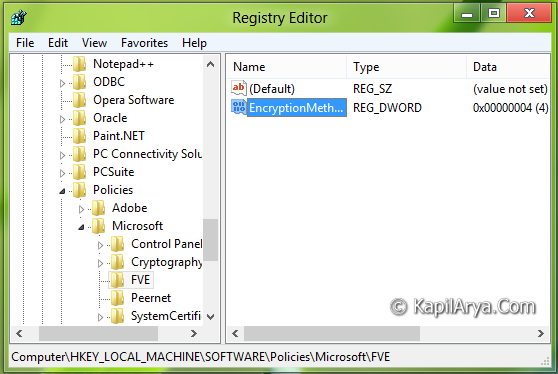
3. In the left pane of this location, create a new key using right click -> New -> Key. Name it as FVE. In the right pane of this so created key, create a DWORD using right click in blank space -> New -> DWORD Value. Name the DWORD as EncryptionMethodNoDiffuser.
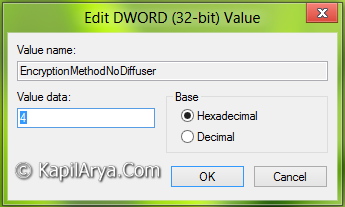
4. Now double click on this above created DWORD to modify it, using following values for its Value data section:
For 128-bit encryption and cipher strength – Put 3
For 256-bit encryption and cipher strength – Put 4
5. That’s it! Now Reboot to get desired results. In case you want revert back to default encryption, simply delete the key created in step 3.
Use 256-Bit Drive Encryption & Cipher Strength Using GPEDIT
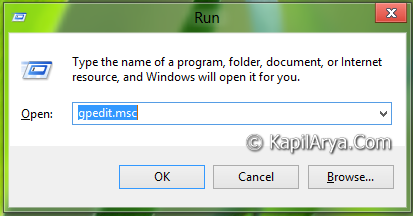
1. Press + R and put gpedit.msc in Run dialog box. Click OK.
2. Navigate here:
Computer Configuration -> Administrative Templates -> Windows Components -> BitLocker Drive Encryption
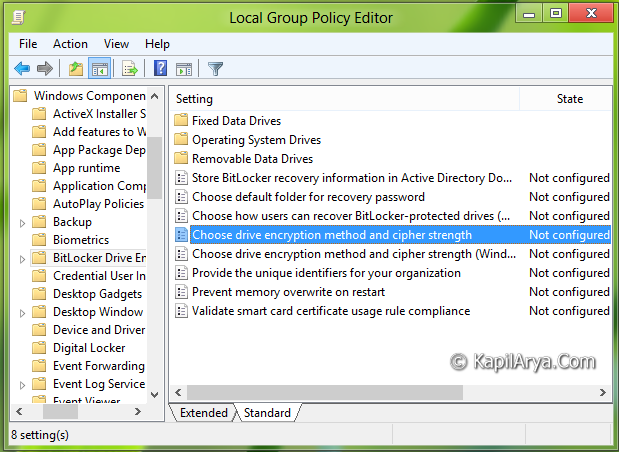
3. In the right pane, double click on policy named Choose drive encryption method and cipher strength and you’ll get this:
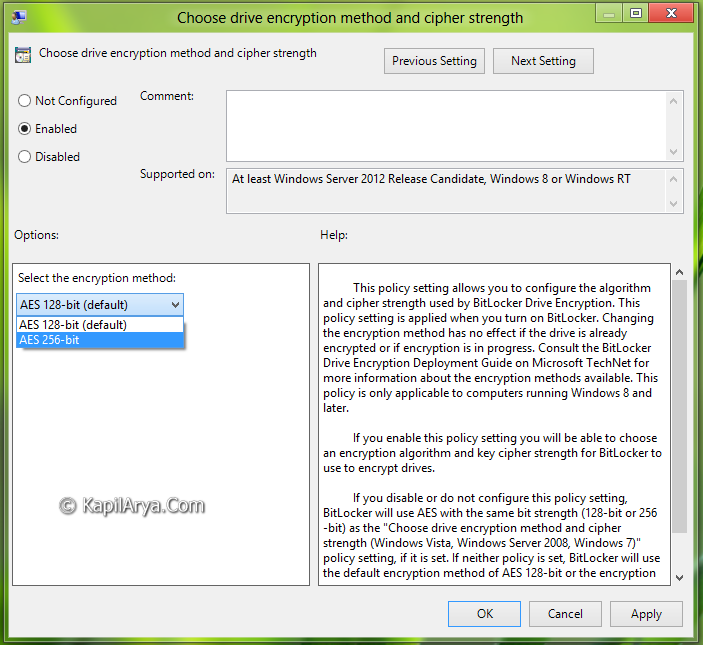
4. Use following settings for their corresponding effect:
To Have Default Encryption – Not Configured / Disabled
To Have Desired Encryption – Enabled
5. For desired encryption, after selecting Enabled above, you can select between AES 128-bit and AES 256-bit as per your requirement.
Hope you like the tip!


Awesome tutorial :)
Good find Kapil. Can we turn it on for the OS drive. I think its too critical to lock the drive on which Windows have its roots :P