Many users consider creating a local account in the Windows PC for various reasons. One of the most important reasons is that instead of syncing the info with your Microsoft account, Windows stores all the account information locally on the computer. This article shows you 5 ways to create a local user account in Windows 11 device of yours.
Page Contents
5 ways to create a local user account in Windows 11
Option 1: Create a local user account in Windows 11 using NETPLWIZ
A handy utility NETPLWIZ lets you view and manage all the user accounts on your device. It also allows you to create a new local account. Below is the process of how to do it.
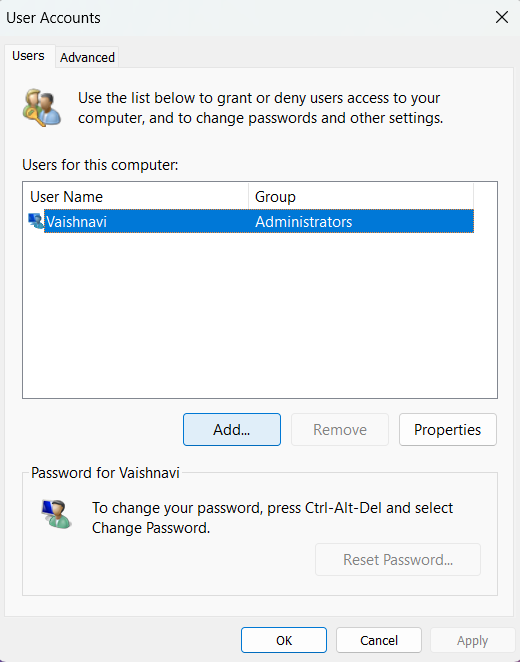
- Press Win + R to open Run and search for netplwiz from there.

- In the User Accounts Window that open, select on Add.

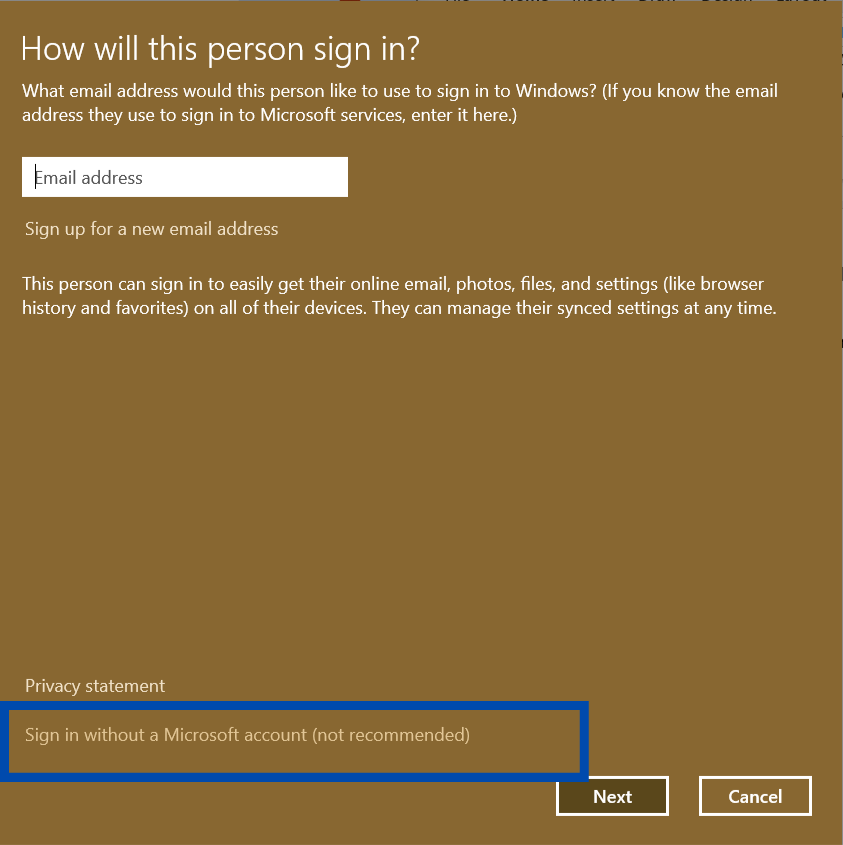
- Click on Sign in without a Microsoft account (not recommended).
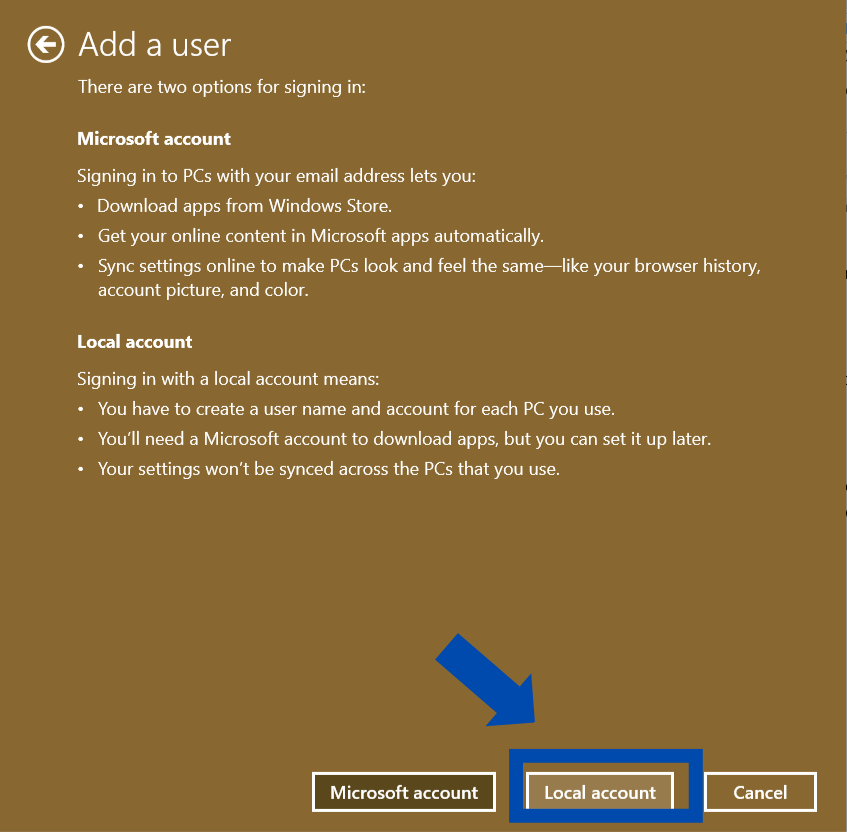
- Select Local Account.
- Now, fill the details for your new local account in the next Window and click on Next. You can choose not to set a password by keeping it blank.

- Click on Finish.
And that is it. Your new account is now created, and you will be able to see it in the User Accounts Window.
Option 2: The Setting App
The easiest option is to do it with the Settings app.
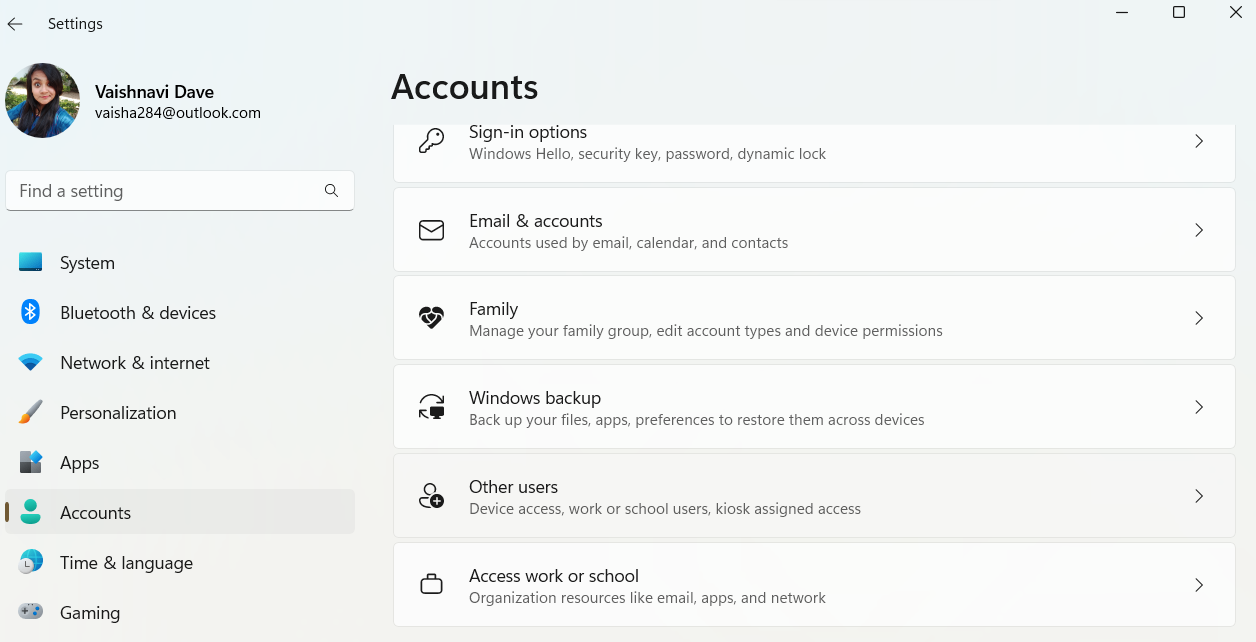
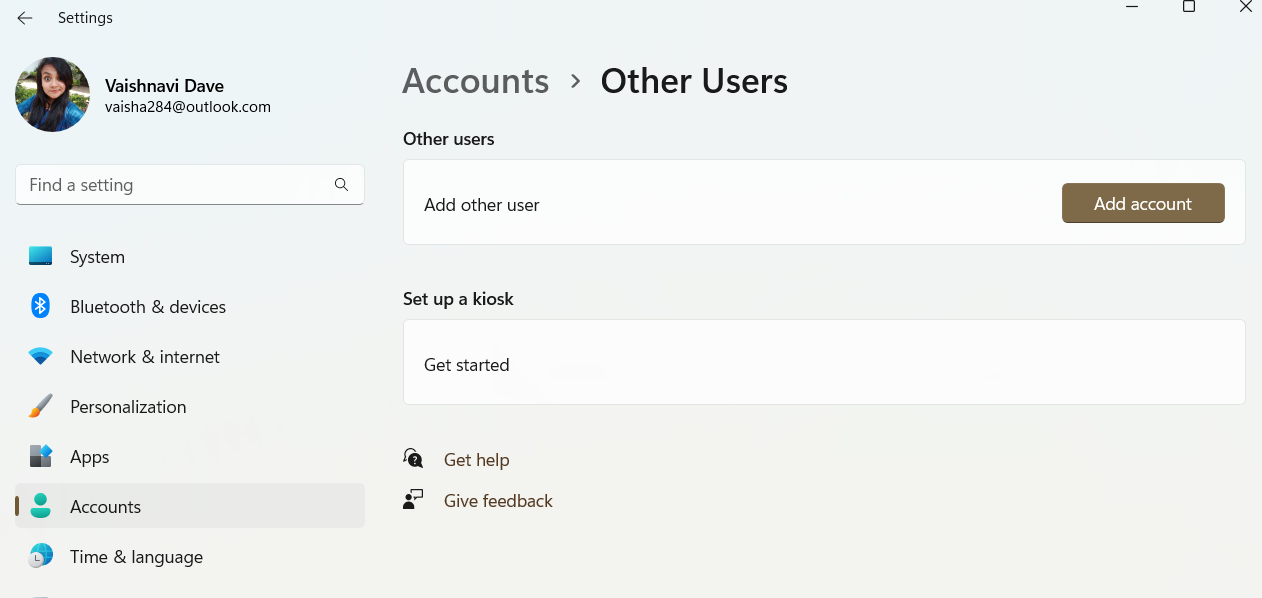
- Open the Settings App and go to Accounts.
- Select Other users.
- Click on the Add account button on this screen.
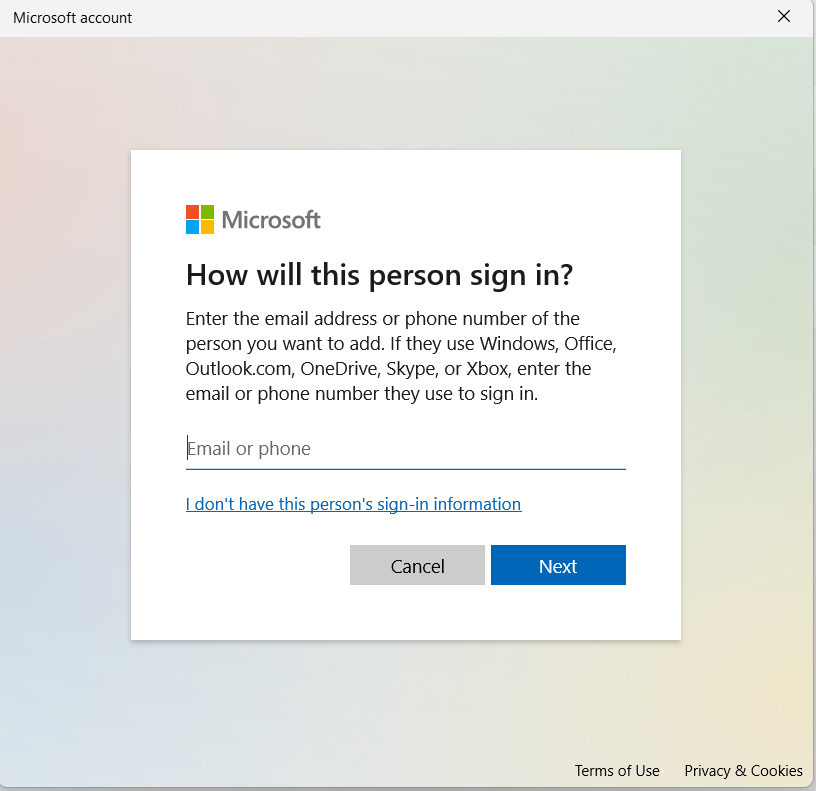
- You will now see a Microsoft Account Window. Click on I don’t have this person’s sign-in information.
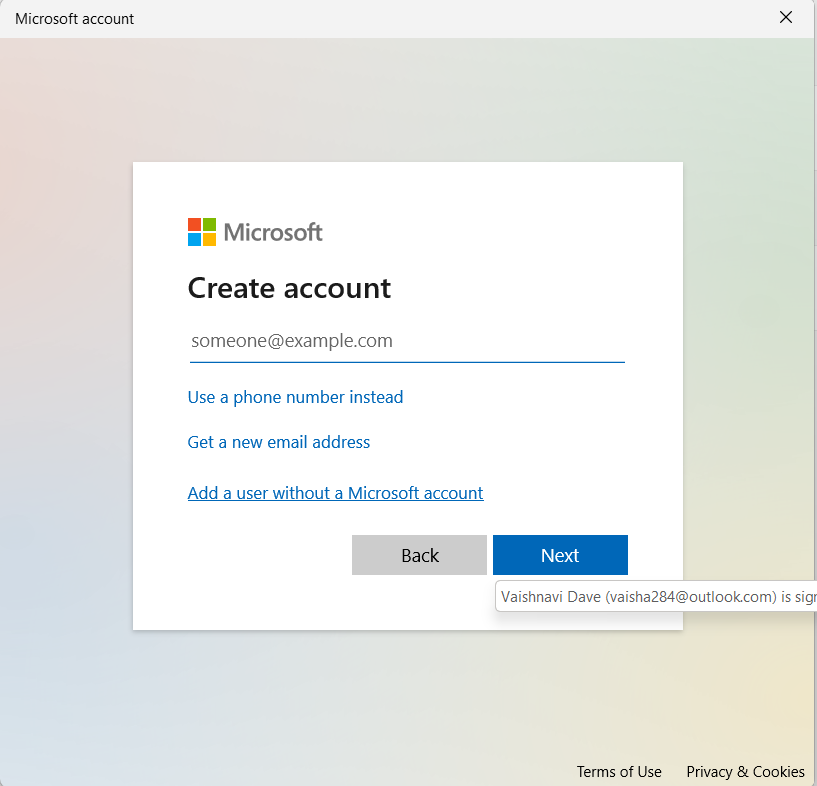
- In the next window, select Add a user without a Microsoft account.
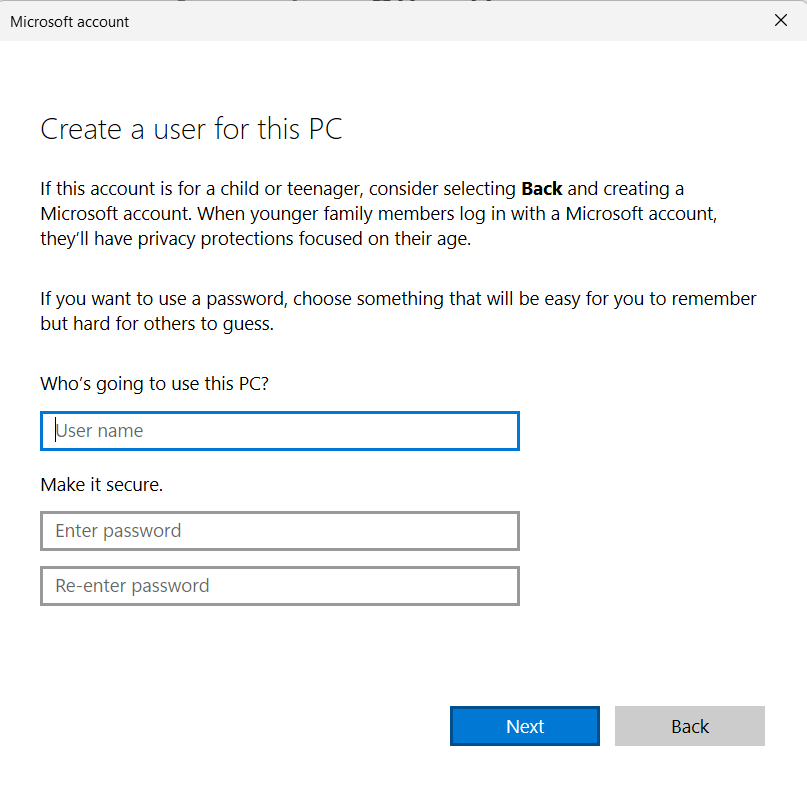
- Here, fill out all the required details for the local account. Then, click on Next.
Now, you should be able to see the local account in your Settings app and can start using it.
Option 3: Computer Management Tool
This another option lets you access all sorts of system tools from one place and can also help you add new users. Important thing to note is that it is only available for Windows 11 pro users, and not available for Windows 11 Home edition users. Here is how you create a new local user account using it.
- Right click on the Windows icon and select Computer Management.
- In the left pane of the Computer Management Window, select Local Users and Groups.
- Right click on Users and select New user.
- Here, fill in all the details for the new local account and click on Create.
That is it. Your new account has been created.
Option 4: Command Prompt
This is also another way of doing it.
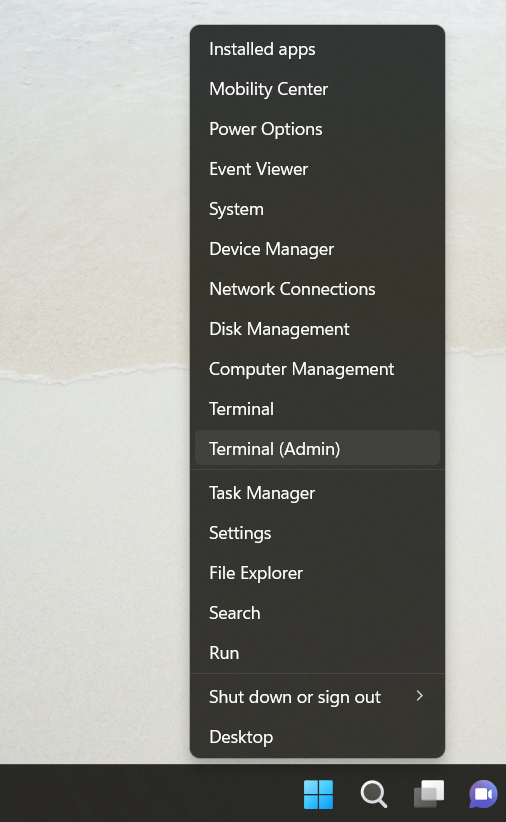
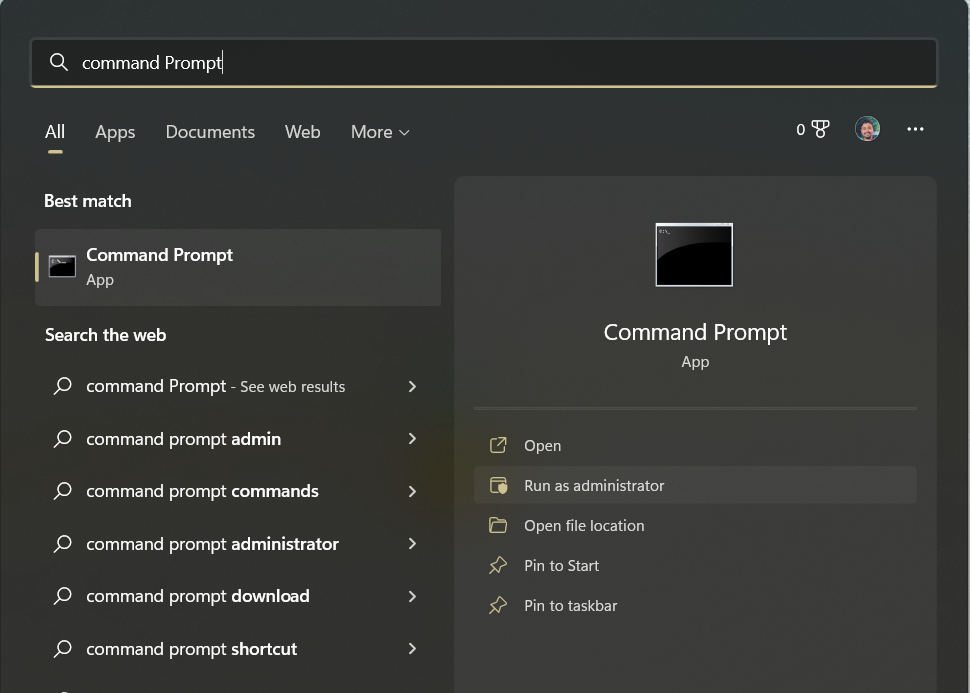
- Right click on the Windows icon and select Terminal (Admin). Or search for Command Prompt in the Start Menu. Select Yes in the UAC prompt.
- Type the following command in the Window that opens (Replace username and Password) and hit Enter.
net user Username Password /add
For example, if my new account name is Testuser1 and password is 123ABC. The command I will enter is net user Testuser1 123ABC /add.
Close the Window. You can now see the new user account and use it.
Option 5: Windows Powershell
This option allows you to specify specific user account type for the local user account type. Here is how you do it.
- Search for Windows Powershell in the Start menu. Run it as administrator.
- Select Yes in the UAC prompt.
- Now, in the screen, type the following command.
$Password = Read-Host -AsSecureString
This will temporarily store the password inside variable named $Password.
- Type your password for the local account and hit Enter.
- Now, type the following command.
New-LocalUser "AccountName" -Password $Password -FullName "Username" -Description "AccountDescription"
Here, replace AccountName and “Username” with the names you want. Also, change the AccountDescription with a brief description for the account. And then hit Enter.
Refer to the screenshot below.

- Finally, type the following command and press Enter to add the user to the local group.
Add-LocalGroupMember -Group "Users" -Member "AccountName"
You just need to replace “AccountName” with the name you used in the previous step.
Moreover, you can give this account user full access, you can replace “Users” in this command with Administrators.
After the command is run, you are done. You can now use your new local account. Hence, using these simple methods, you can easily create a local account in your Windows 11 PC.
Read next: How to add Microsoft account in Windows 11.