
In Windows operating system, the WMI command-line (WMIC) utility provides a command-line interface for Windows Management Instrumentation (WMI). WMIC is compatible with existing shells and utility commands. Previously, an end user would generally write a script to gather information by means of WMI. WMIC can only be used by the local system administrators regardless of WMI namespace permissions on the local machine. Although, the WMI command-line (WMIC) utility is deprecated as of Windows 10, version 21H1, and as of the 21H1 semi-annual channel release of Windows Server. But with Windows 11 build 22572 or later, WMIC is now available as an optional feature. In this article, we’ll see how you can add or remove WMIC in Windows 11.
There are 2 most common methods you can use to add or remove WMIC in Windows 11. Here are both methods.
Page Contents
Add or remove WMIC in Windows 11
Method 1 – Using Settings app
1. Press  + I keys to open Settings app.
2. In Settings app, go to Apps > Optional features.
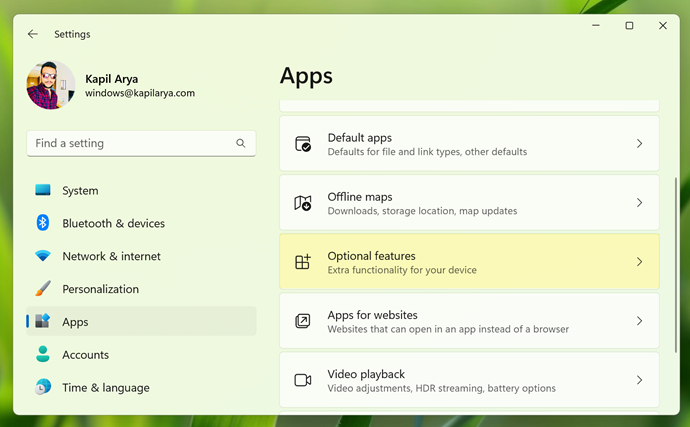
3. Under Optional features, click on View features.

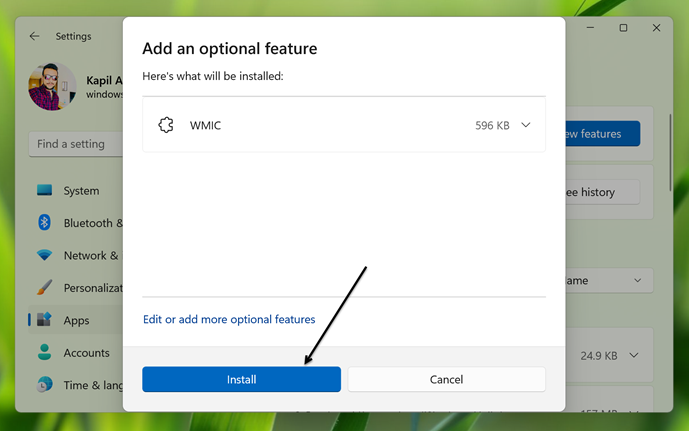
4. Now under Add an optional feature, search for WMIC and select the same from search results and click Next.

5. Click on Install button finally install the WMIC feature.
6. In few moments, you will find that WMIC is now installed as an optional feature.

If this method doesn’t works, you can try the alternative Windows PowerShell method mentioned next in this article.
Method 2 – Using Windows PowerShell
1. Press + X keys and select Windows Terminal.
2. Under Windows Terminal, open Windows PowerShell. Or you can also directly open Windows PowerShell.
3. In the Windows PowerShell, type the following command to add WMIC and press the Enter key to execute it:
DISM /Online /Add-Capability /CapabilityName:WMIC~~~~

Once the command has been executed successfully, WMIC will be added as an optional feature to your Windows 11 operating system.
Later, if you want to remove WMIC using Windows PowerShell, you can use following command for that:
DISM /Online /Remove-Capability /CapabilityName:WMIC~~~~
That’s it!
Read next: How to install RSAT on Windows 11.


