
We all know that how important RSAT is for IT admins. Remote Server Administration Tools (RSAT) allows IT administrators to remotely manage roles and features in Windows Server from client operating system such as Windows 11 or 10 etc. Although, as of this writing, Windows 11 is still in development mode. If you’re using Windows 11 Insider Preview Build in your environment, and you need to use RSAT, this article is for you. In this article, we’ll see how to install RSAT on Windows 11.
In Windows 11, you can install RSAT directly using the Settings app. In this Windows operating system, RSAT is available as optional features. So it is quite easy to get RSAT on Windows 11 and you don’t need to download them separately. Note that you can’t install RSAT on Windows Home editions. You can follow below mentioned simple steps to get RSAT installed on your Windows 11.
How to install RSAT on Windows 11
1. Press  + I keys to open Settings app.
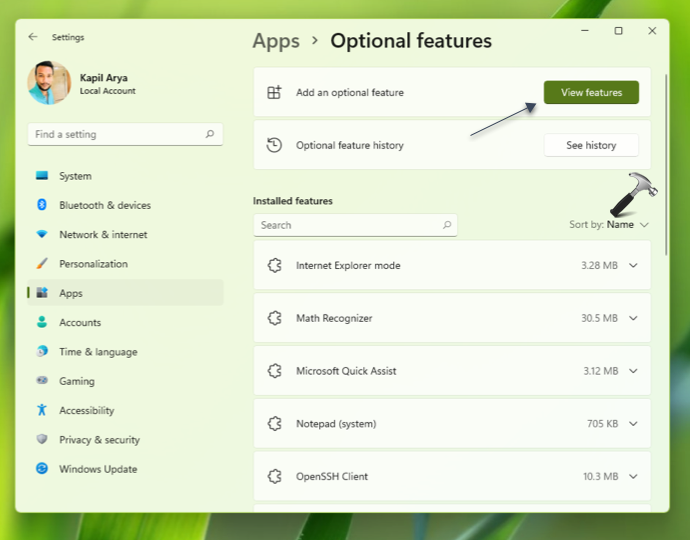
2. In the Settings app, go to Apps > Optional features. Under Options features, click on View features next to Add an optional features.
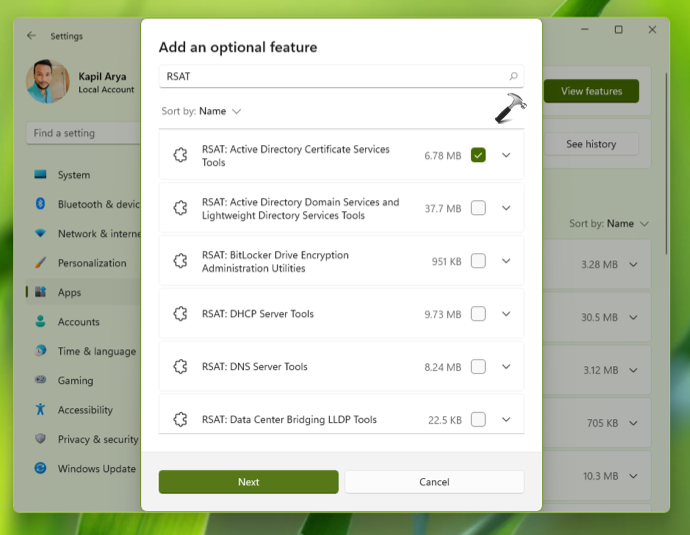
3. In the Add an optional features pop-up, type RSAT in the search box to list all RSAT features you can install. Select the RSAT features you want in this list and hit Next.
4. Then review your selection of RSAT tool to install. Finally, click on Install button.
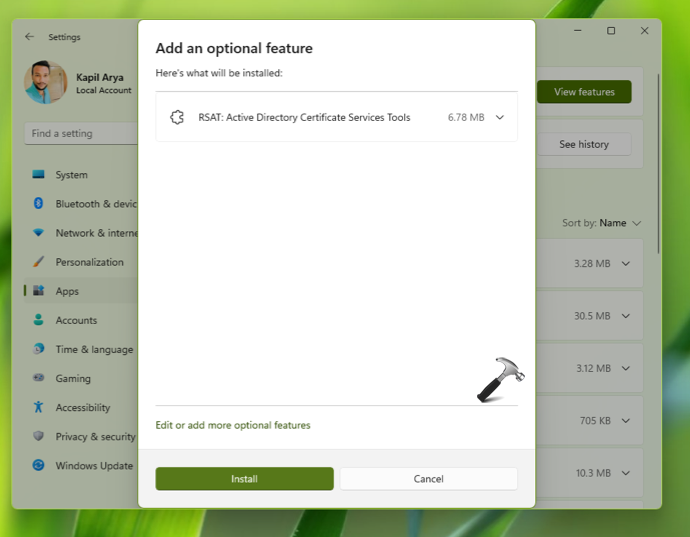
5. Windows will now begin installing the RSAT tools you’ve selected. This will complete soon, depending upon your network speed.

6. Once your selected RSAT tools are installed, they can be found out under Installed features on same page.
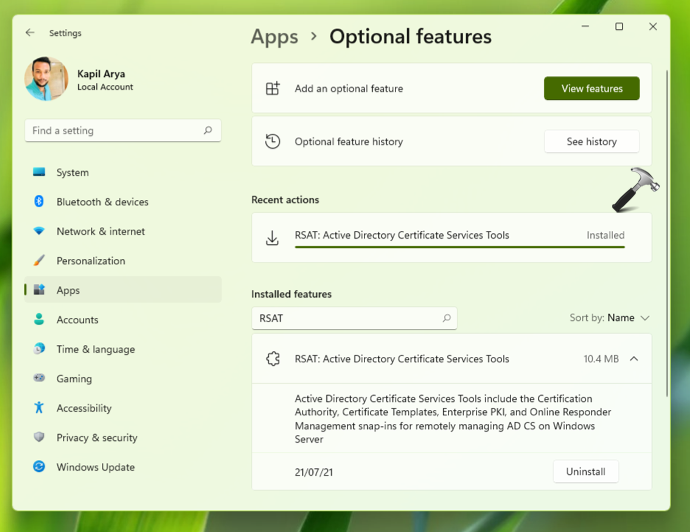
If you even need to remove any RSAT tool, simply hit the Uninstall button next to it.
So this is how you can install RSAT on your Windows 11.
If you’re on Windows 10 Version 1809 or later, check this guide instead to install RSAT.
That’s it!


Make sure you are logged in as Administrator and not connected to a domain when trying to install these optional features. I just spent a whole day trying to get this installed on a MS Surface Pro 9.
^^ Thanks for adding this Derrick 😎
Derrick for the WIN! Thank you!