By default, Windows 11 can set your system time automatically. When you set up Windows 11 for the first time, based upon the region and locale details you provide, your system automatically gets the correct time. However, if you are seeing the incorrect time even after this and want to correct it automatically, this article is for you. In this article, we will see how to allow Windows 11 to set time automatically.
It is very important that you set your Windows 11 to correct Time zone in order to get correct time automatically. You can use either of the below mentioned methods to set Windows 11 time automatically.
Page Contents
Allow Windows 11 to set time automatically
Method 1: Set time automatically in Windows 11 using Settings app
1. Press  + I keys to open Settings app.
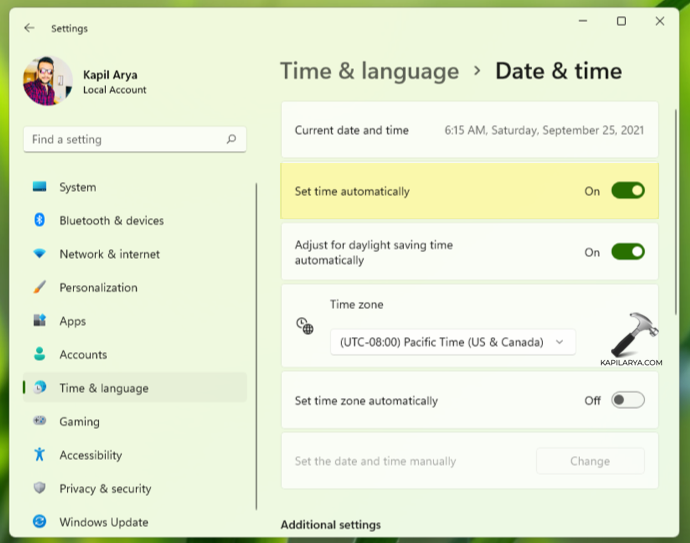
2. In the Settings app, go to Time & language.
3. In the right pane, go to Date & time. Here, you’ll find the option Set time automatically. Once you turn On this option, you don’t need to manually set your Windows 11. The system can now set your time automatically based upon your time zone. To ensure correct time, make sure you select the your correct Time zone in this window.
4. Once done, you can now close Settings app.
Method 2: Set time automatically in Windows 11 using registry
1. Run regedit command to open Registry Editor.
2. In the Registry Editor window, navigate to:
HKEY_LOCAL_MACHINE\SYSTEM\CurrentControlSet\Services\W32Time\Parameters
3. In the right side of Parameters, you will find a registry string named Type. To allow Windows 11 to set your system time automatically, you can set this registry string with Value data equal to NTP.
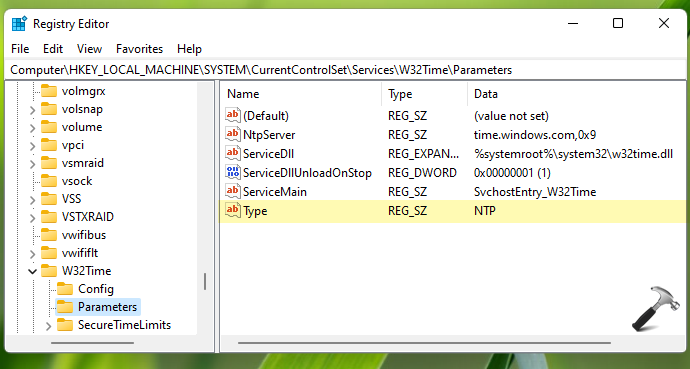
In case if you do not want Windows 11 to set time automatically, you can instead set Type registry string Value data to NoSync.
4. Close Registry Editor, when done.
That’s it!