On Windows Server, you can use Remote Access server role to install and configure VPN. Remote Access role can enable Remote Access service, Routing and Web Application Proxy. In this guide, we’ll use this server role to configure VPN on Windows Server 2019.
First, we’ll use Server Manager to install Remote Access feature. Once we do that, we’ll deploy the VPN and allow VPN access. Then our next step will be assign IP addresses to VPN. And finally, we’ll give users the required permissions to use the VPN on client machine.
Configure VPN On Windows Server 2019
1. Open Add Roles and Features Wizard using Server Manager. On the Server Roles section, select Remote Access.

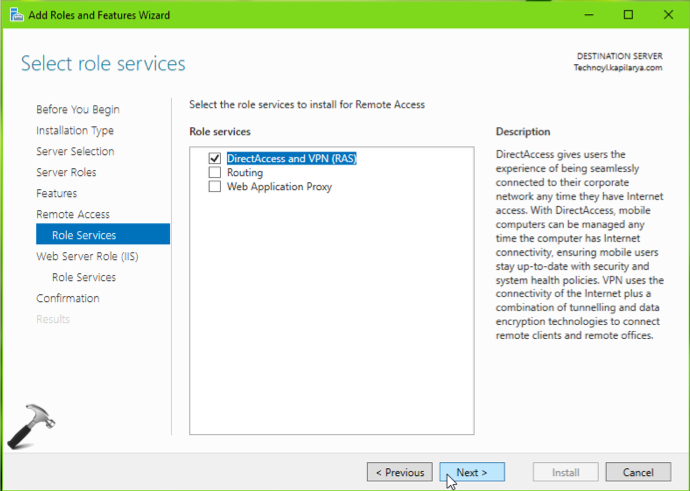
2. Then under Role Services, select DirectAccess and VPN (RAS).
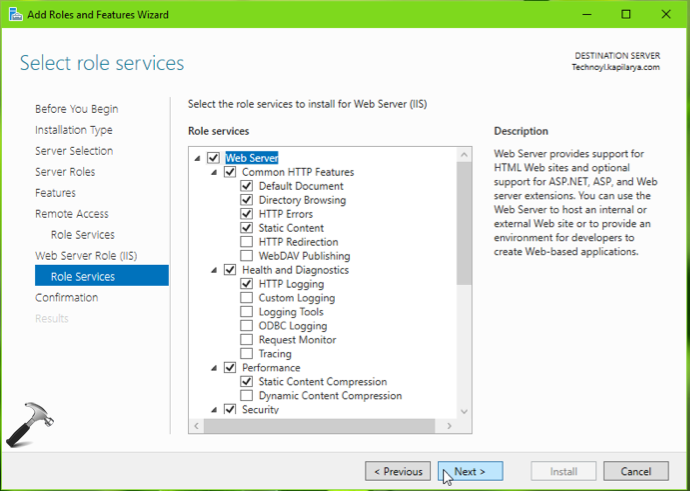
3. In the Web Server Role (IIS) Role Services, make up your choice or move with defaults.
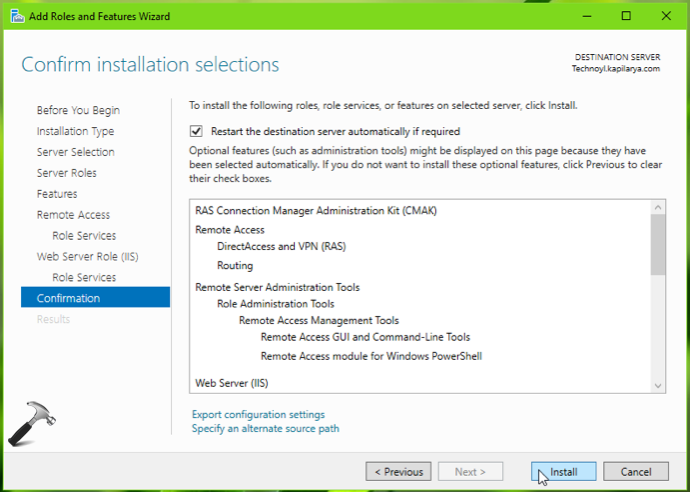
4. Then in the Confirmation section, click Install. The installation of features will now begin and it may few minutes to complete.
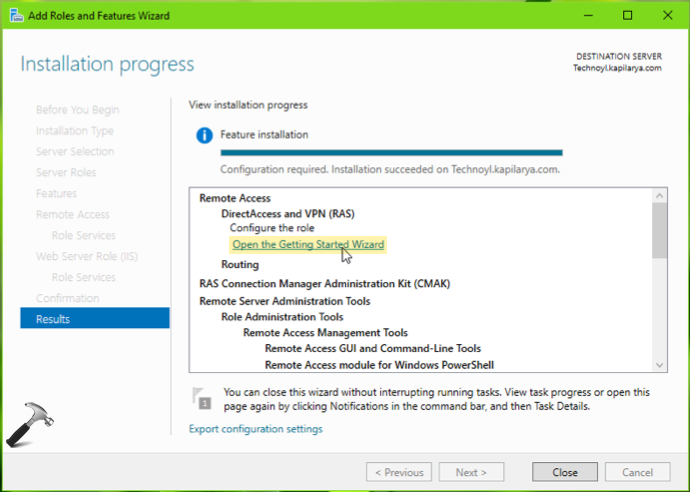
5. Once installation is completed, click on the Open the Getting Started Wizard link.
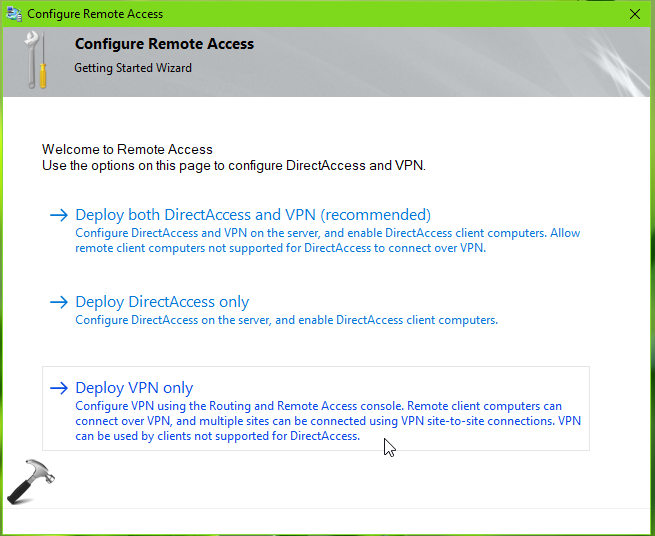
6. This will open Configure Remote Access and select Deploy VPN only option.
7. Now we’re Routing and Remote Access window open. Right click on your server and select Configure and Enabled Routing and Remote Access option.

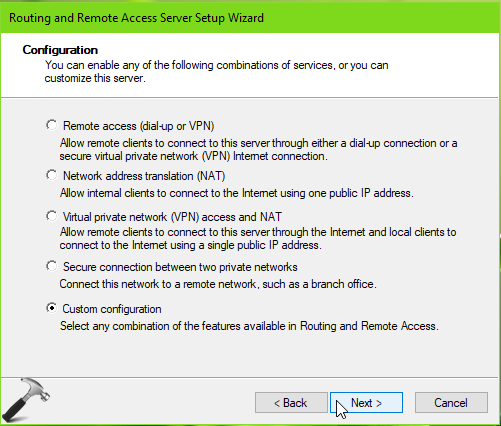
8. In Routing and Remote Access Server Setup Wizard window, select Custom configuration and click Next.
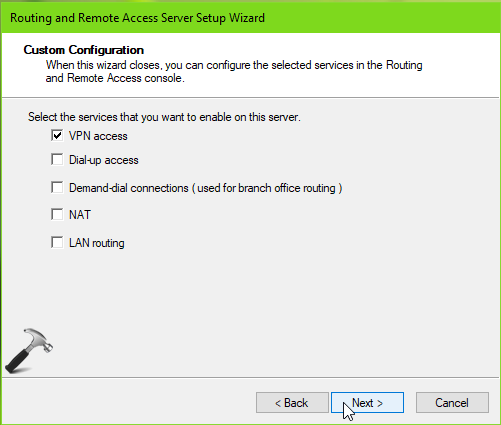
9. Then select VPN access in the next window and hit Next.
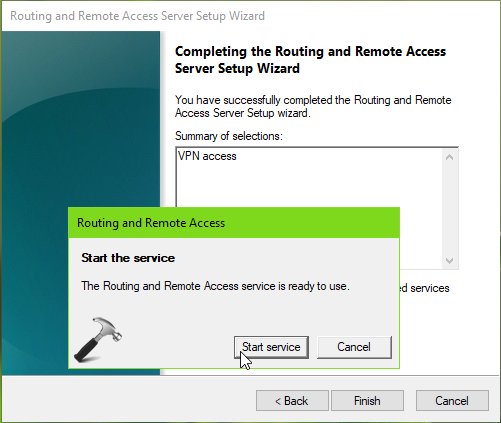
10. Now we’re finished Routing and Remote Access Server Setup Wizard with VPN access. So far, we now have Routing and Remote Access service (RARS) is ready to use, so click on Start service. At this stage, we’ve enabled VPN access but now still need to setup IP address that will be used with VPN connection.
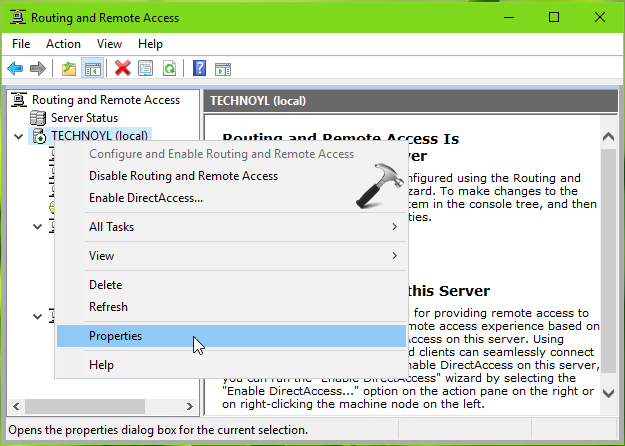
11. Go back to Routing and Remote Access window and right click on your server, select Properties.
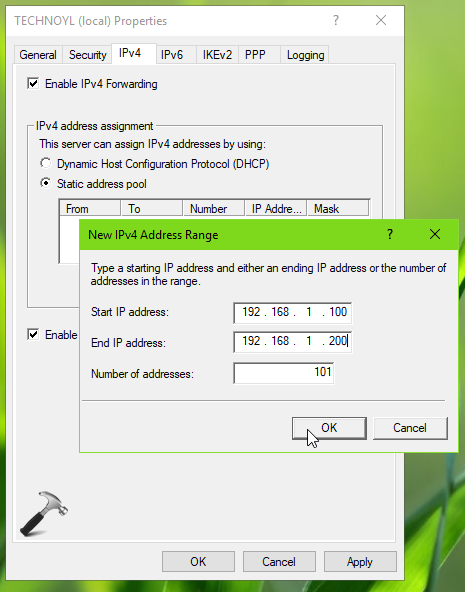
12. On the property sheet, switch to IPv4 tab. Now you’ve to decide whether you want to use DHCP or static IP address. If you want to use DHCP, you can select its option here. Or if you want to use static IP, select Static address pool and then type start and end IP addresses.
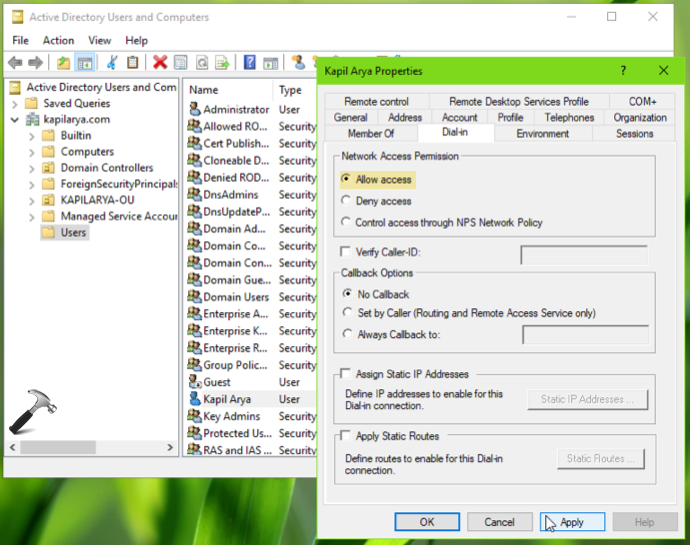
13. Then open Active Directory Users and Computers snap-in. Create/select an existing user for the VPN connection and right click on it. On the Dial-in tab, select Allow access for Network Access Permission.
So now we’ve configured VPN, setup its IP addresses and allowed users to connect to this VPN.
On client based system, you can use following guide to connect to above configured VPN server:
How to setup VPN connection in Windows 10/8/7
Hope you find the guide useful!
Also see: How to enable WiFi in Windows Server 2019.

![Fix VPN error 812 on Windows 11/10 [6 practical fixes]](https://www.kapilarya.com/assets/VPN-6-768x684.jpg)