VPN, as we all know stands for Virtual Private Network. VPN allows you to create a secure and encrypted connection between your device and the internet. When you connect to a VPN, your internet traffic is routed through an encrypted tunnel, which makes it difficult for anyone to intercept or monitor your online activities. In this guide, we’ll see how you can manually set up or configure a VPN on Windows 11.
Page Contents
Why you should use VPN?
You can use VPN for either of these benefits:
- Privacy and Security: A VPN encrypts your internet traffic, making it extremely difficult for hackers, government agencies, or other third parties to intercept and decipher your data. This is particularly important when using public Wi-Fi networks, where your data can be vulnerable to interception.
- Anonymity and Online Identity Protection: VPNs can mask your IP address, which is a unique identifier associated with your internet connection. By using a VPN, you can make it appear as if you’re connecting from a different location, thus preserving your anonymity and protecting your online identity.
- Bypassing Geo-restrictions: Many websites and online services are geo-restricted, meaning they are only accessible from specific countries or regions. With a VPN, you can connect to a server located in a different country and access content or services that may be blocked or restricted in your actual location.
- Accessing Blocked Websites and Censorship Circumvention: In certain countries or regions, governments impose strict internet censorship and block access to specific websites and online services. VPNs can help bypass these restrictions by allowing you to connect to servers in other countries and access blocked content.
- Secure Remote Access: VPNs are commonly used by businesses to provide their employees with secure remote access to company resources, such as files, databases, or internal networks. This allows employees to work remotely while maintaining a secure connection to the company’s infrastructure.
It’s important to note that while VPNs provide an added layer of security and privacy, they are not foolproof. It’s still crucial to practice good online security habits and use other security measures, such as using strong and unique passwords, keeping your devices updated, and being cautious while sharing personal information online.
Manually set up or configure a VPN on Windows 11
- Open Settings by pressing Windows + I keys.
- Then click on Network & internet > VPN on the right side.
- Next click on Add VPN.
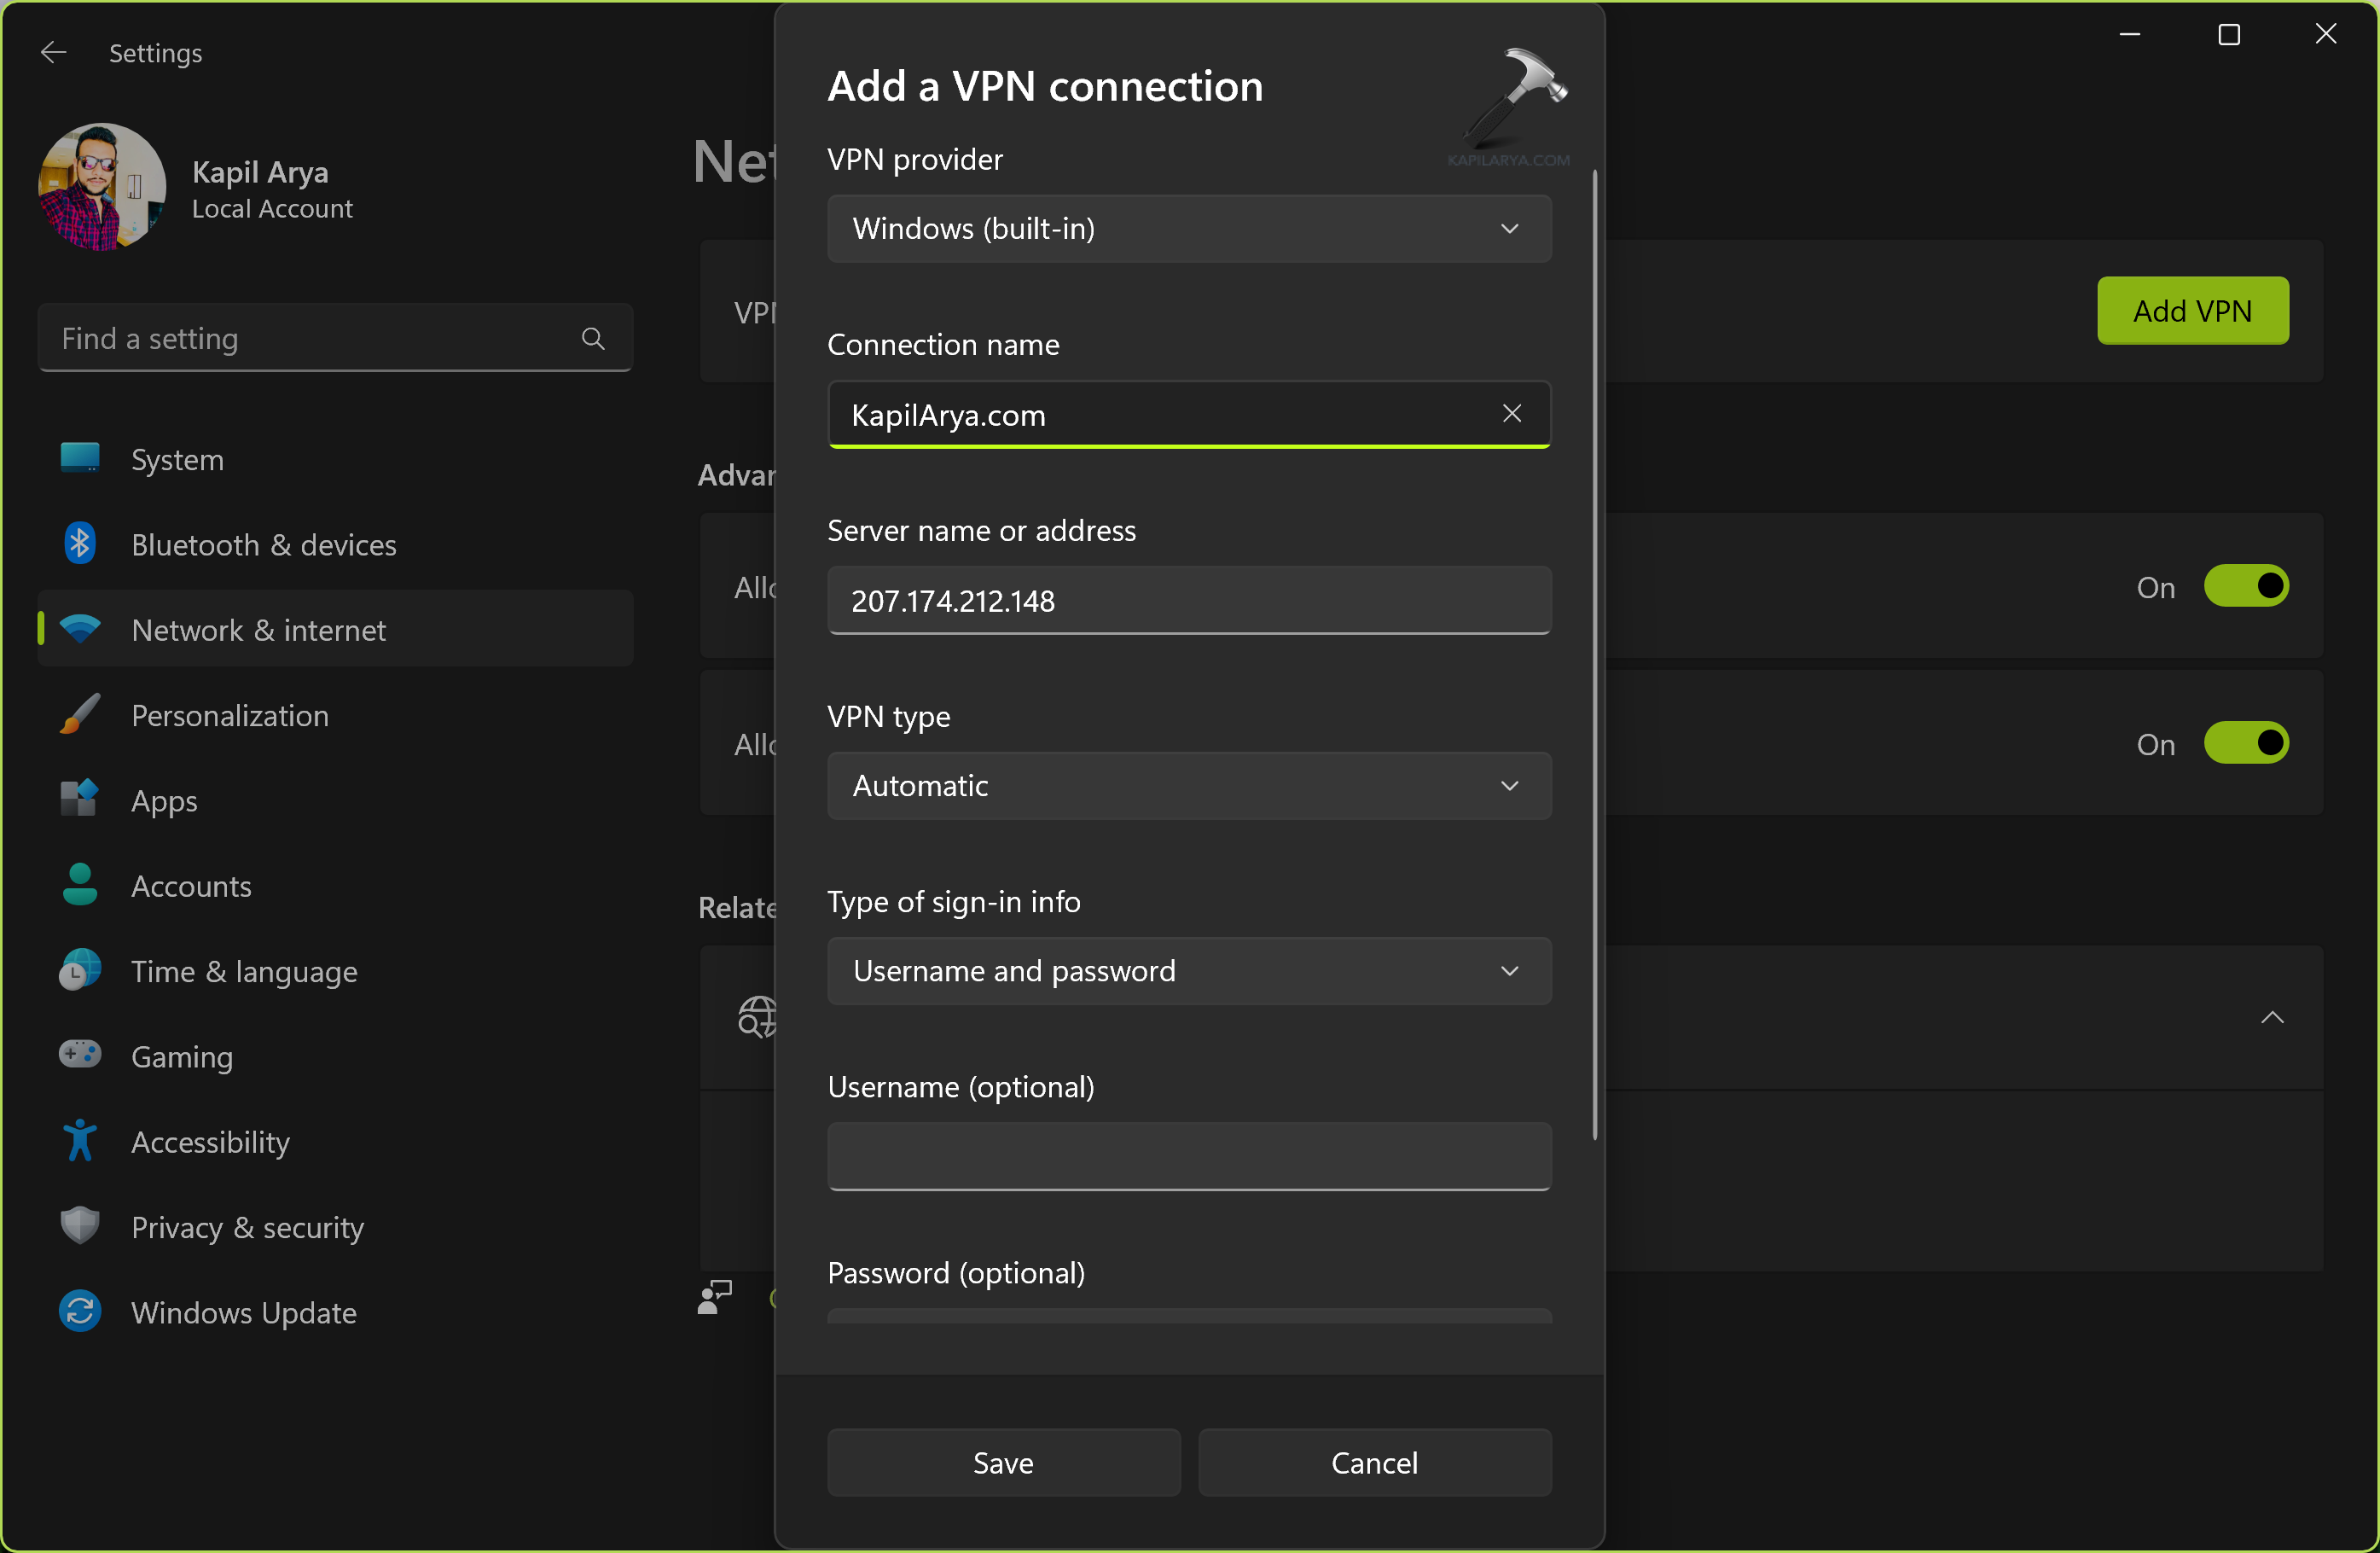
- Use the “VPN provider” drop-down menu and select the Windows (built-in) option.
- In the “Connection name” setting, enter a name to identify the connection.
- In the “Server name or address” setting, enter the server name and address of the VPN server. This information should be provided by your VPN provider.
- In VPN type, select Automatic.
- Next in type of Username and Password for authentication.
- Now click on Save.
Steps to connect VPN server in Windows 11
- Open Settings by pressing Windows + I keys.
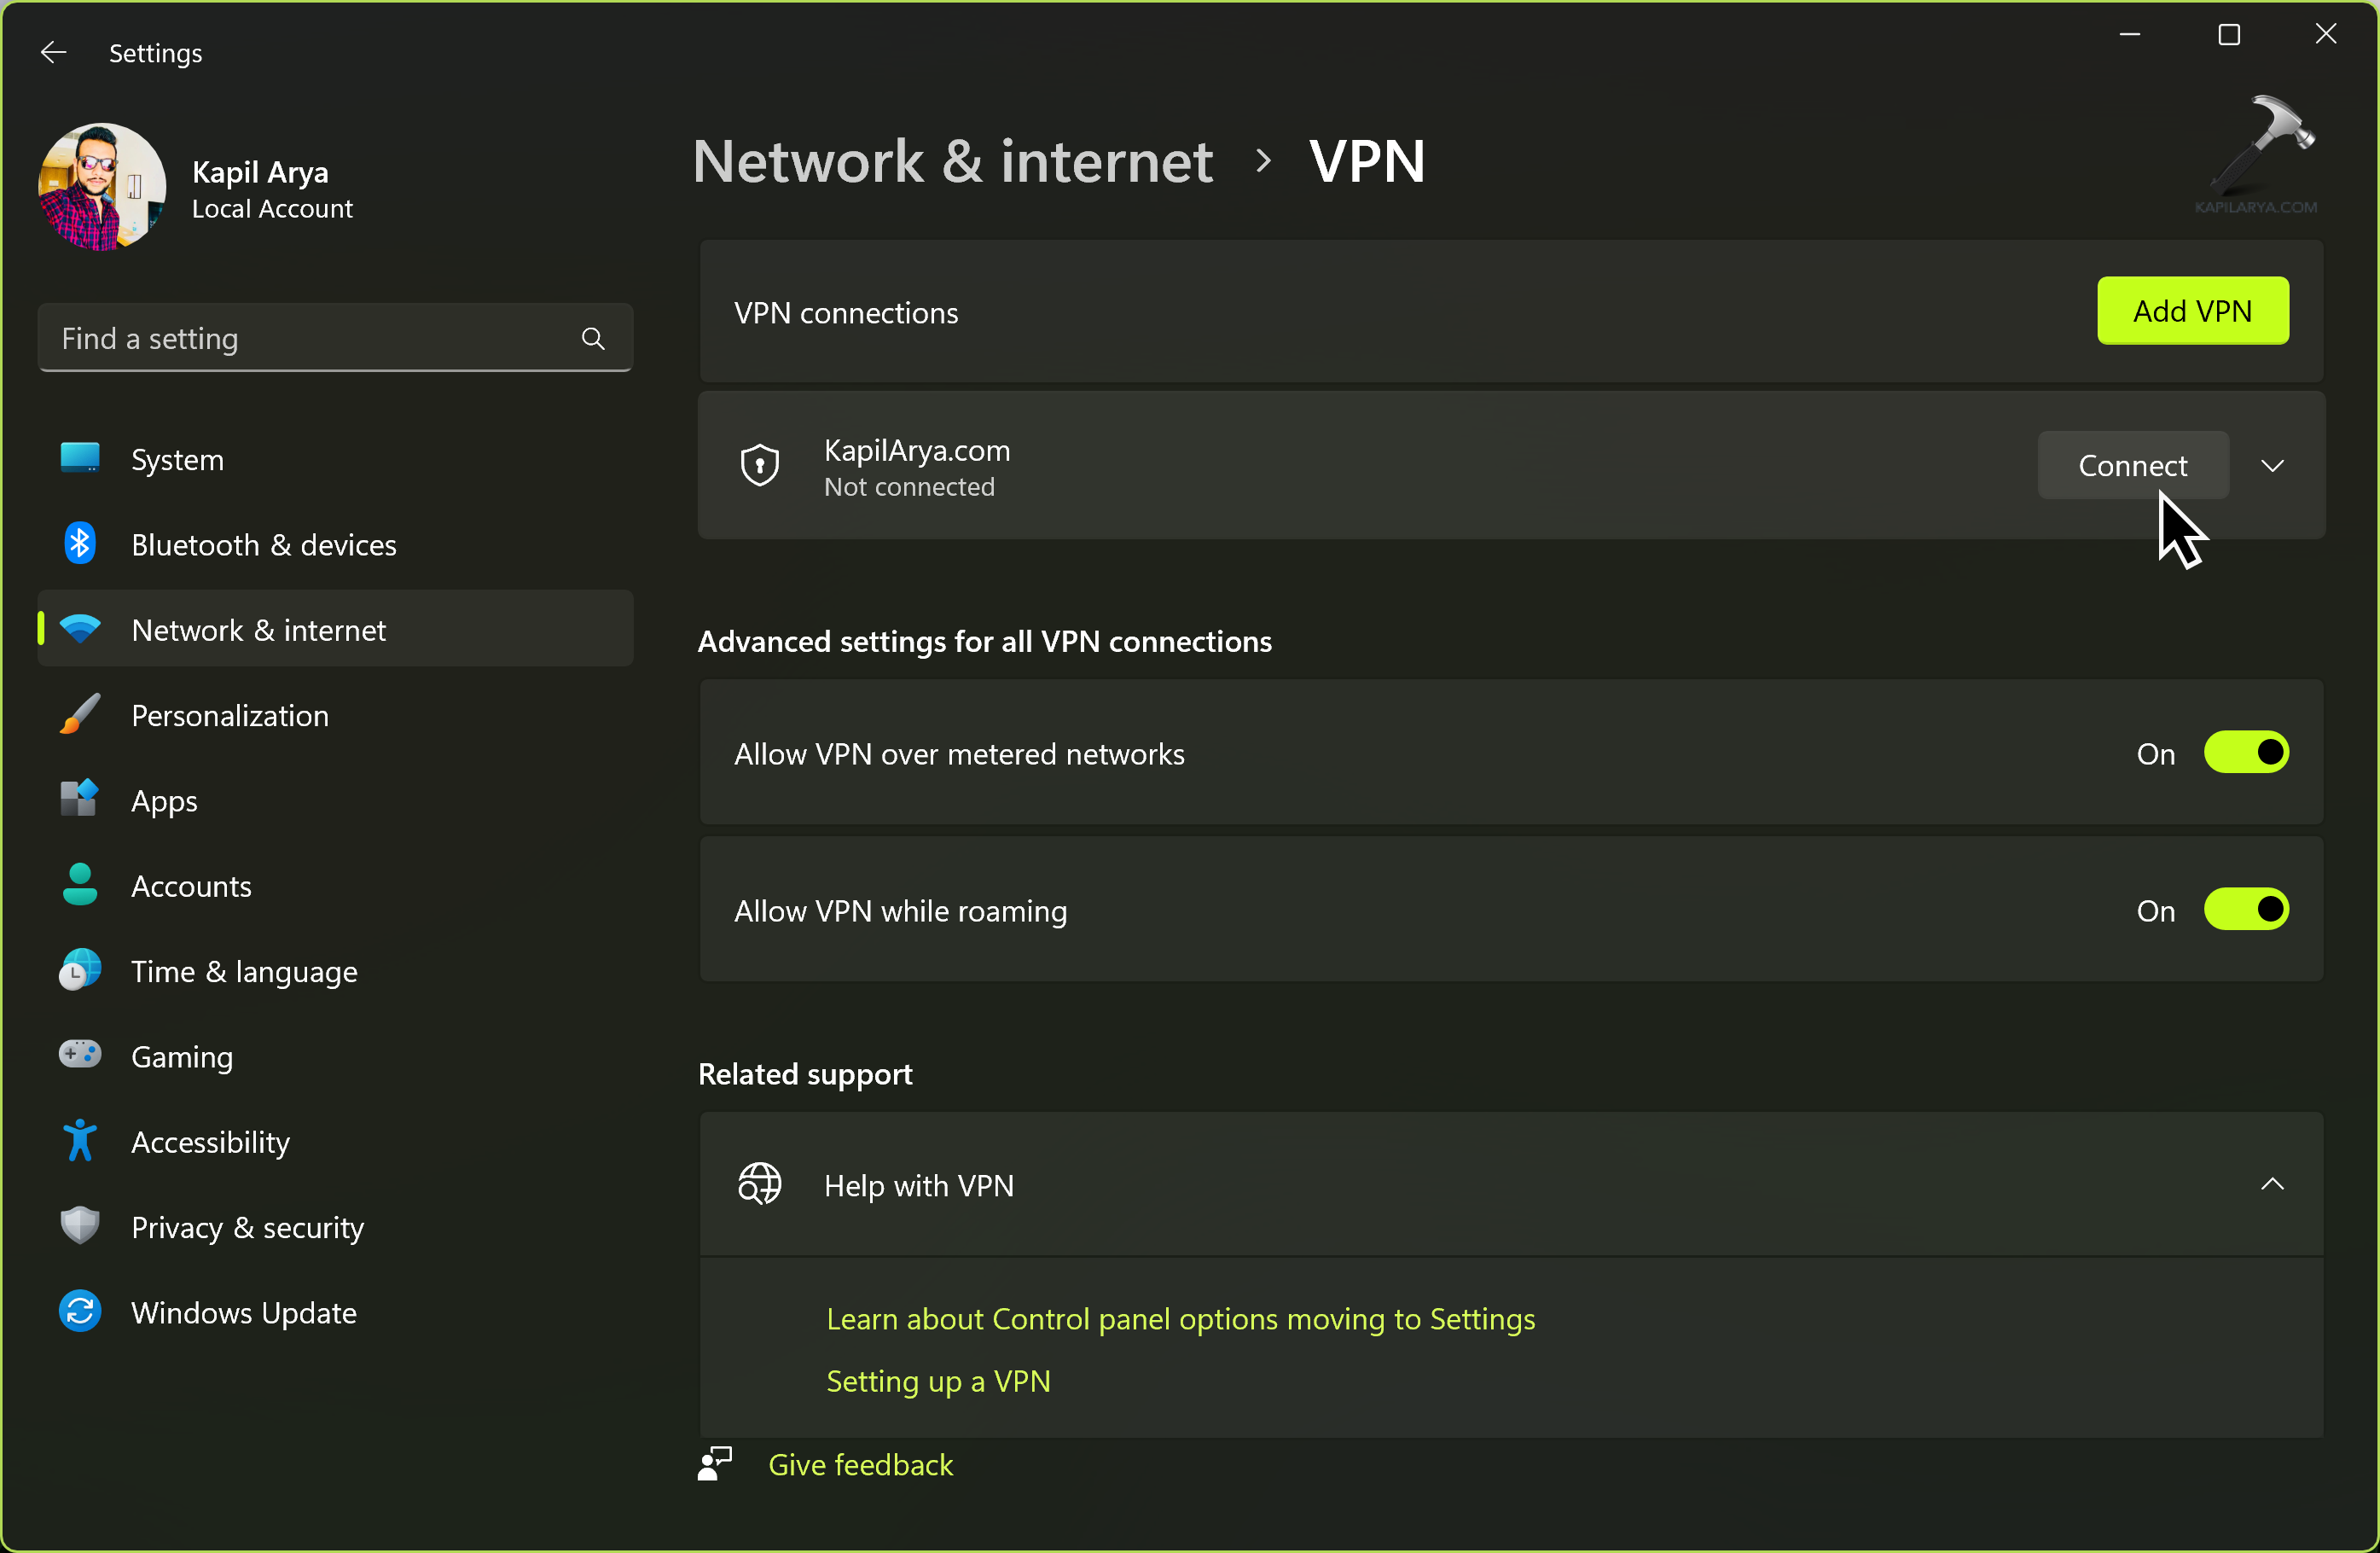
- Now click on Network & internet > then on VPN.
- At VPN screen, click on Connect next to VPN profile you connected with above steps.
- Type in your sign-in information and click OK to connect.
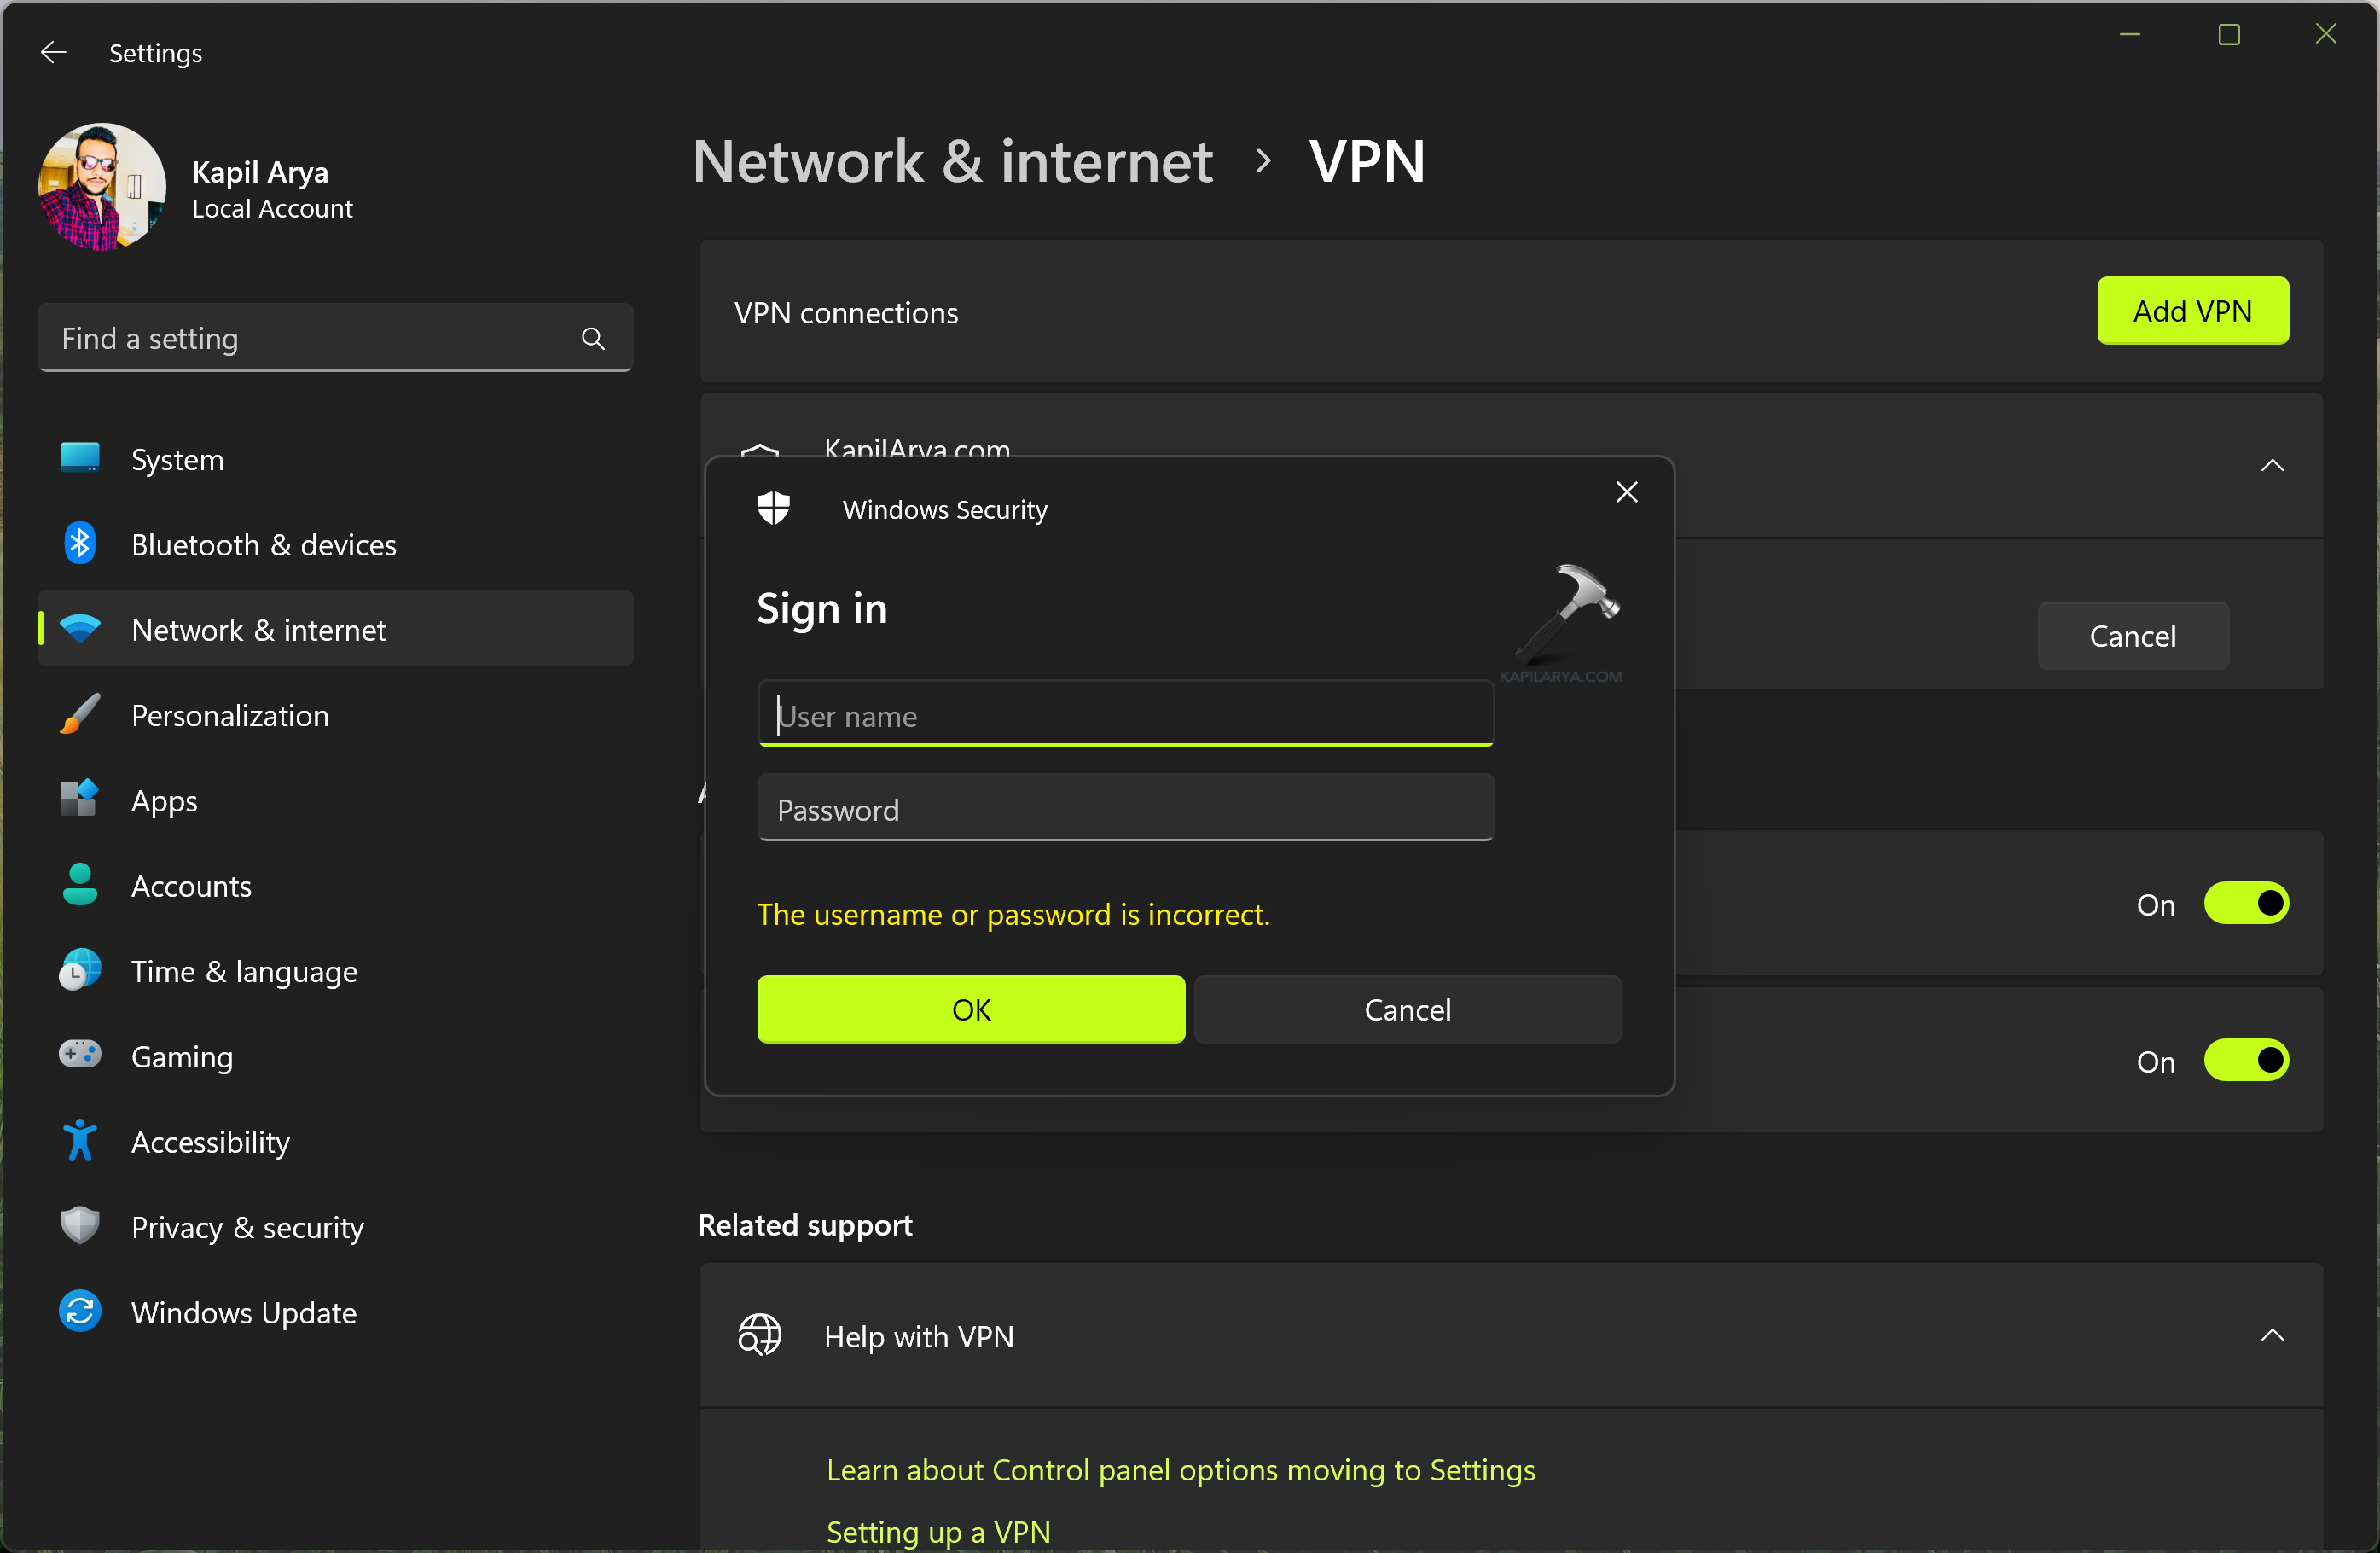
That’s it!
See this post, if Windows 11 VPN not working.

![Fix VPN error 812 on Windows 11/10 [6 practical fixes]](https://www.kapilarya.com/assets/VPN-6-768x684.jpg)