The device Driver Update comes along with the Windows Update which includes new features and improved performance and also is automatically installed on your computer. If the system keeps trying to install an incompatible driver along with bugs, it can cause issues to your computer. You can disable the automatic driver updates and manually download and install the driver from the drive manufacturer’s website when needed. This article will guide you on how to enable or disable automatic driver updates on Windows 11.
Page Contents
Enable or Disable Automatic Driver Updates on Windows 11
Here’s how to enable or disable the feature in 3 different ways:
Method 1: Enable or Disable Automatic Driver Updates using Local Group Policy Editor
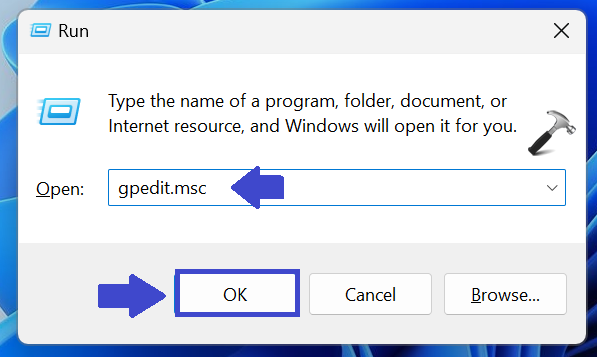
1. Press the Windows key + R. Type gpedit.msc and click OK.
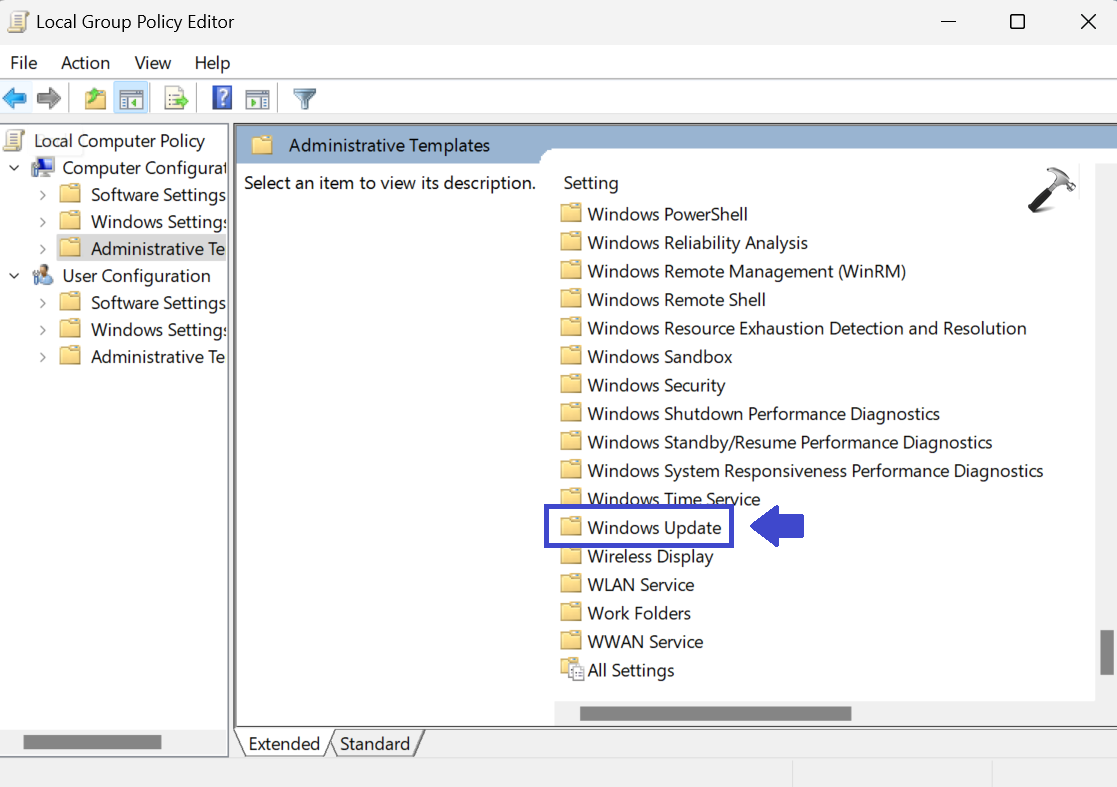
2. Navigate the following path:
Computer Configuration\Administrative Templates\Windows Update
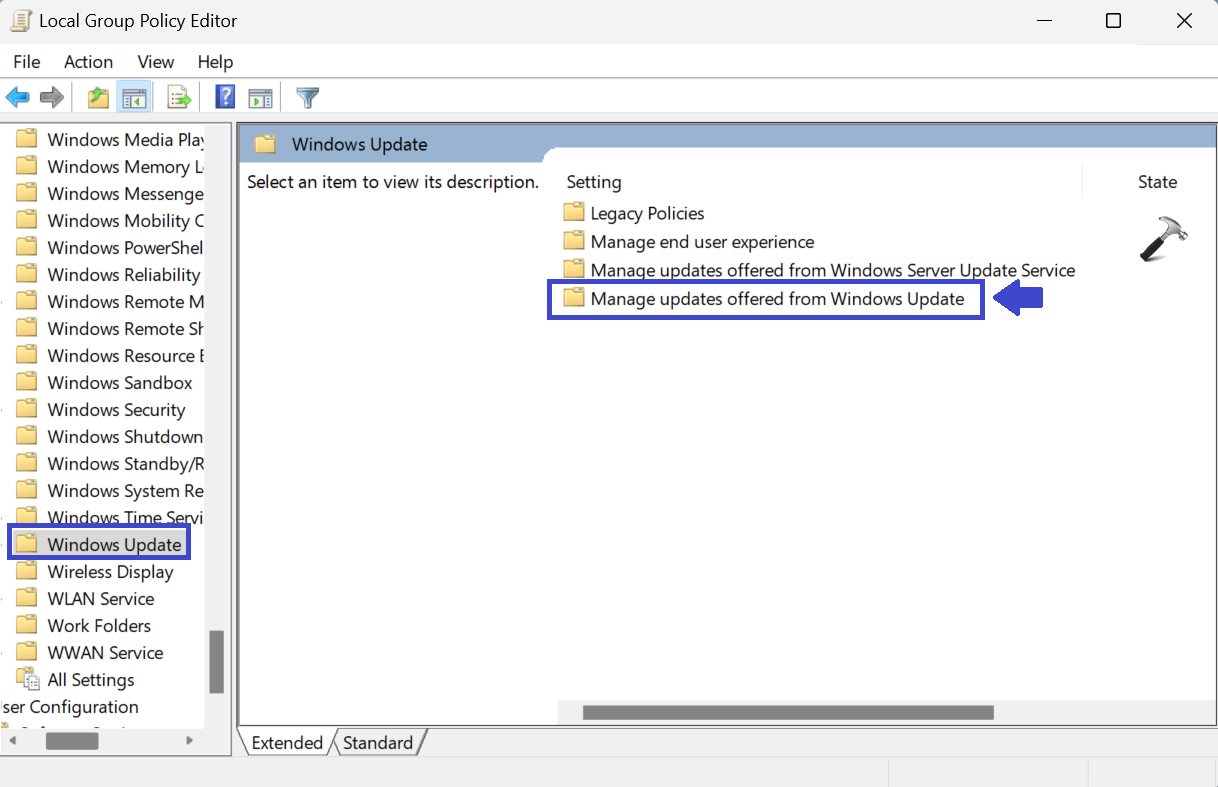
3. Now, click “Manage updates offered from Windows Update”.
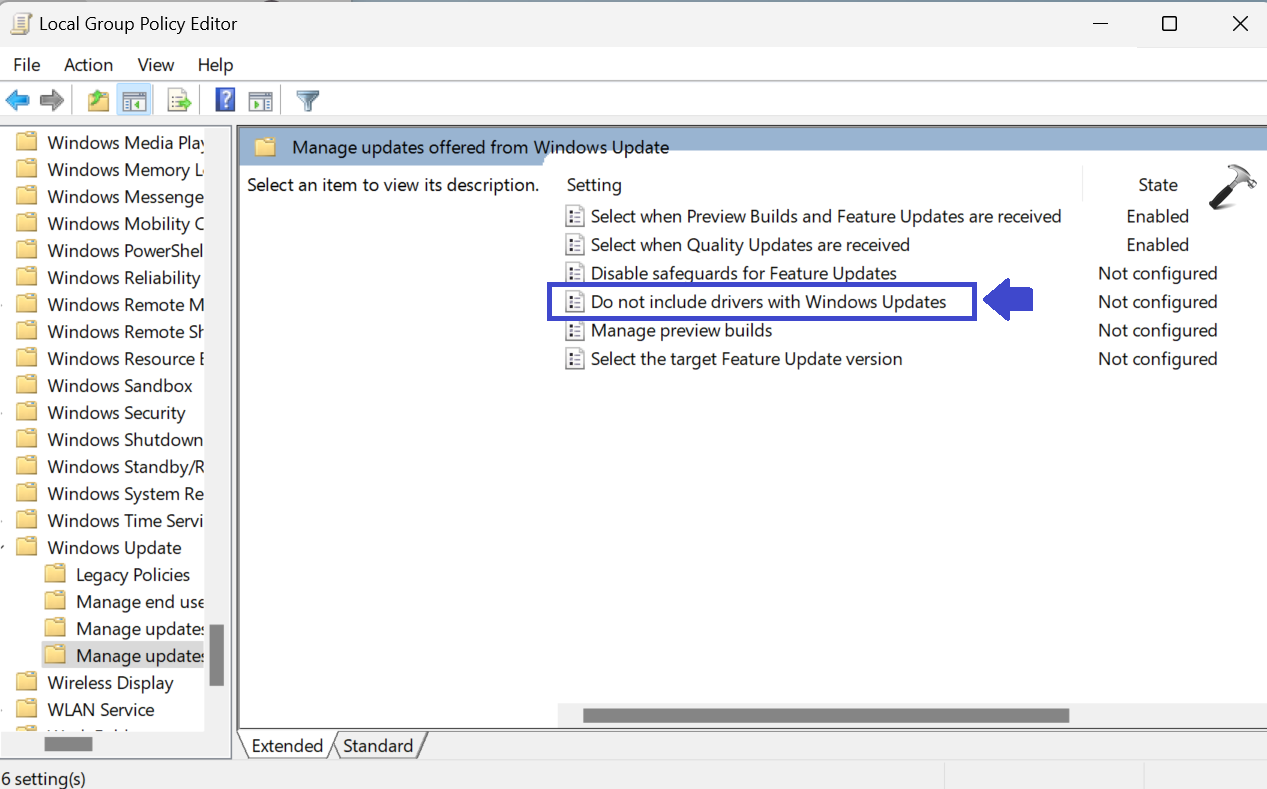
4. Double click on “Do not include driver with Windows Update”.
5. Prompt box will appear.
Select “Enabled” to enable the “Do not include driver with Windows Update”.

6. Click OK followed by Apply.
7. Close the Local Group Policy Editor Window and restart the PC to apply the settings.
Method 2: Enable or Disable Automatic Driver Updates using Settings App
1. Open Settings App and click About.

2. Under the “Device specifications”, click on “Advanced system settings”.

3. Select Hardware tab and click on “Device Installation Settings”.

4. Select “No (your device might not work as expected)” option.
5. Click on “Save Changes” followed by OK.

6. Close the Settings App and restart the PC to apply the settings.
Method 3: Enable or Disable using Registry Editor
1. Press the Windows key + R. Type regedit.exe and click OK.
2. Navigate the following path:
Computer\HKEY_LOCAL_MACHINE\SOFTWARE\Microsoft\Windows\CurrentVersion\DriverSearching

3. Now, double-click on “SearchOrderConfig” registry key. Prompt box will appear.
4. Set the value from 1 to 0 and click OK.

5. Close the Registry Editor Window and restart the PC to apply the settings.
You can also check out following video to demonstrate these methods:
That’s It!