Do you know how to enable or disable Memory Compression in Windows 11/10? In Windows 11, there is a feature called Memory compression. This feature was introduced in Windows 10, which lets you store more data in the RAM than it usually could. As its name suggests, memory compression stores part of the memory pages in a compressed manner in RAM. For instance, if your apps require to store 4GB data, then Windows might have 3 GB uncompressed data and 0.5 GB compressed data. Now, this compressed data would have actually taken up 1 GB in RAM.
With this feature, Windows 11/10 can compress a part of RAM for reducing the page swap out. So, Memory compression is helpful for Windows users who do not have much physical memory. Now, let’s see how to enable or disable Memory Compress in Windows PC.
Page Contents
Enable or Disable Memory Compression in Windows 11/10
Part 1: How to Check if Memory Compression is Enabled
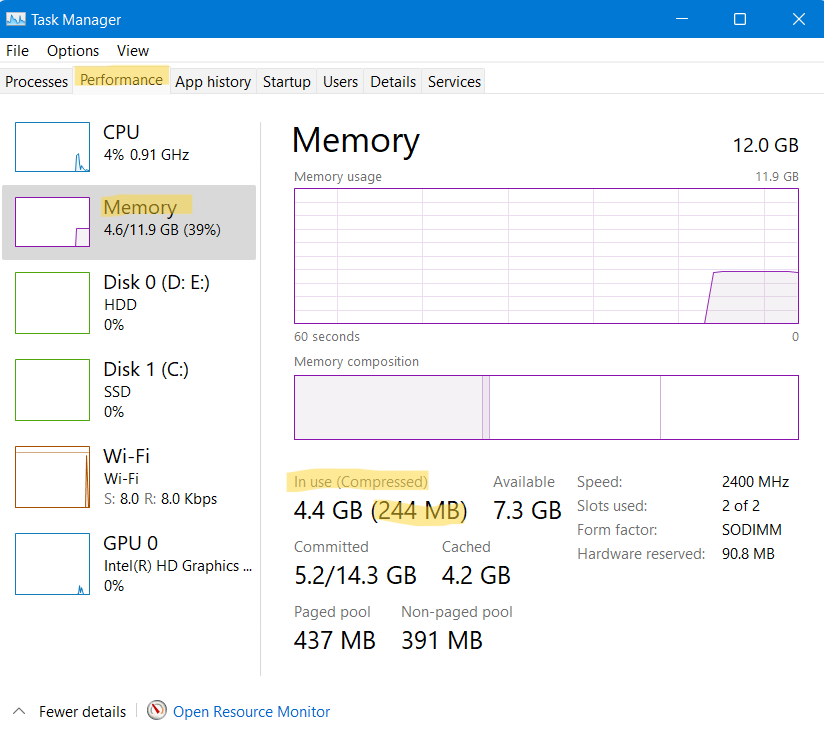
1. Firstly, open Task Manager on your system. After that, go to Performance and choose Memory.
2. Within the In Use (Compressed) section, you could check how much memory is compressed. The memory displayed in the brackets is the compressed one. However, if the compressed memory is displayed as 0 MB, then this feature is disabled on your Windows PC.
Part 2: Enable or Disable Memory Compression in Windows 11/10
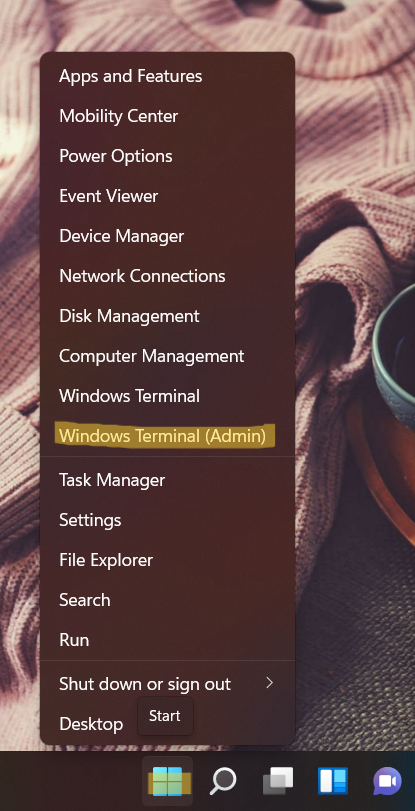
1. To disable Memory Compression, open Windows Terminal (Admin) by right-clicking on the Windows Start button. For Windows 10 users, open Windows PowerShell as administrator.
2. Now, run the following command to disable Memory Compression:
Disable-MMAgent -mc
Once executed, run another command as follows:
Get-MMAgent
Now, you will be able to see whether the Memory Compression feature is disabled on your system successfully or not. If False is written next to MemoryCompression, it means it is disabled now.

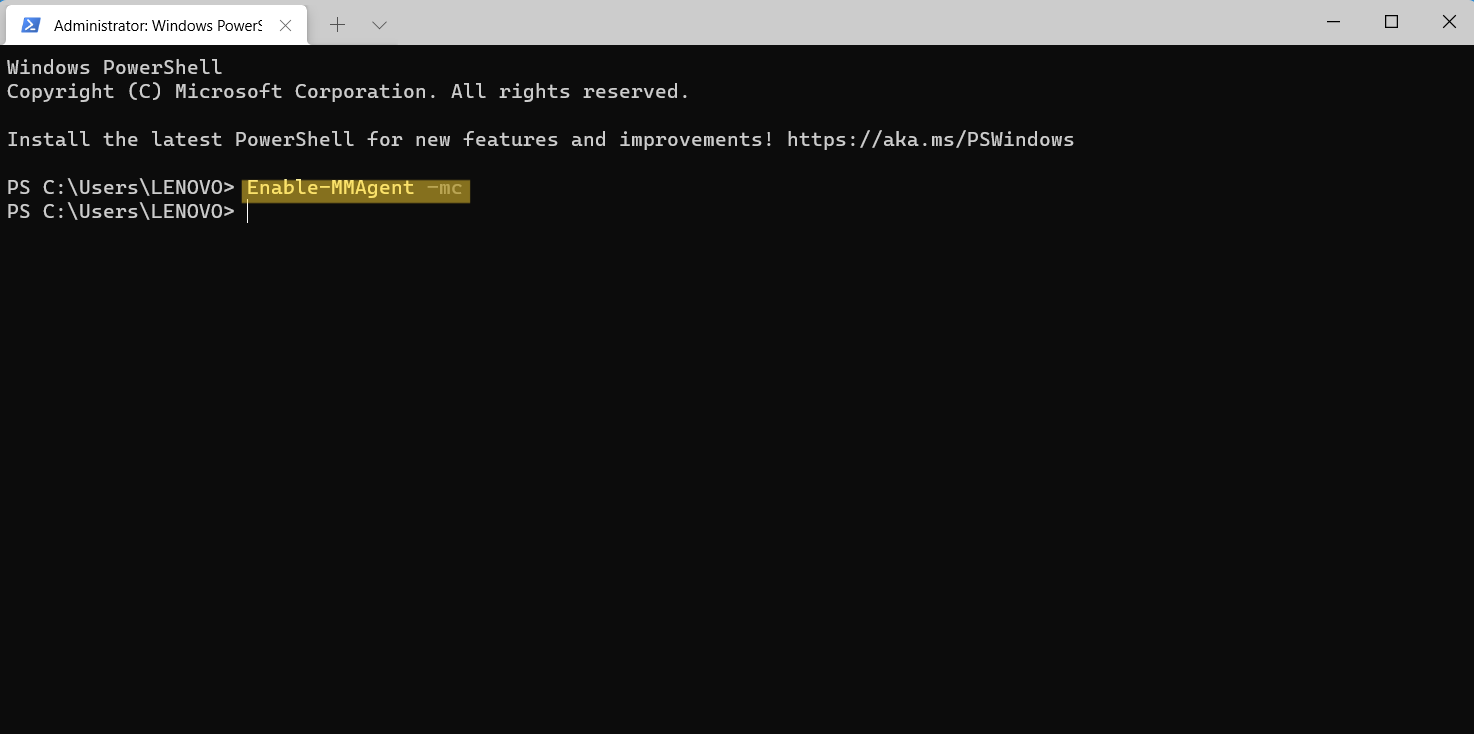
3. To enable Memory Compression, run the following command:
Enable-MMAgent –mc
Now, reboot your Windows system for applying the changes. Once done, check if this feature is on or not through Task Manager.
So, this is how you can turn on or off the Memory Compression feature on your Windows 11/10 PC hassle-free.