In Windows 11, you get a dynamic feature called as Widgets. Now, Widgets is a feature which automatically keeps refreshing the latest happenings around you. You can define the source of interest, and you will get updated information about your interests. Now, for some users, the Widgets feature is a cool thing while for others, it may not be a requirement. So in case, if you are willing to disable Widgets in Windows 11, this article may help you. Note that Widgets are enabled by default.
Here, it’s worth to mention that Widgets cannot be disabled using their own settings. You need to rely on Settings app, Group Policy or registry to disable Widgets feature.
Page Contents
Enable or disable Widgets in Windows 11
Method 1: Using Settings app
1. Press  + I keys to open Settings app.
2. In Settings app, go to Personalization > Taskbar.
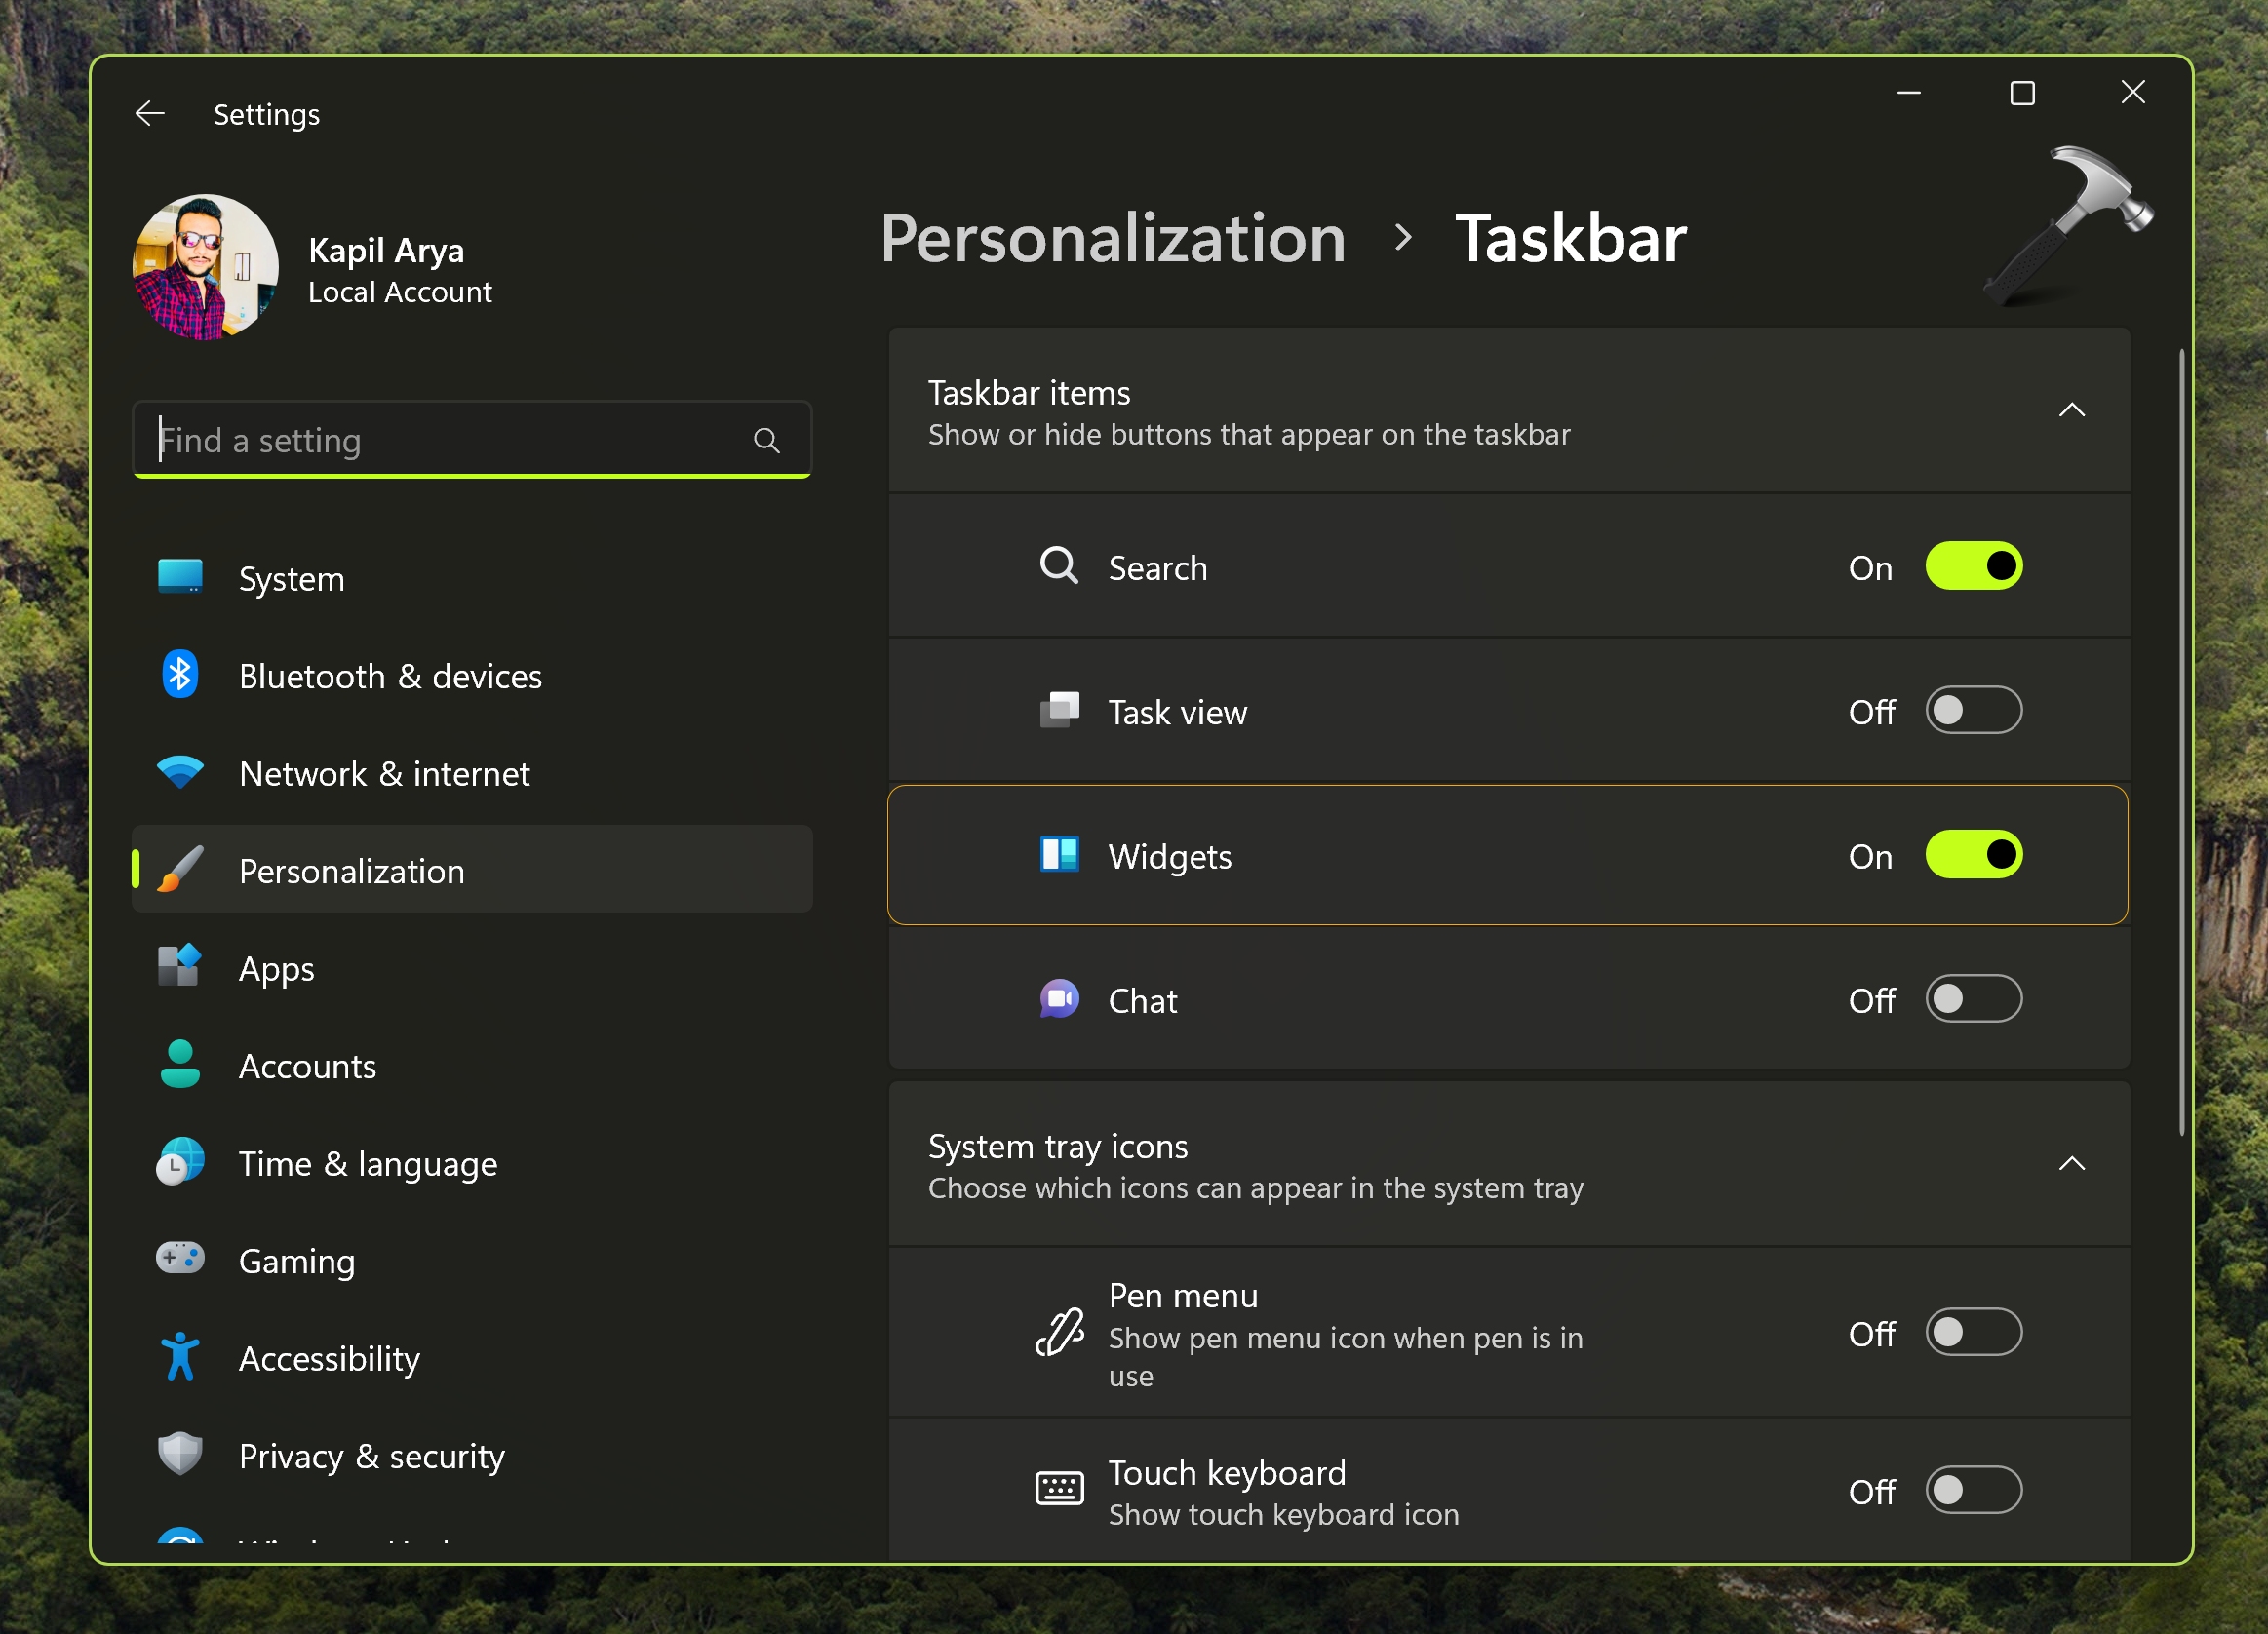
3. You can turn Off the Widgets option here, and they should be disabled immediately. You can then close Settings app and return to your work.
Method 2 : Using registry
You can configure this feature on per user basis with below registry tweak.
 Registry Disclaimer: It is recommended to create a System Restore point first, if you’re not familiar with registry manipulation.
1. Run regedit command to open Registry Editor.
2. In left pane of Registry Editor window, navigate to:
HKEY_CURRENT_USER\Software\Microsoft\Windows\CurrentVersion\Explorer\Advanced
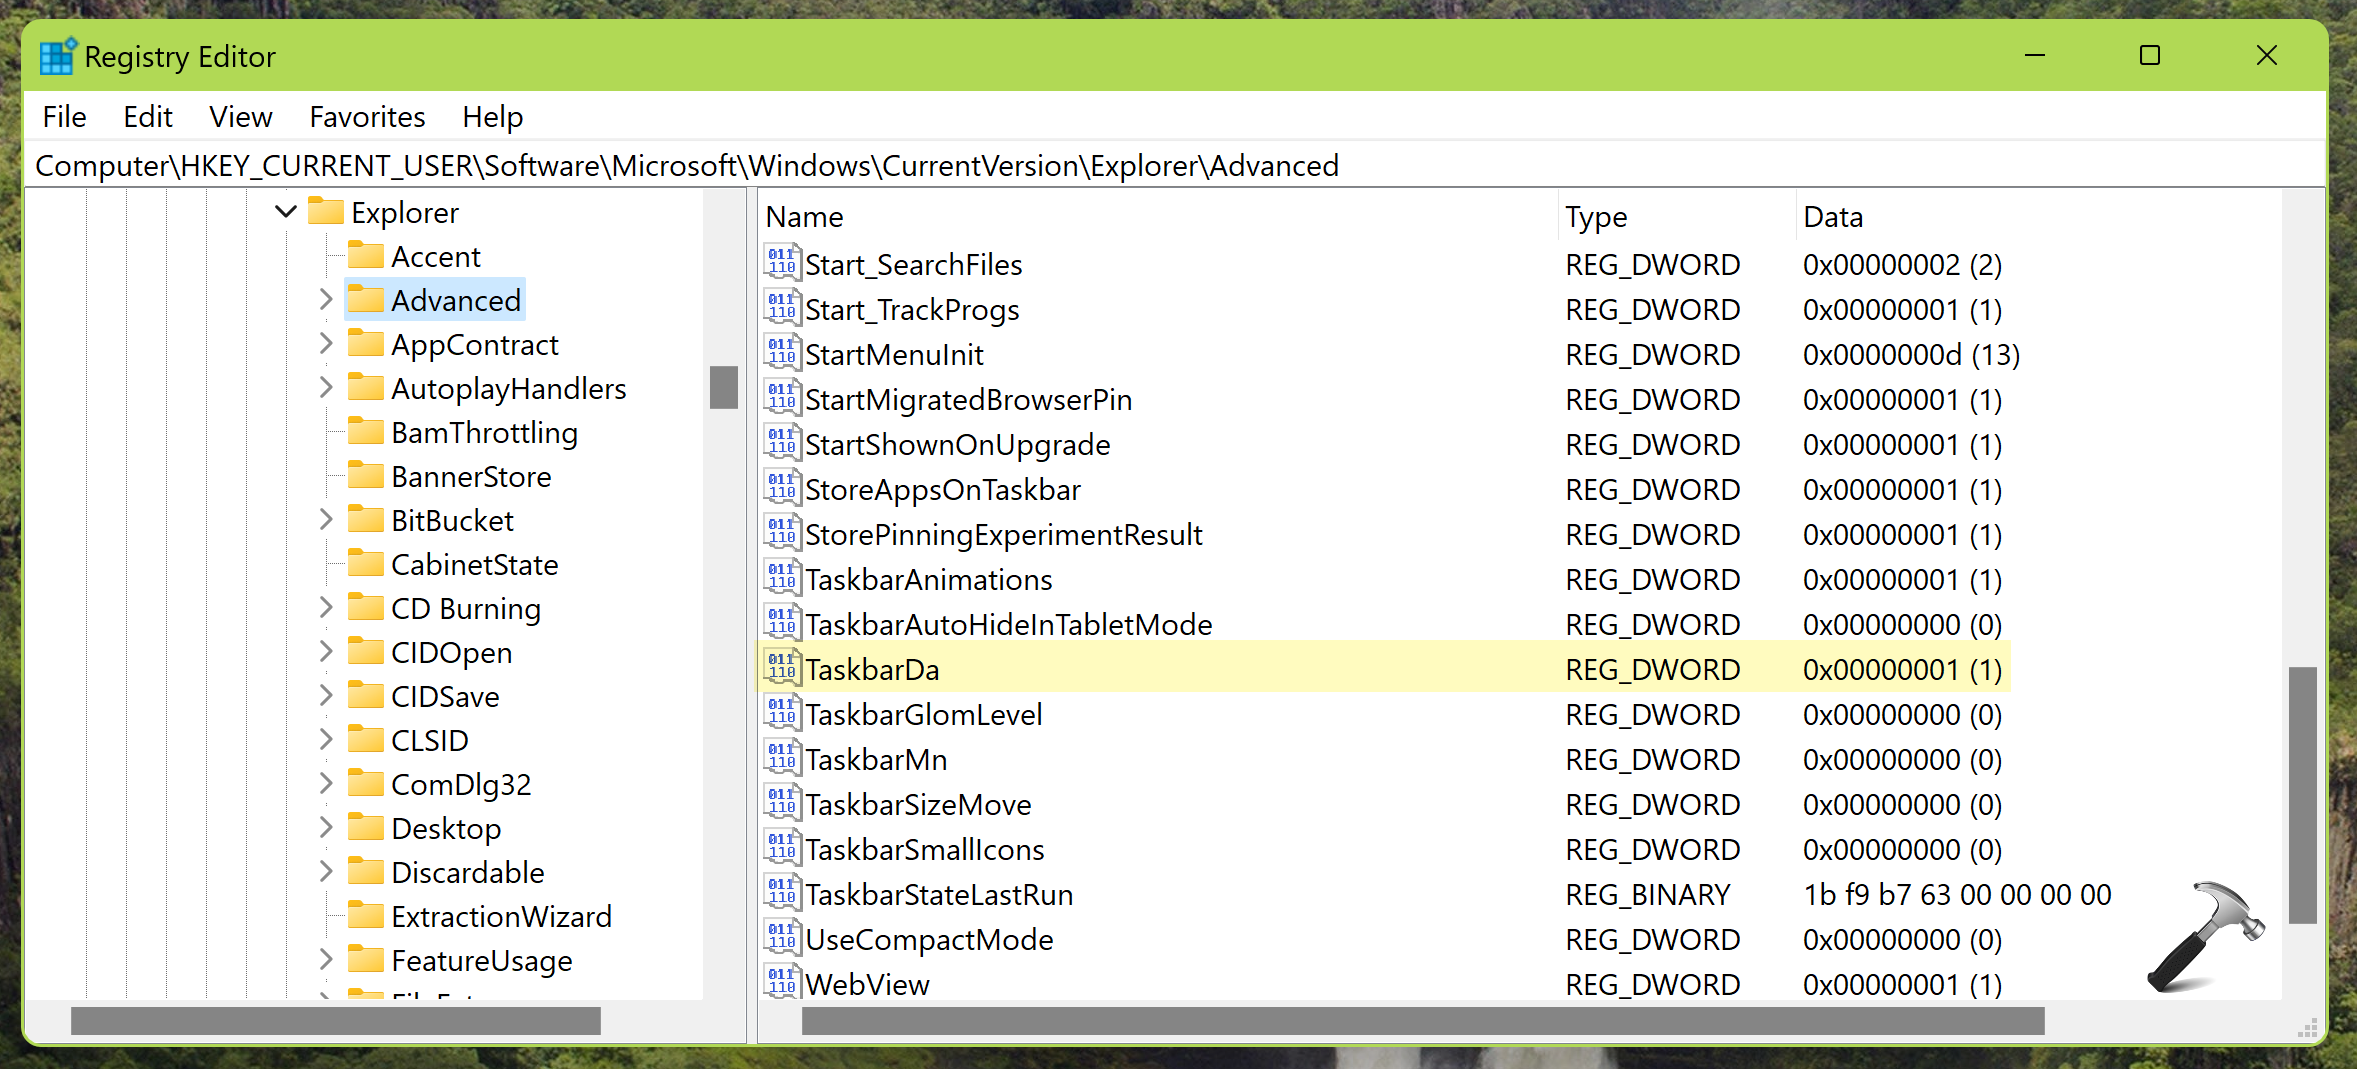
3. In the right pane of Advanced registry key, locate the registry DWORD named TaskbarDa. By default, the Value data for this registry DWORD is set to 1 which means Widgets are enabled. To disable Widgets simply double click on this DWORD value and set its Value data to 0.
4. Close the Registry Editor. The changes should be reflected immediately.
Method 3: Using Group Policy
IT Pros and system administrators can use this method to manage Widgets for their clients.
1. Press + R and put gpedit.msc in Run dialog box. Click OK to open Group Policy snap-in.
2. Go to following location:
Computer Configuration > Administrative Templates > Windows Components > Widgets
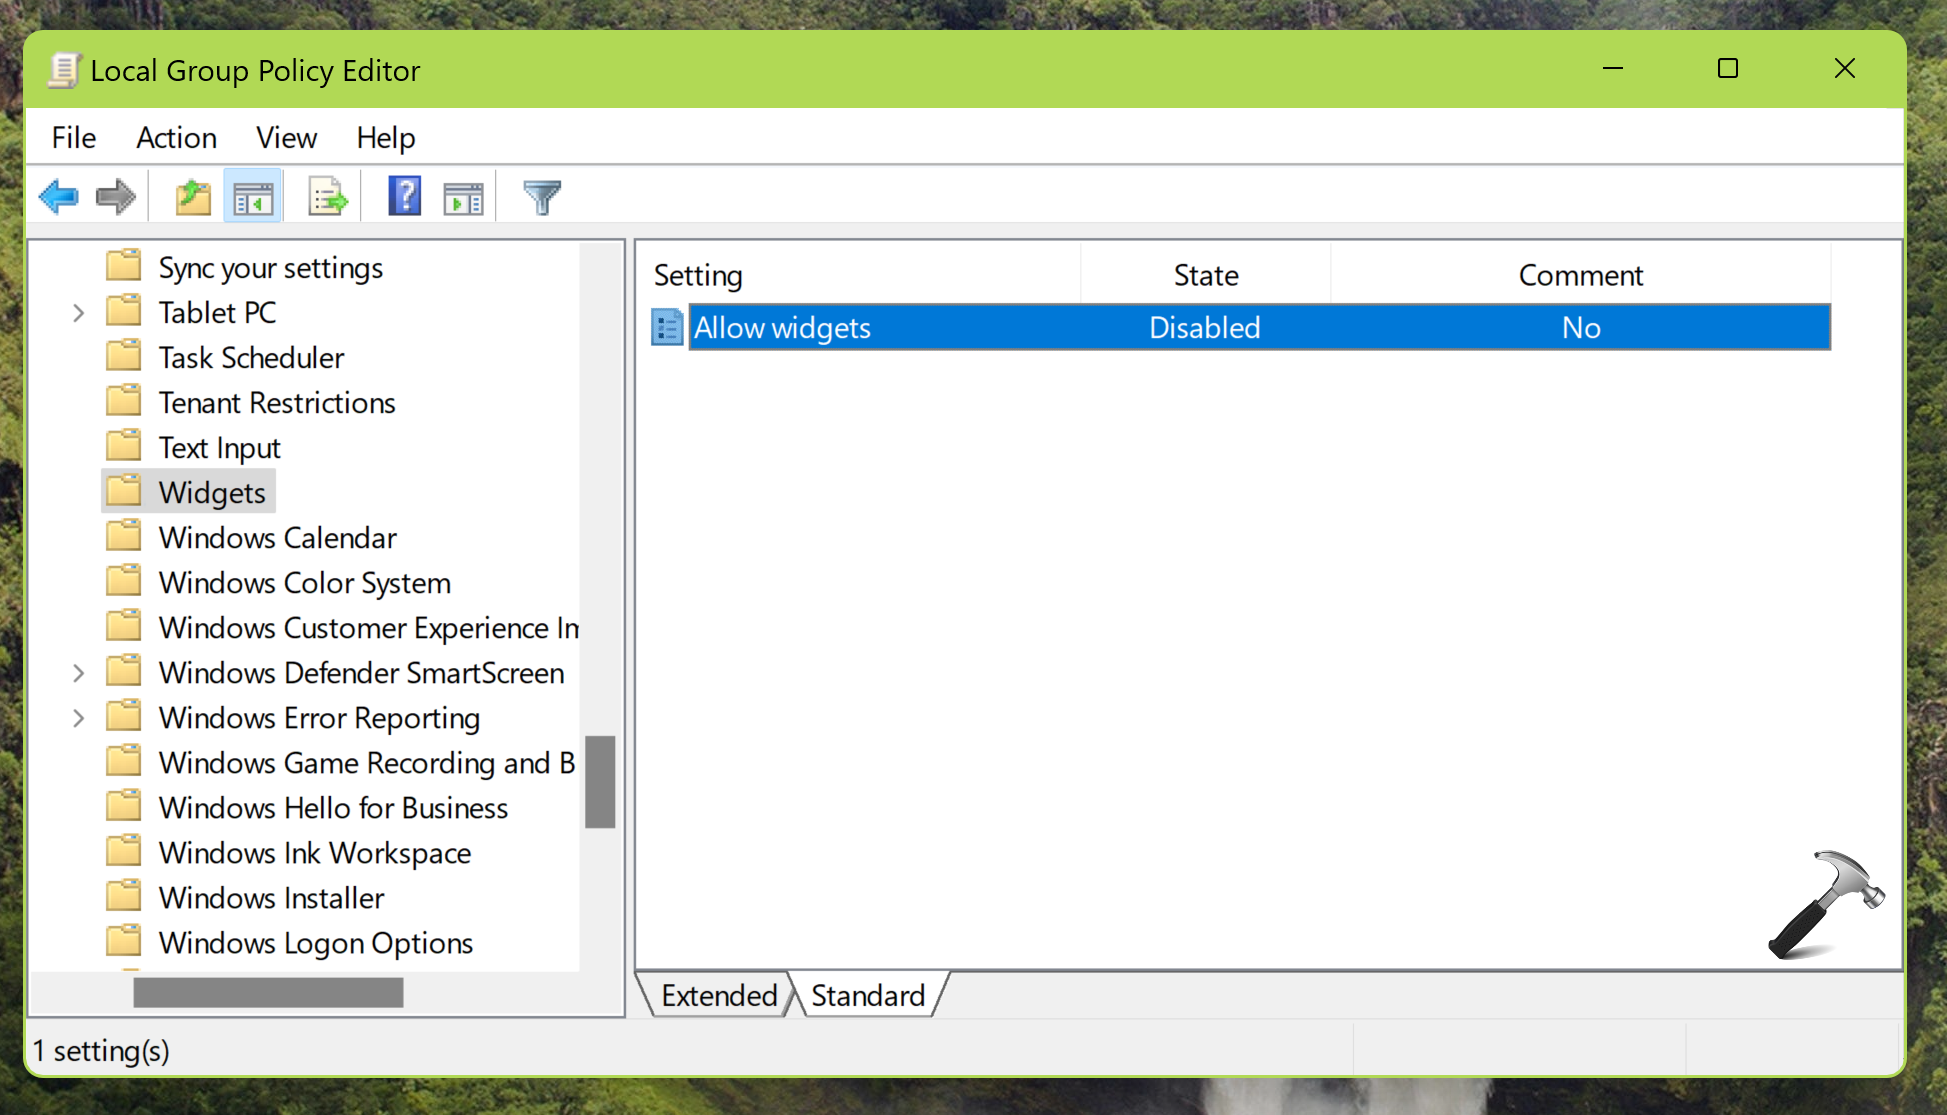
3. Under the Widgets folder you will be able to locate Allow widgets named Group Policy setting, which is not configured by default. Just double click on this policy and set its value data to Disabled in case, if you want to turn off Widgets. Leaving the policy to Enabled or Not configured will let the Widgets feature enabled.
4. Close the Group Policy Editor and update the Group Policy engine to make changes effective.
Video fix
You can check out this video for live demonstration of above methods:
That’s it!
![Taskbar unresponsive in Windows 11 [Fix]](https://www.kapilarya.com/assets/Taskbar-3.png)