A Blue Screen of Death (BSOD) error is a sign that there’s something wrong with your Windows PC. It’s a critical error—your PC is forced to reboot when it appears. In this article, we will learn how to fix Ntoskrnl.exe BSOD error in Windows 11.
Page Contents
What is Ntoskrnl.exe?
Ntoskrnl.exe is Windows NT Operating System Kernel. It is the essential Windows component that is responsible for hardware abstraction, process and memory management, and various system services.
It consists of:
- Cache manager
- Kernel
- Memory manager
- Executive
- Security reference monitor
- Scheduler (Dispatcher)
What causes Ntoskrnl.exe BSOD error?
Ntoskrnl.exe causes BSOD when there are some issues with the RAM or Memory installed in your computer. If you have two RAMs of different speeds, you might find this issue on your computer. On the other hand, this error might occur due to faulty hardware and corrupted system files as well. The issue can be related to software or hardware as well. Some of the issues may include:
- Your software is outdated or your system is corrupt or not compatible.
- Faulty RAM.
- Your RAM and local storage may be inadequate in keeping up the computer activities.
- Overclocked device.
- Corrupt system files.
Fix: Ntoskrnl.exe BSOD error in Windows 11
There are 6 methods through which you can solve this error with.
Method 1: Run the System File Checker or CHKDSK scan
1. Go to Start Menu. Open Command Prompt and select “Run as administrator”.
2. Copy and paste the below command. Press Enter.
sfc /scannow
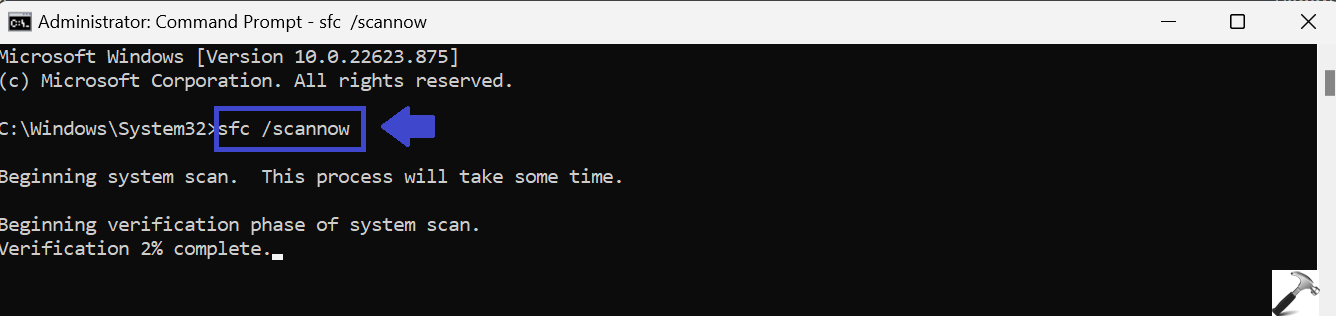
3. You will get the report on the repairs.
4. If the system show that problems are unable to be solve, run CHKDSK scan.
To run CHKDSK scan, follow the below steps:
1. Press the Windows key + X.
2. Click on Command Prompt (Admin) from the given list.
3. Copy and paste the below command. Press Enter.
CHKDSK /f /r
4. Now, type “yes” and press Enter.
5. It will scan the whole system and wait until the scan is completed.
6. Again, run the System File Checker (SFC) Scan.
7. After scanning, restart your PC.
Method 2: Reset overclocking settings
Overclocking is a smart way of exploiting the maximum capability of your hardware but it can lead to overheating, hardware breakdlead, and system crashes. If you are experiencing the Ntoskrnl.exe error then stop overclocking your device.
You can disable overclocking in BIOS. Follow the below steps:
1. Click on troubleshoot and go to advanced options.
2. Go to UEFI Firmware Settings. Click Restart.
3. When PC will start again, it will open BIOS automatically.
4. In Performance, click on Overclocking.
5. Now, disable Overclocking.
6. Save the changes and restart your PC again.
Method 3: Windows Update
1. Open Settings App.
2. Go to Windows Update.
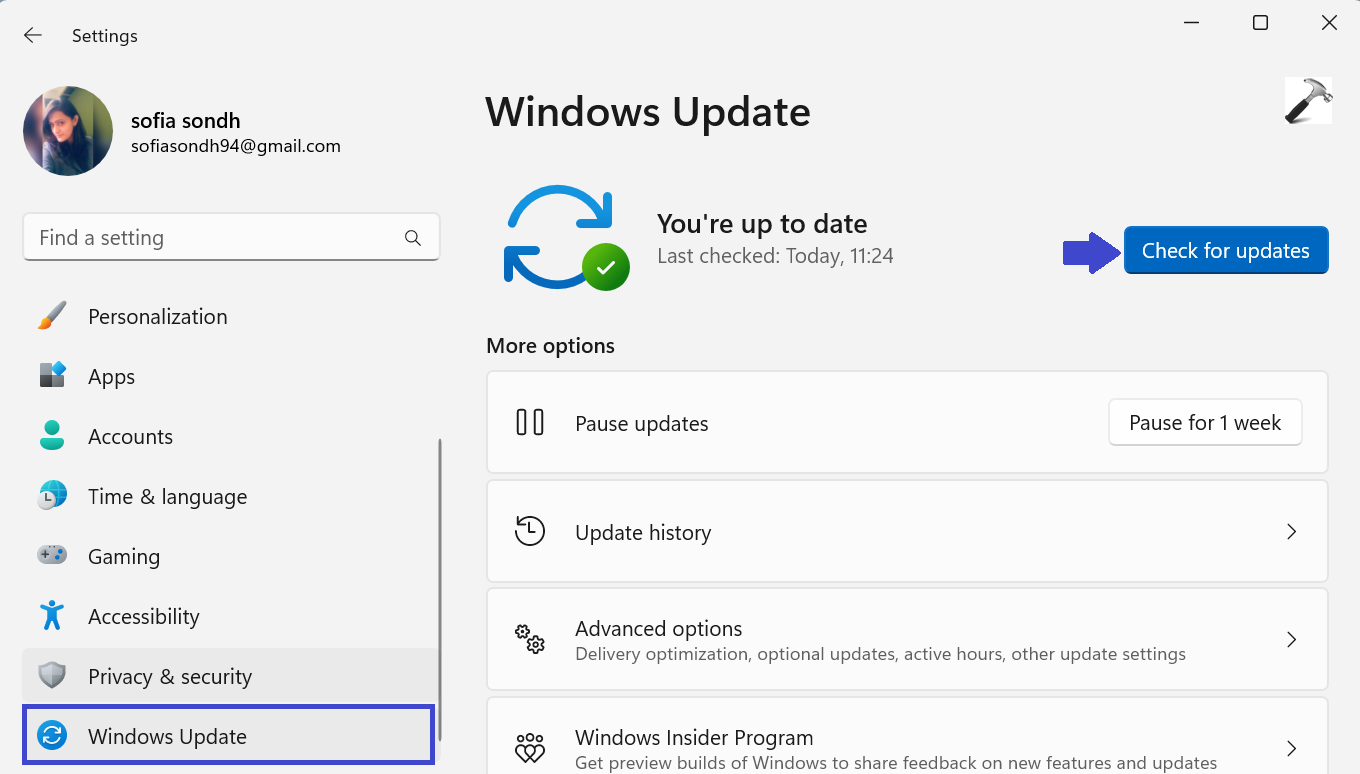
3. Click on “Check for updates“.
Method 4: Check your hardware
A failing RAM module or Solid State Drive (SSD) could be the cause of the error you are dealing with. Replace your hard sticks and see if the issue will be resolved.
If you have two RAM slots, you can try removing both sticks. Clean the slots, and reinsert one stick. See if that fixes the issue.
If the issue is not solved, you should visit an expert to help you perform this fix.
Method 5: Update your drivers
1. Press the Windows key + X to open WinX menu. Select Device Manager.
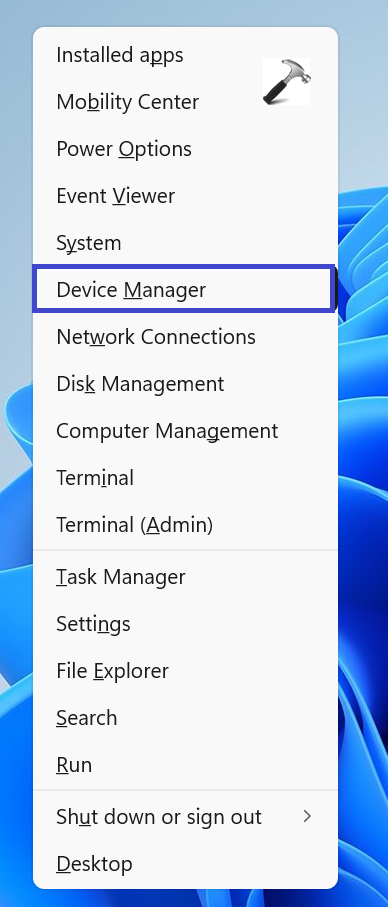
2. Navigate to the problematic driver. For example, if you want to update graphics card driver, go to Display adapters. If you want to update Microphone Driver, go to Audio Inputs and Outputs.

3. Right click the driver and select Update Driver.
4. Windows will update and install the driver update. Restart your PC to apply the settings.
Method 6: System Restore
System restore will take your OS back when there were no issue. To do so, follow the below steps:
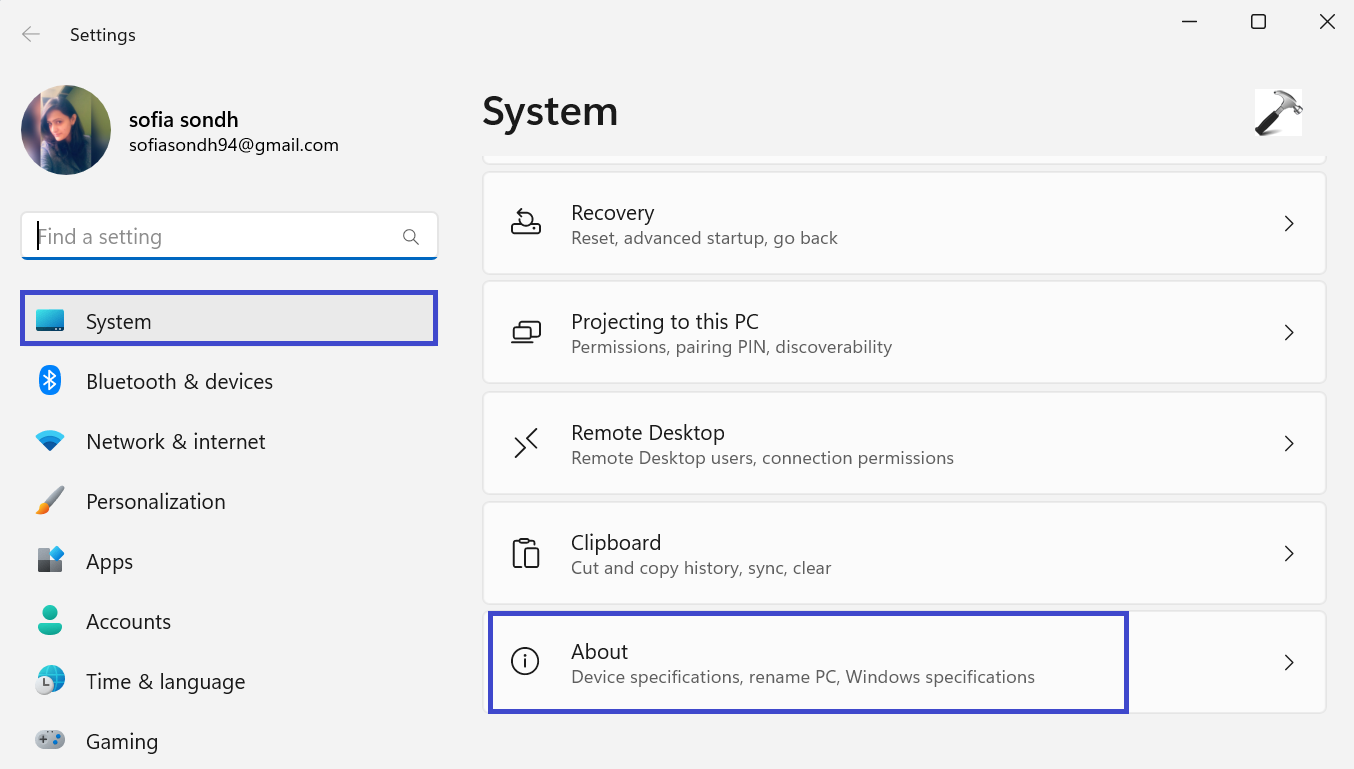
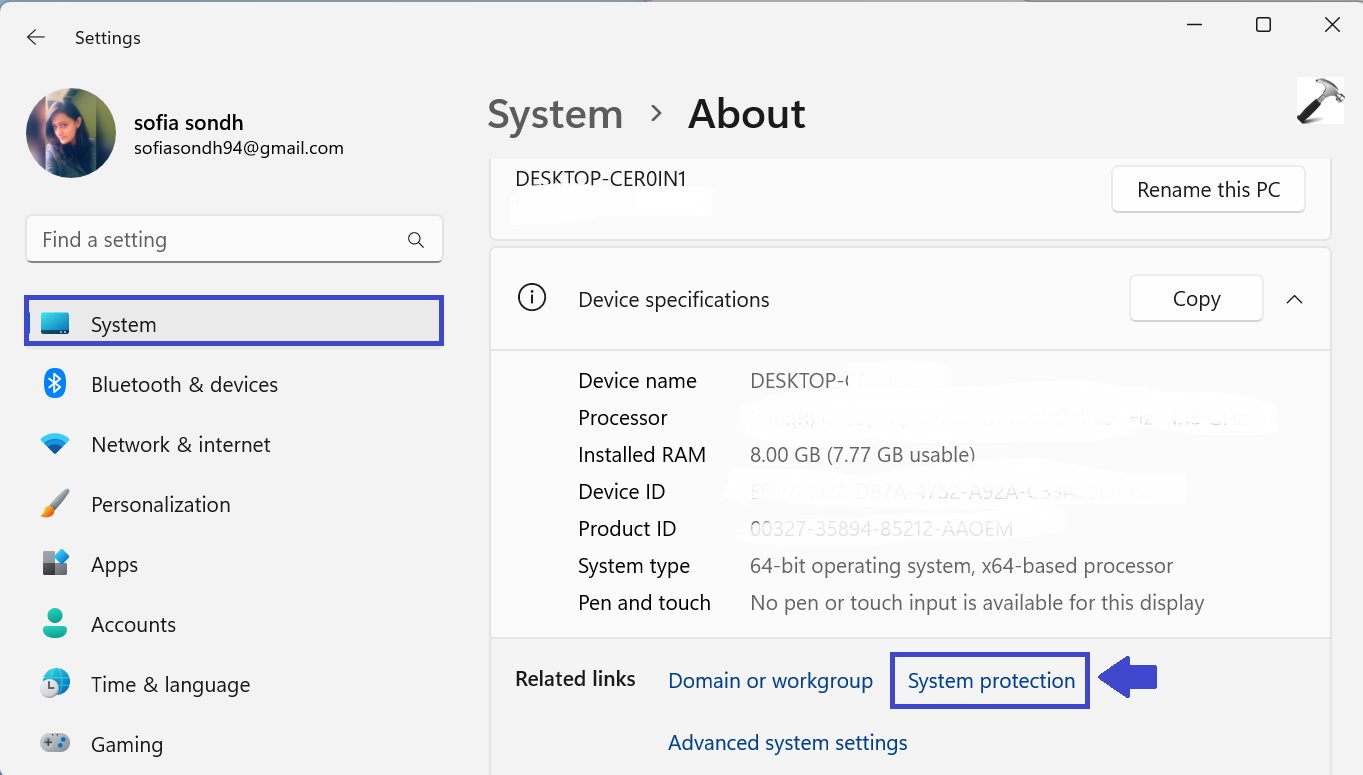
1.Open Settings App and go to “About“.
2. Now, click on “System protection“.
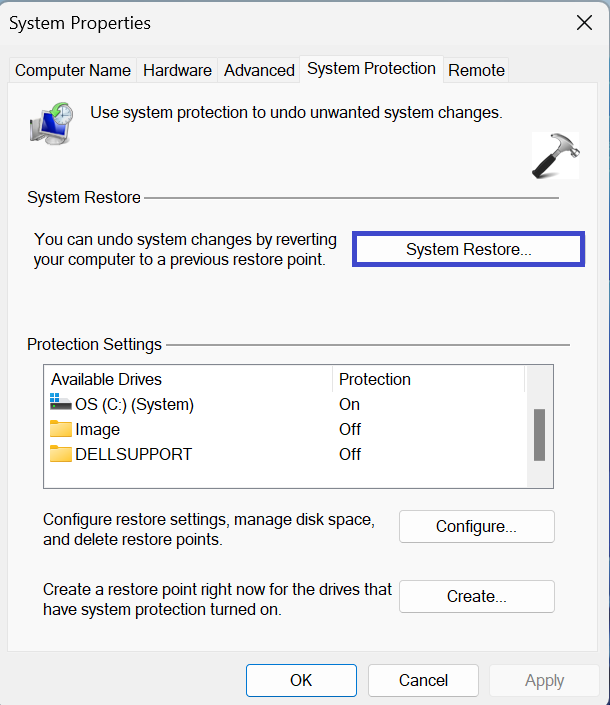
3. After clicking “System protection“, prompt box will appear.
4. Now, click on “System restore“.
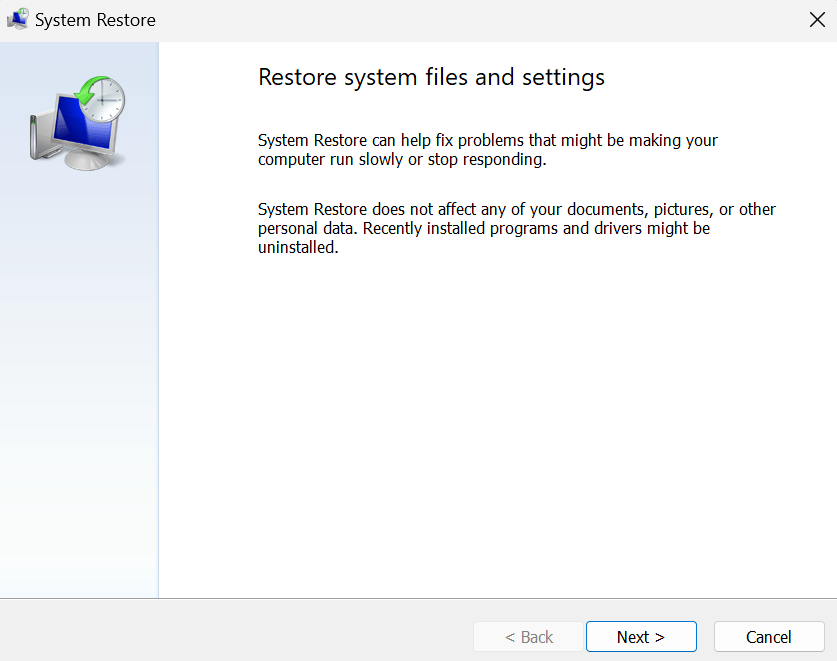
4. Click Next and follow the onscreen wizard to finish the process.
That’s It!