The users of Windows 11 at times go through the error of SESSION1 INITIALIZATION FAILED BSOD. It mainly appears when the boot files are corrupted and after a hardware/software installation and causes a lot of trouble for the users. Thus, this article will help the users to fix this issue.
Page Contents
Fix SESSION1 INITIALIZATION FAILED BSOD on Windows 11
Now, let us check all the fixes which will allow us to solve the issue of SESSION1 INITIALIZATION FAILED BSOD on Windows 11.
Fix 1: Disabling Unnecessary Startup Apps
Various ongoing startup apps can lead to the occurrence of the issue of failed BSOD issue. Thus, the issuers should disable any startup app that is enabled. Follow the steps below for doing that.
Step 1- Navigate to Task Manager > Startup > Startup apps. Thereafter, disable all the startup items.

Step 2- Lastly, select Apply > OK and save all the changes. Also, reboot the PC if necessary.

Fix 2: Running CHKDSK
Damaged disks may too cause the issue. Thus, for checking and repairing the errors of the drive, we need to run the CHKDSK command. Follow the steps given below to do the same-
Step 1- Primarily, run the Command Prompt as an administrator.

Step 2- Now, copy and paste the prompt given below to run the CHKDSK command and press Enter.
chkdsk /x /f /r

Step 3- Now, the CHKDSK command will scan any error in the system and repair it. Again, if it asks for scheduling a disk check next time, press Y on the keyboard. Thereafter, press Enter and reboot the PC to allow the CHKDSK command to run.
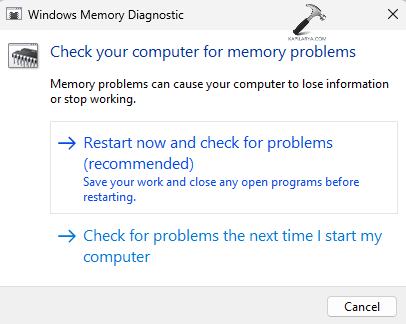
Fix 3: Running Memory Diagnostic
The users can also try running Windows Memory Diagnostic for fixing the issue. Follow the steps for doing the same.
Step 1- Firstly, type Windows + R and open the Run dialog box.
Step 2- Next, copy and paste the prompt below and select OK.
mdsched.exe

Step 3- Now, select any of the options appearing on the window screen as per requirement. Finally, restart the PC and wait for the memory check to run.
Fix 4: Updating Drivers
Outdated or missing drivers in the system may also add to the issue of failed BSOD. Hence, updating the drivers of the system is another fix that can be adopted by users to fix the issue. Now, let us see the steps to update the drivers-
Step 1- Firstly, open Device Manager.

Step 2- Next, locate the driver and right click on it. Now, click Update driver.

Step 3- Further, in the Update Drivers window, press Search automatically for drivers.

Step 4- Lastly, follow the prompts that appears in the screen to install the updated drivers.
Repeat above steps and update all drivers.
Fix 5: Running SFC and DISM scan
Running a system file scan and a DISM scan can help the users in solving the aforementioned issue easily. Therefore, follow the steps given below to run the SFC and DISM Scan and solve the issue.
Step 1- At first, open Command Prompt and run it as an administrator.
Step 2- Next, copy and paste the prompt given below for running a SFC scan and select Enter.
sfc /scannow

Step 3- Again, to run the DISM tool scan, type the commands given below one by one and press Enter after each command:
Dism /Online /Cleanup-Image /ScanHealth

Dism /Online /Cleanup-Image /CheckHealth

Dism /Online /Cleanup-Image /RestoreHealth

Step 4- Lastly, after the completion of the scan, exit the Command Prompt and reboot the PC. This should solve the issue.
Fix 6: Updating Windows
Other than the above fixes, the users can try for fixing the issue by updating both Windows. To do that, follow the steps below-
Step 1- At first, type Windows + I and open Settings.

Step 2- Next, select Windows Updates. Click on Check for updates. Hereafter, install any available Optional or Driver updates.

Fix 7: Running the Blue Screen Troubleshooter
Running the Blue Screen troubleshooter can aid in solving the issue too. Thus, the users should give it a try.

Fix 8: Windows Compatibility Mode
Running the application with the error in compatibility mode with older version should help in fixing the problem
Step 1- Right-click the application and select Properties.

Step 2- Next, navigate to Compatibility. Then, check the box of Run this program in compatibility mode for and choose any older version of Windows from the drop-down menu.

Step 3- Lastly, select Apply > OK for saving all the changes.
Fix 9: Deleting Bootcat.cache
Deleting the Bootcat.cache with the steps below will certainly assist in fixing the issue.
Step 1- Open Command Prompt
Step 2- Now copy and paste the prompts given below one by one and press Enter after each prompt.
C:

cd windows/system32/codeintegrity

del bootcat.cache

This will delete the cache and Windows should reinstall it.
Fix 10: Resetting the PC
Last way the users can fix this problem is through resetting the PC. But, before resetting the PC, ensure to back up all the files of the PC and transfer them to an external device. This will help in keeping all the data safe. Now, follow these steps to reset the PC-
Step 1- Firstly, go to Settings > System > Recovery.

Step 2- Thereupon, below the Recovery option, select the Reset PC button close to Reset this PC.
Step 3- Now, a blue pop-up window will open. As per requirement, choose either “Keep my files” or “Remove everything”.

Step 4- Lastly, follow the prompts that appears on the Window screen and reset the PC.
Hoping that all of these fixes help the users!