The Settings app is the control center of your Windows 11 system, where you configure everything from display settings to network connections and privacy preferences. When this essential tool begins to reset itself automatically, it can disrupt your workflow and lead to a frustrating user experience. In this article, we will explore the best methods that will help you to fix Settings app keep resetting in Windows 11 problem.
Page Contents
What Causes the Settings App to Keep Resetting in Windows 11?
- Corrupted User Profile: Sometimes, a corrupted user profile can lead to issues with various settings, including those in the Settings app. This can cause settings to reset to their default values.
- Windows Updates: Occasionally, Windows updates may introduce changes or conflicts that affect the Settings app. This can result in settings reverting to default values.
- Third-Party Software: Certain third-party applications or utilities that interact with system settings may conflict with the Settings app, causing it to reset.
- Registry or Group Policy Changes: Incorrect changes made to the Windows Registry or Group Policy settings can impact the behavior of the Settings app, potentially causing it to reset.
Fix: Settings app keep resetting in Windows 11
Below, we’ll explore effective methods to address the vexing issue of the Settings app repeatedly resetting in Windows 11.
Method 1: Run Startup Repair
Startup Repair is a tool in Windows that can automatically fix common startup problems. It can fix the Settings app keeps resetting issue in Windows 11. For example, the issue may be caused by a corrupt system file, a missing BCD entry, or a problem with the Windows registry. Startup Repair can scan your system for these problems and try to fix them automatically.
To use Startup Repair to fix the Settings app keeps resetting issue in Windows 11, follow these steps:
1. Open the Settings App and select “Recovery“.

2. Under “Advanced Options“, click on “Restart now“.

3. Now, when the PC will restart press F1.
4. After that, click on “Troubleshoot“.
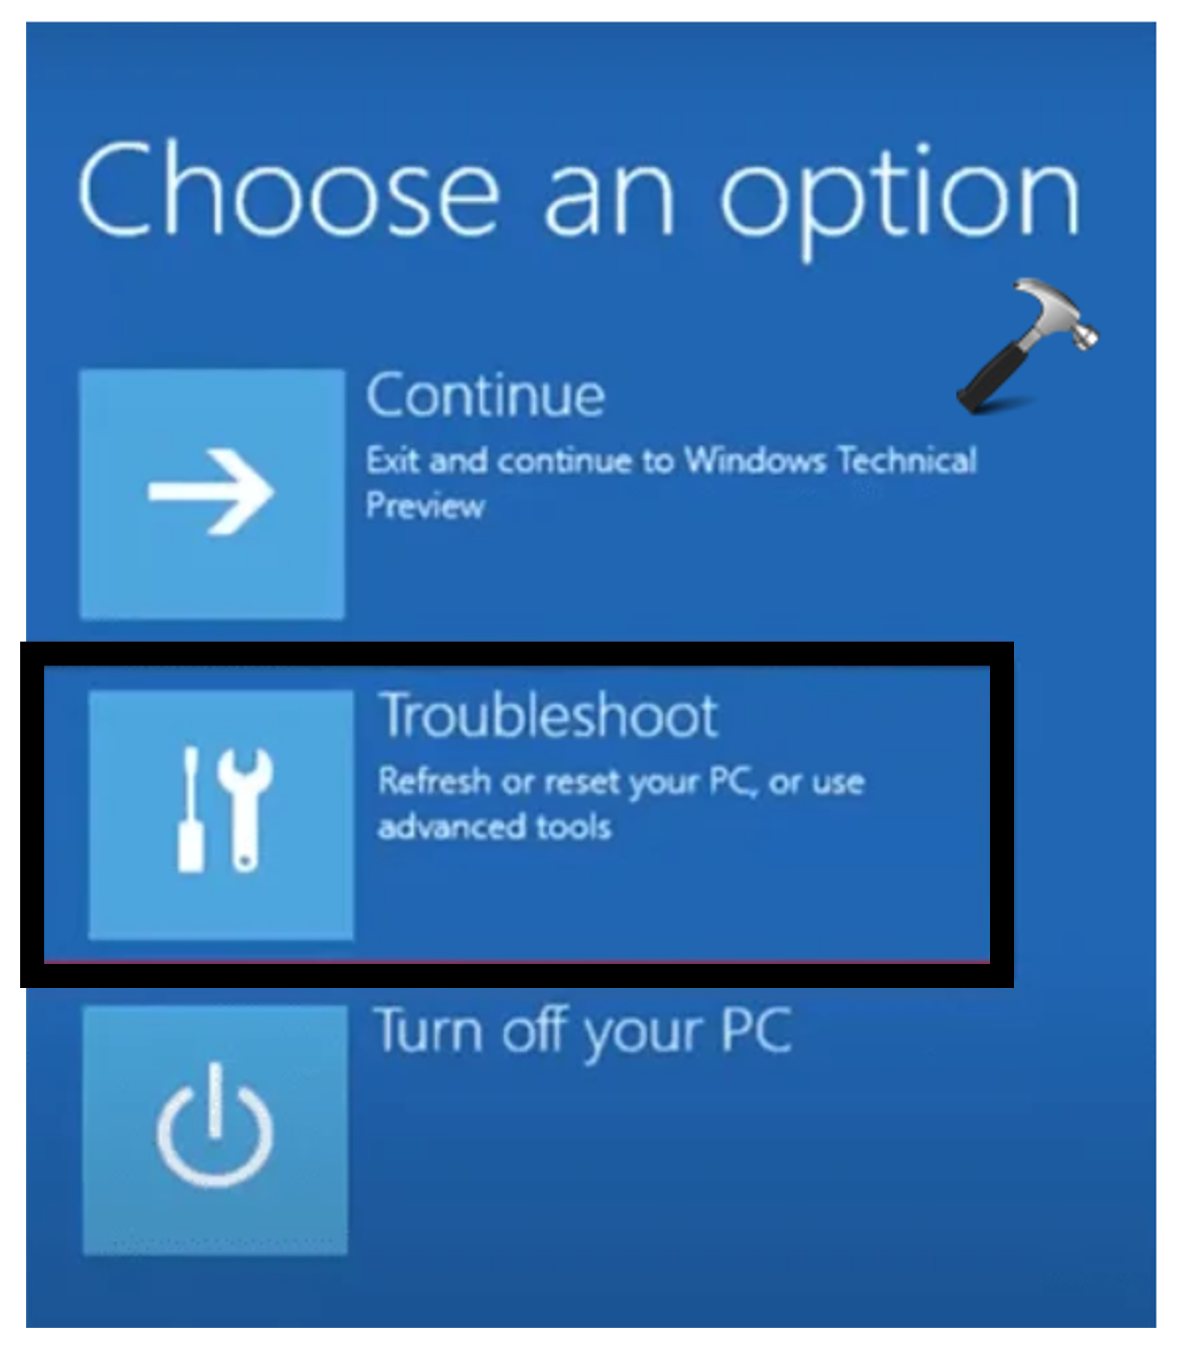
5. Then, click on “Advanced options“.
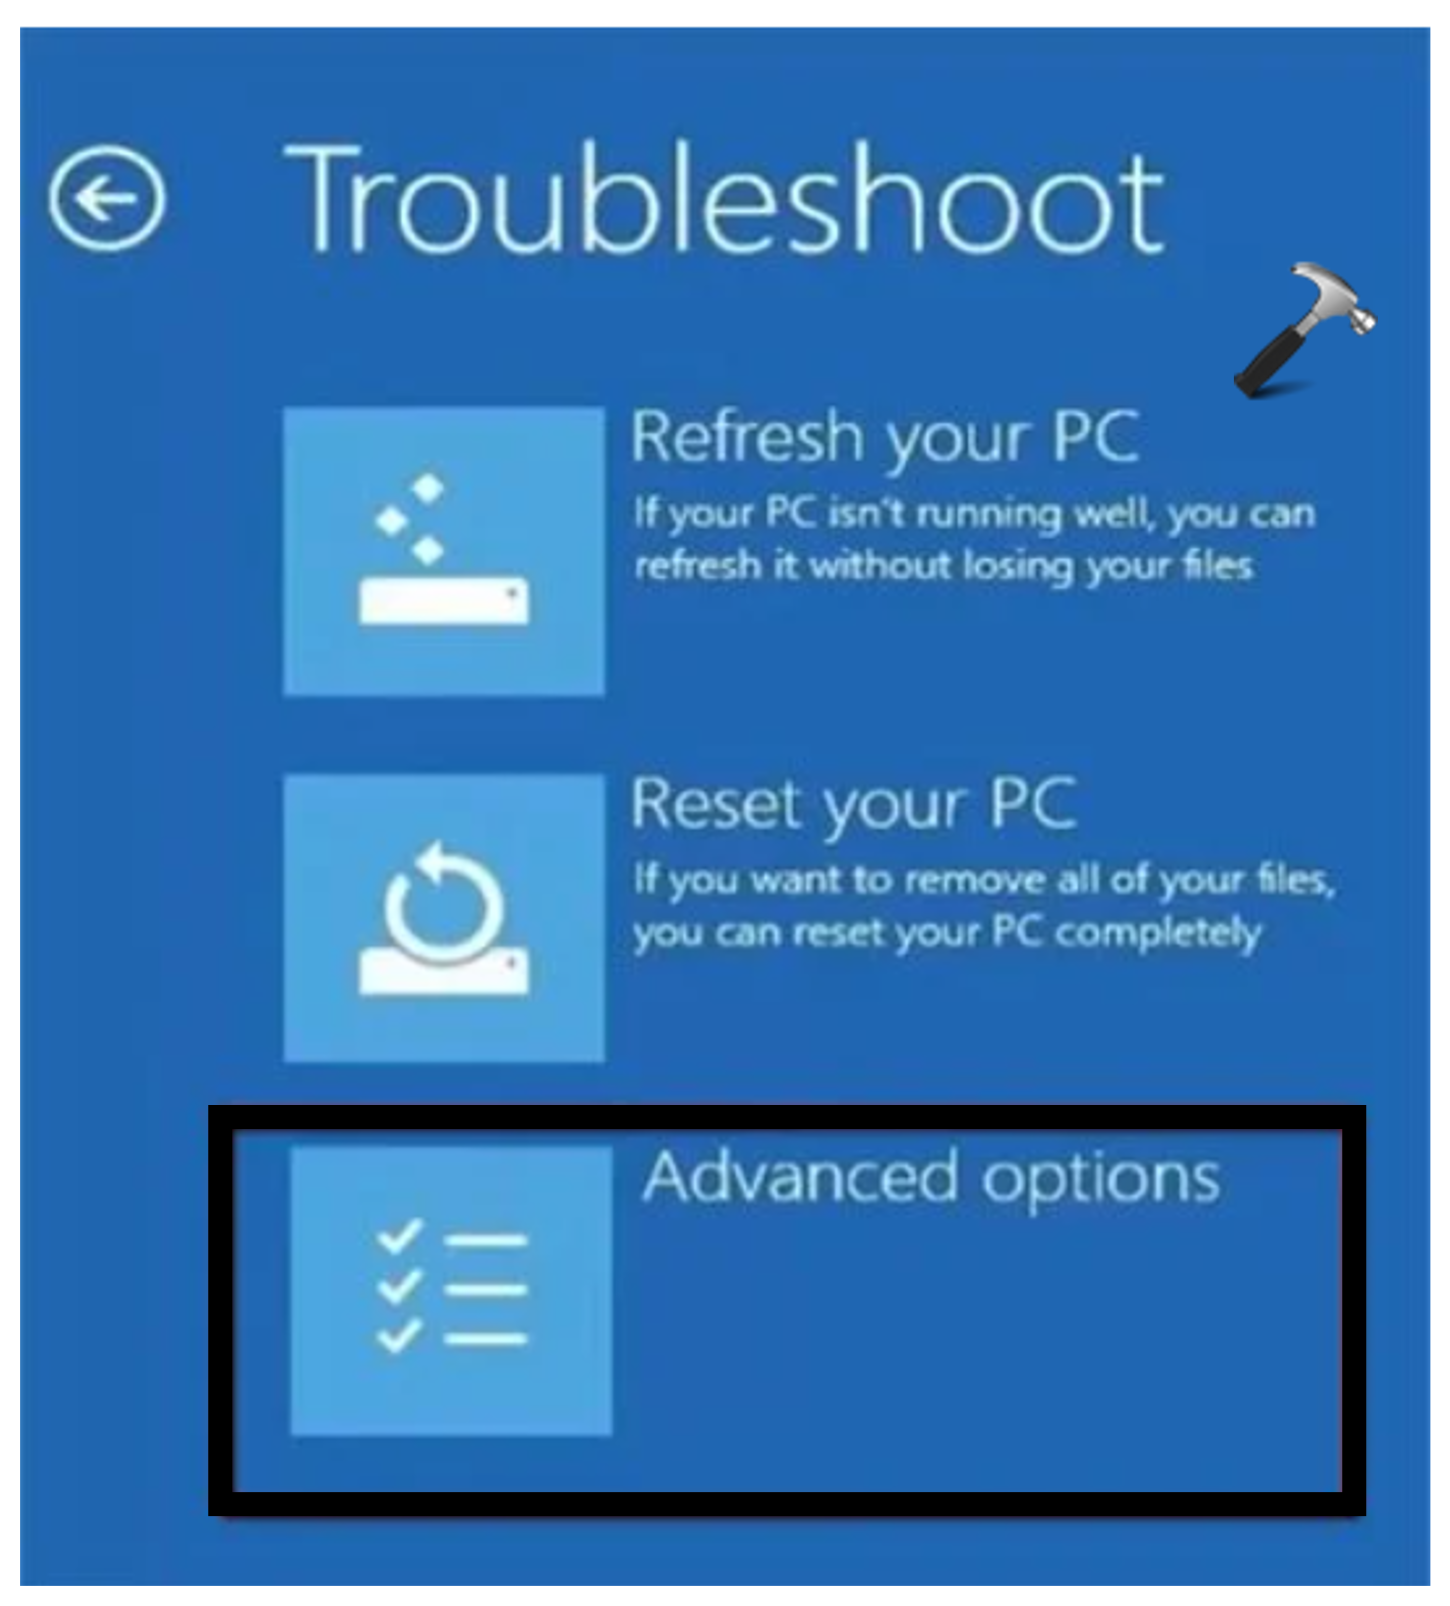
6. Click on “Startup Repair“.
7. Follow the on-screen instructions to complete the repair process.
After completing the process, check whether the issue is resolved or not.
Method 2: Try Clean Boot
A clean boot is a troubleshooting method that starts Windows with a minimal set of drivers and startup programs. This can help you to identify if a background program is interfering with the Settings app.
To try a clean boot in Windows 11, follow these steps:
1. Press the Windows key + R. Type “msconfig” and press Enter.

2. In the “System Configuration” window, click on the “Services” tab,
3. Select “Hide all Microsoft services” and click on the “Disable all” option.

4. Now, go to the “Startup” tab. Click on “Open Task Manager“.

5. One by one, select all the third-party programs and select “Disable“.
6. After disabling all the third-party programs, restart your PC.
Method 3: Repair Corrupted System Files
To repair corrupted system files, you can use the System File Checker (SFC) and the Deployment Image Servicing and Management (DISM) tools.
To run the SFC tool, follow these steps:
1. Open Command Prompt and run as administrator.
2. Now, copy and paste the below command to repair the corrupted system files:
sfc /scannow

The SFC tool will scan your system for corrupted system files and try to repair them automatically.
3. If the SFC tool finds any corrupted system files but is unable to repair them, you can try running the DISM tool. The DISM tool is more robust than the SFC tool and can repair more severe system file corruption.
Use the following command to repair the files using the DISM tool:
DISM /Online /Cleanup-Image /CheckHealth
DISM /Online /Cleanup-Image /ScanHealth
DISM /Online /Cleanup-Image /RestoreHealth
4. After that, restart your PC and check whether the issue is fixed or not.
Method 4: Repair Corrupted User Profile
A corrupted user profile can cause problems in Windows 11, including the Settings app resetting. To repair a corrupted user profile, you can try the following methods:
1. Press the Windows Key + R. A prompt box will appear. Type “regedit.exe” and press Enter.
2. Navigate the following path:
Computer\HKEY_LOCAL_MACHINE\SOFTWARE\Microsoft\Windows NT\CurrentVersion\ProfileList
3. You will see all the user profiles under the “ProfileList“.
4. Now, one by one select each S-1-5 folder and check if the username under Data corresponding to ProfileImagePath matches your current username.
5. After that, select your user profile from the left panel.

6. Right-click on “State Value” and select “Modify“.
Set the value to 0 and click OK.
7. Now, right-click on “RefCount” and select “Modify“.
Set the value to 0 and click OK.
8. Close all the Windows and restart your PC to apply the settings.
Method 5: Uninstall the Latest Windows Update
To fix the Settings app keeps resetting issue in Windows 11, you can try uninstalling the most recent Windows update. This may fix the problem if the update is corrupted or causes a conflict with another program or service.
To uninstall a Windows update, follow these steps:
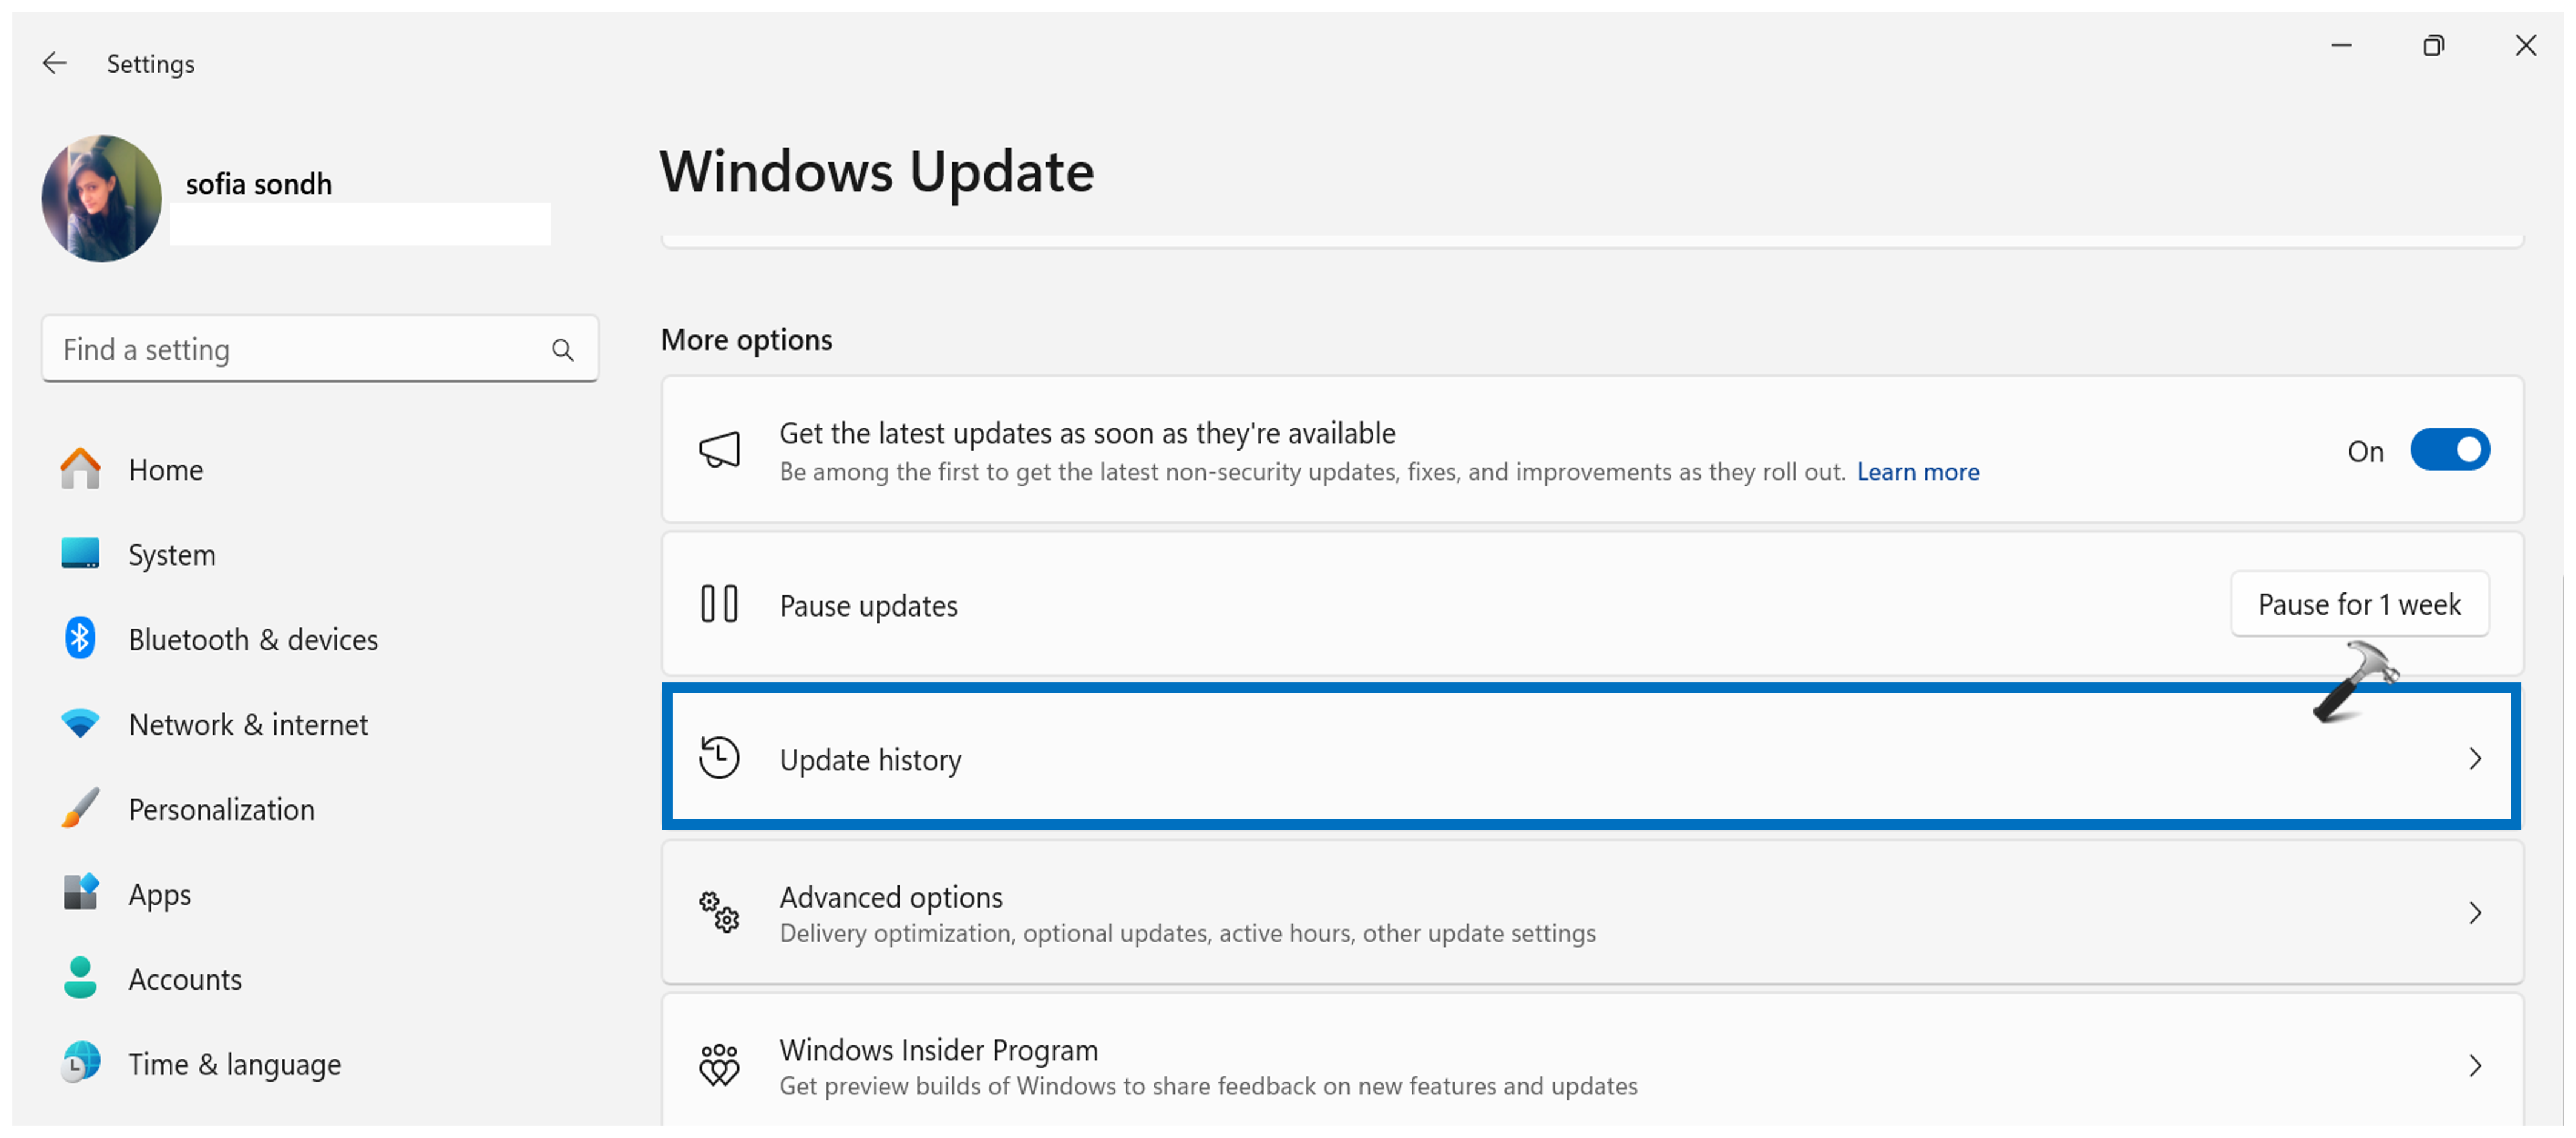
1. Open the Settings App and go to “Windows Update“.
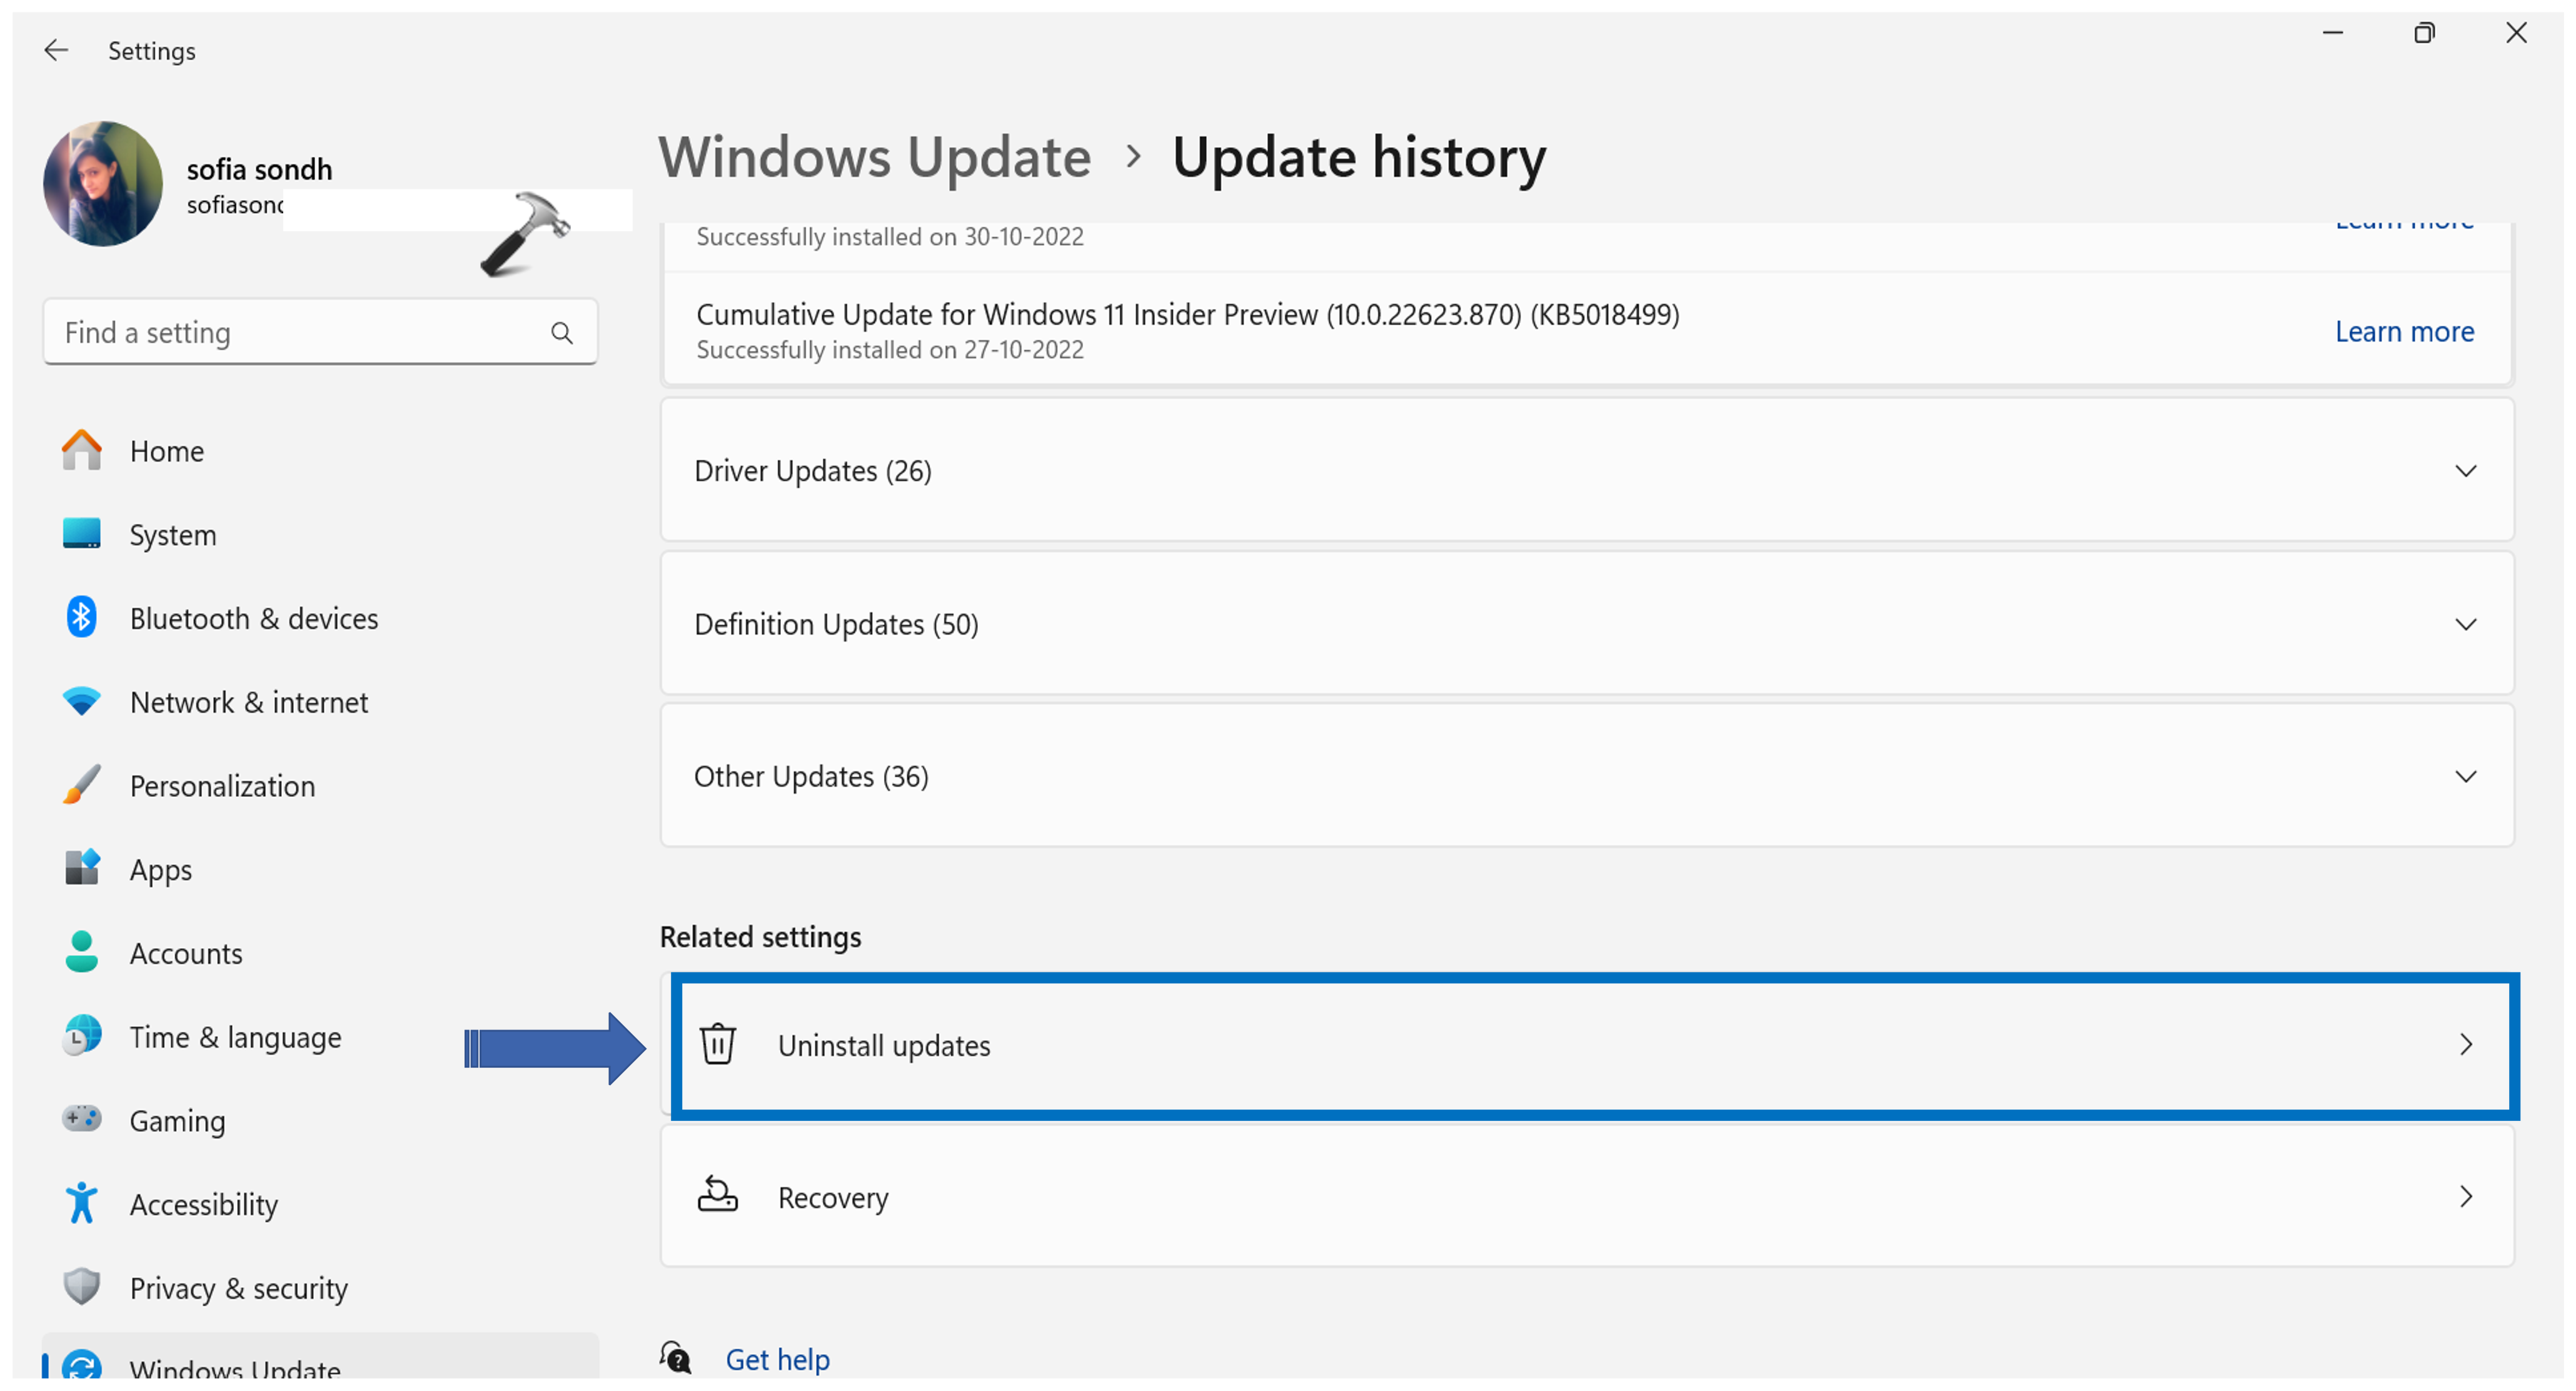
2. Now, click on “Update history“.
3. Click on “Uninstall updates“.
4. Check the recently installed update and click “Uninstall“.

5. If the issue persists even after uninstalling the recently installed update, you may need to uninstall additional updates to resolve the problem.
That’s It!