Adjusting brightness to a comfortable level is a quite simple and important feature in a laptop, especially when you are using your device for long hours. There are generally physical keys on the keyboard to adjust it, but sometimes users complain that they do not seem to work. But there are some fixes for it. This article shows you different ways you can fix system brightness not working in Windows 11 devices.

Page Contents
Fix: System brightness not working in Windows 11
Fix 1: Disable Auto-Brightness
If auto-brightness is turned on, that is what’s stopping you from adjusting brightness manually. Here’s how you disable it.
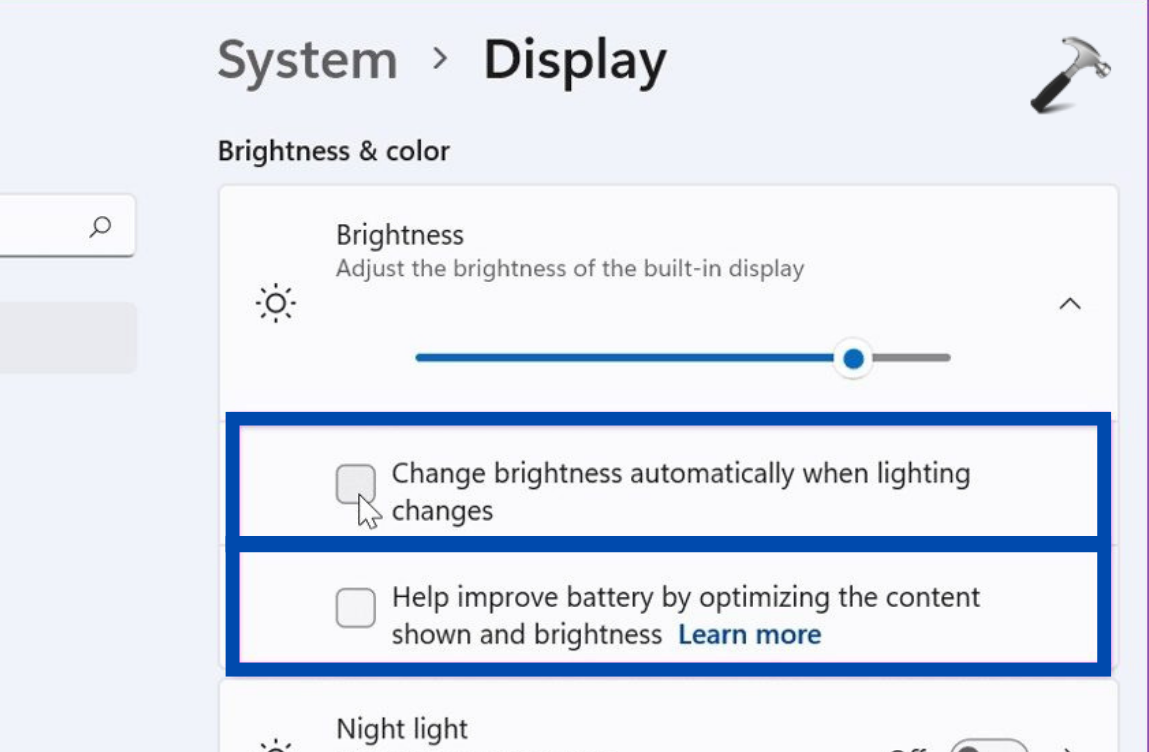
- Open Settings and go to System > Display.
- You will see the option of Brightness here under the Brightness & color section. Click on the arrow you see to its right. Uncheck the boxes against ‘Change brightness automatically when lighting changes’ and ‘Help improve battery by optimizing the content shown and brightness.’
Fix 2: From the Action Centre
If the function keys are not working, you can do it from the action centre on the taskbar.
Simply press ‘Win + A’ to launch the action centre or click on the left of the clock on your taskbar. Adjust the brightness at the level of your comfort from here.
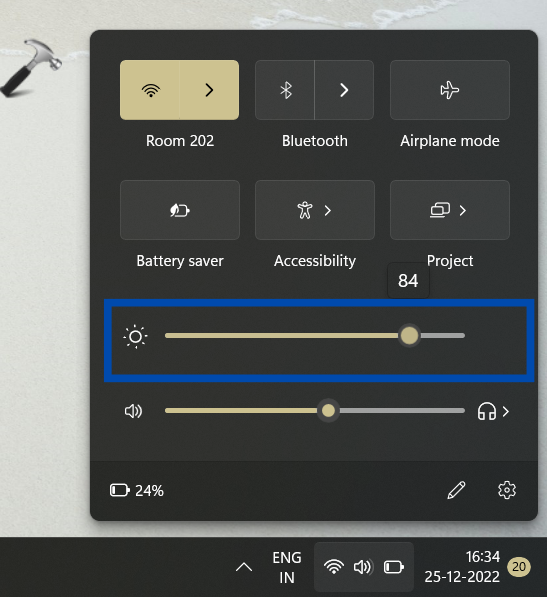
Alternate option is to do it from the Settings app. Open the Settings and go to System > Display. Under Brightness and color, you will see brightness bar. Manually adjust it from here.

Fix 3: By repairing System Files
- Right click on the Windows icon and select Terminal (Admin).
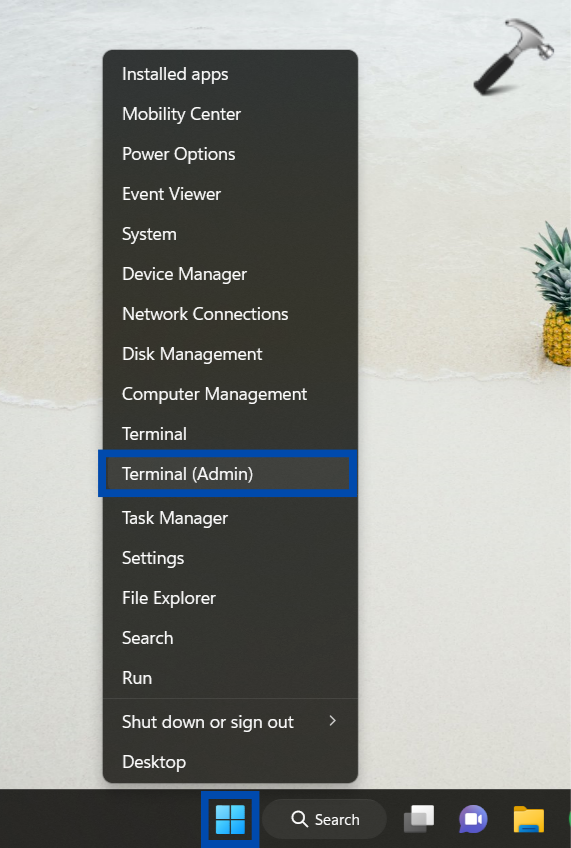
- On the black screen that appears, type the following command, and hit enter.
sfc /scannow
System will now scan for problems in the systems and suggest options to fix it. Reboot your Windows PC after that and see if the problem is resolved.
Fix 4: By updating Display Driver
Updating the display drivers that may be corrupted or outdated can solve the issue at hand.
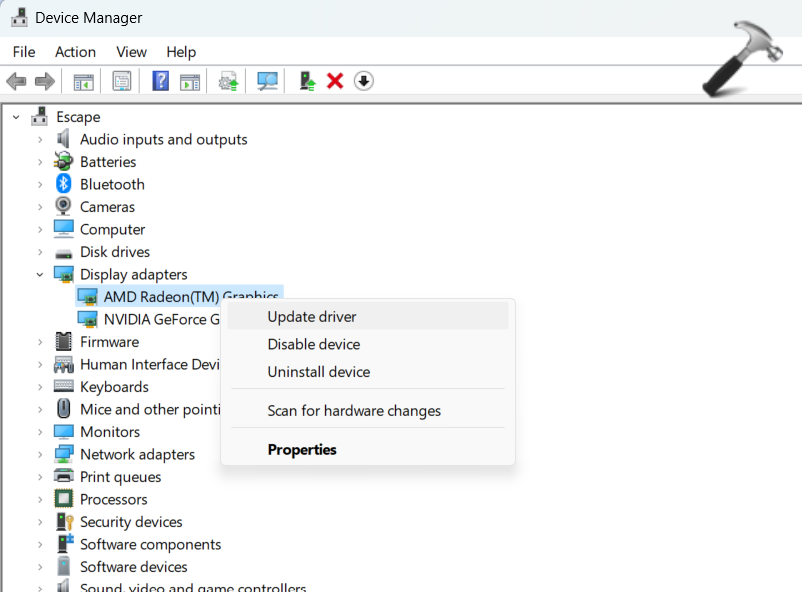
- Search for Device Manager in the Start Menu and open it.
- Here, expand Display adapters, right click on the display driver, and select Update driver.
Now, follow the instructions on the screen. Once done, see if the issue is resolved.
Fix 5: Update Windows 11
Open the Settings application and go to Windows Update. Check if there are any updates. If there are, download and install the update. It could be the cure to the problem you are facing.

Fix 6: Use Microsoft Basic Display Adapter
You can try switching to Microsoft’s basic display adapter driver.
- Follow steps 1 and 2 as shown in the fourth option. Click on Update driver. In the next dialog box that pops up, select Browse my computer for drivers.
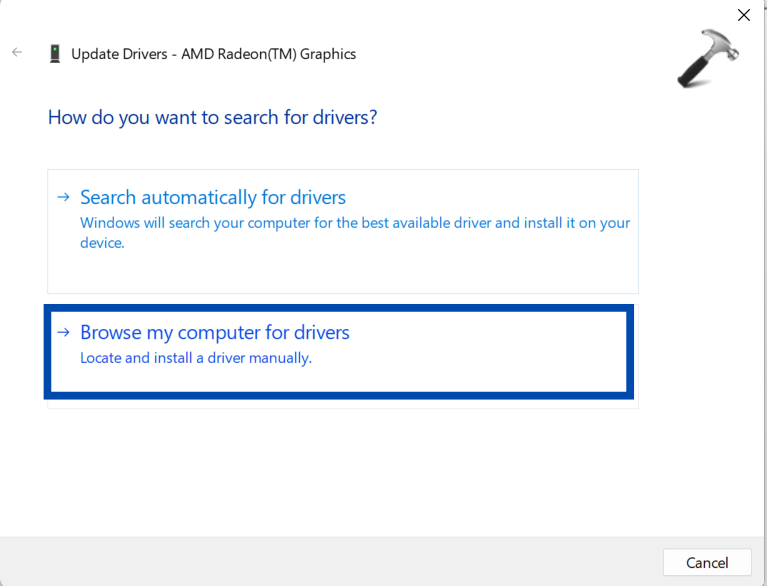
- click on the Let me pick from a list of available drivers on my computer link.

- Next, select Microsoft Basic Display Adapter and click on Next to install it.

Once it is installed, restart your PC, and then check if the issue is resolved.
Fix 7: Re-enable generic Monitor Driver
Last option is to try disabling the Generic PnP monitor driver and enabling them again.
- Open Device Manager by searching for it in the Windows menu.
- Expand Monitors, right click on Generic PnP Monitor and select Disable device.

- Restart you PC.
- Using the same steps above, select Enable Device this time.
Now, check if the issue is solved. One of these fixes will solve your problem.
Video fix
Check video fix for further help:
Hope it helps!