
System Restore in Windows 11 allows users to revert their system to a previous state, providing a lifeline when things go wrong. However, there may be times when you find the System Restore option greyed out, preventing you from creating a restore point. This article will guide you through the steps to troubleshoot and fix System Restore greyed out in Windows 11, enabling you to use System Restore effectively once again.
Page Contents
Fix: System Restore greyed out in Windows 11
The System Restore option in Windows 11 can be greyed out due to several reasons:
- System Protection is disabled: The System Restore feature relies on System Protection, which needs to be enabled for each volume in your hard drive. If System Protection is turned off, especially for the Windows boot drive (commonly C: drive), the System Restore button will be greyed out.
- Corrupted System Files: If system files are corrupted, it can affect the functionality of System Restore.
- Third-Party Antivirus Software: Some antivirus software can interfere with System Restore, causing it to be greyed out.
- Incorrect System Settings: Certain system settings or policies, if incorrectly configured, can disable System Restore.
- Corrupted Restore Point: If the selected restore point is corrupted or no longer available, Windows may encounter errors during the System Restore process.
- Disk Errors: Issues with your hard drive can prevent Windows from accessing the restore point data.
Below are the three best solutions to fix the issue.
Solution 1: Fix System Restore greyed out in Windows 11 using Group Policy Editor
1. Press the Windows Key + R. Type gpedit.msc and then press Enter. 2. Navigate to the following path:
Computer Configuration > Administrative Templates > System > System Restore
3. First, double-click on the “Turn off configuration” policy. 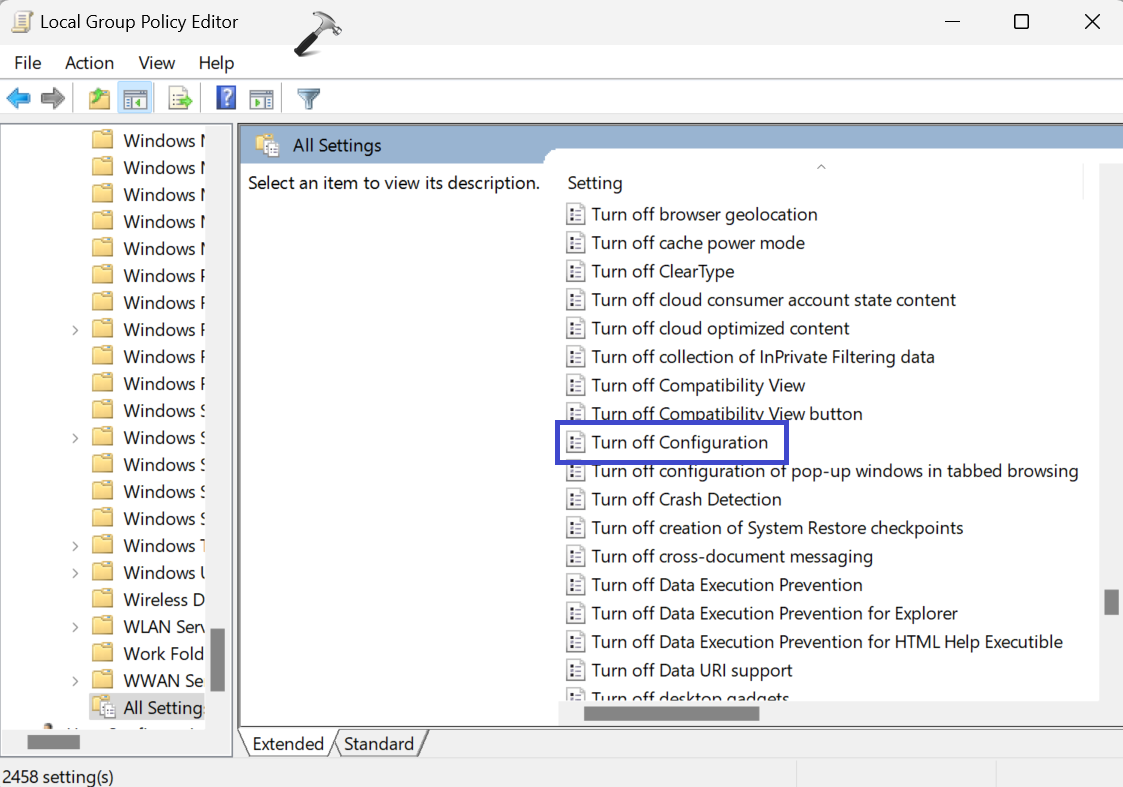 A dialog box will appear. Select “Disabled“. Disabling this will enable the system restore button for C: drive.
 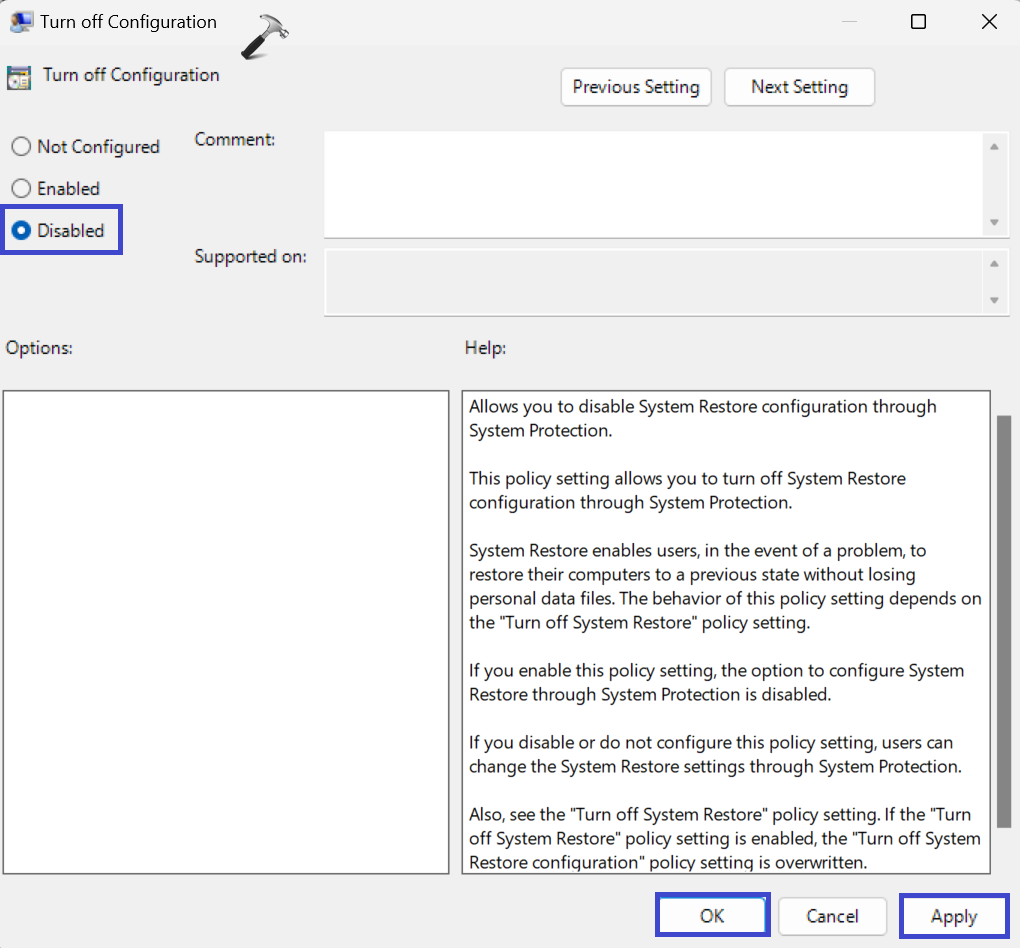 4. Secondly, double-click on “Turn off System Restore“.
  A dialog box will appear. Select “Disabled“. Disabling this will enable Configure in system protection for C: drive.
  Close all the Group Policy Editor windows and restart the PC. Now, check whether the issue is solved or not.
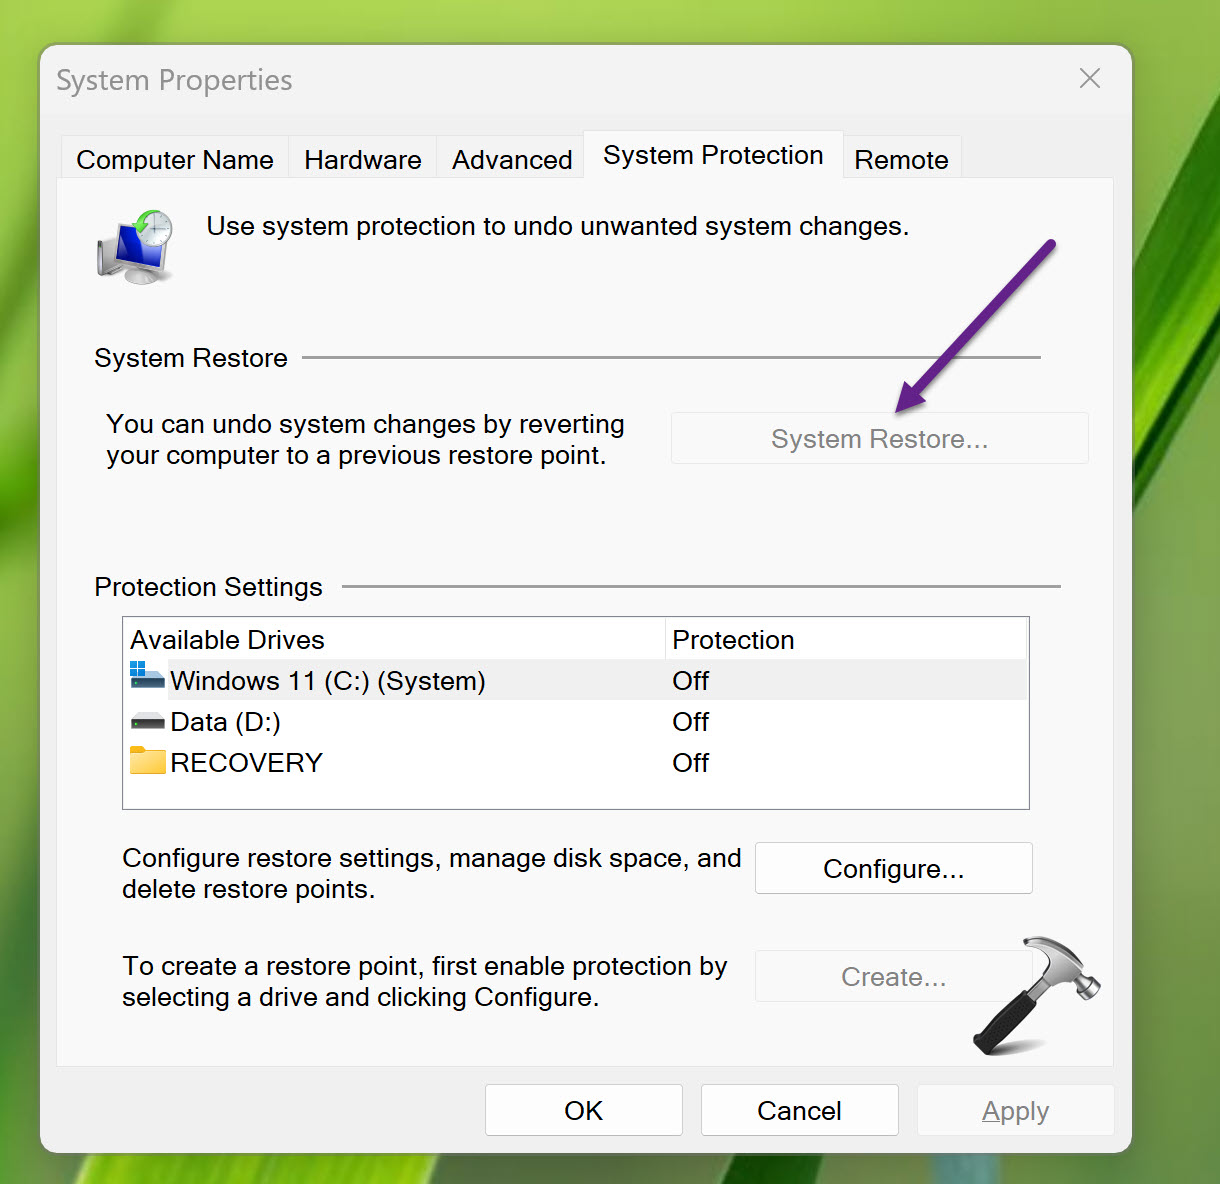
Solution 2: Fix System Restore greyed out by Enabling System Protection
1. Open the Settings app. Navigate to System and click “About“. 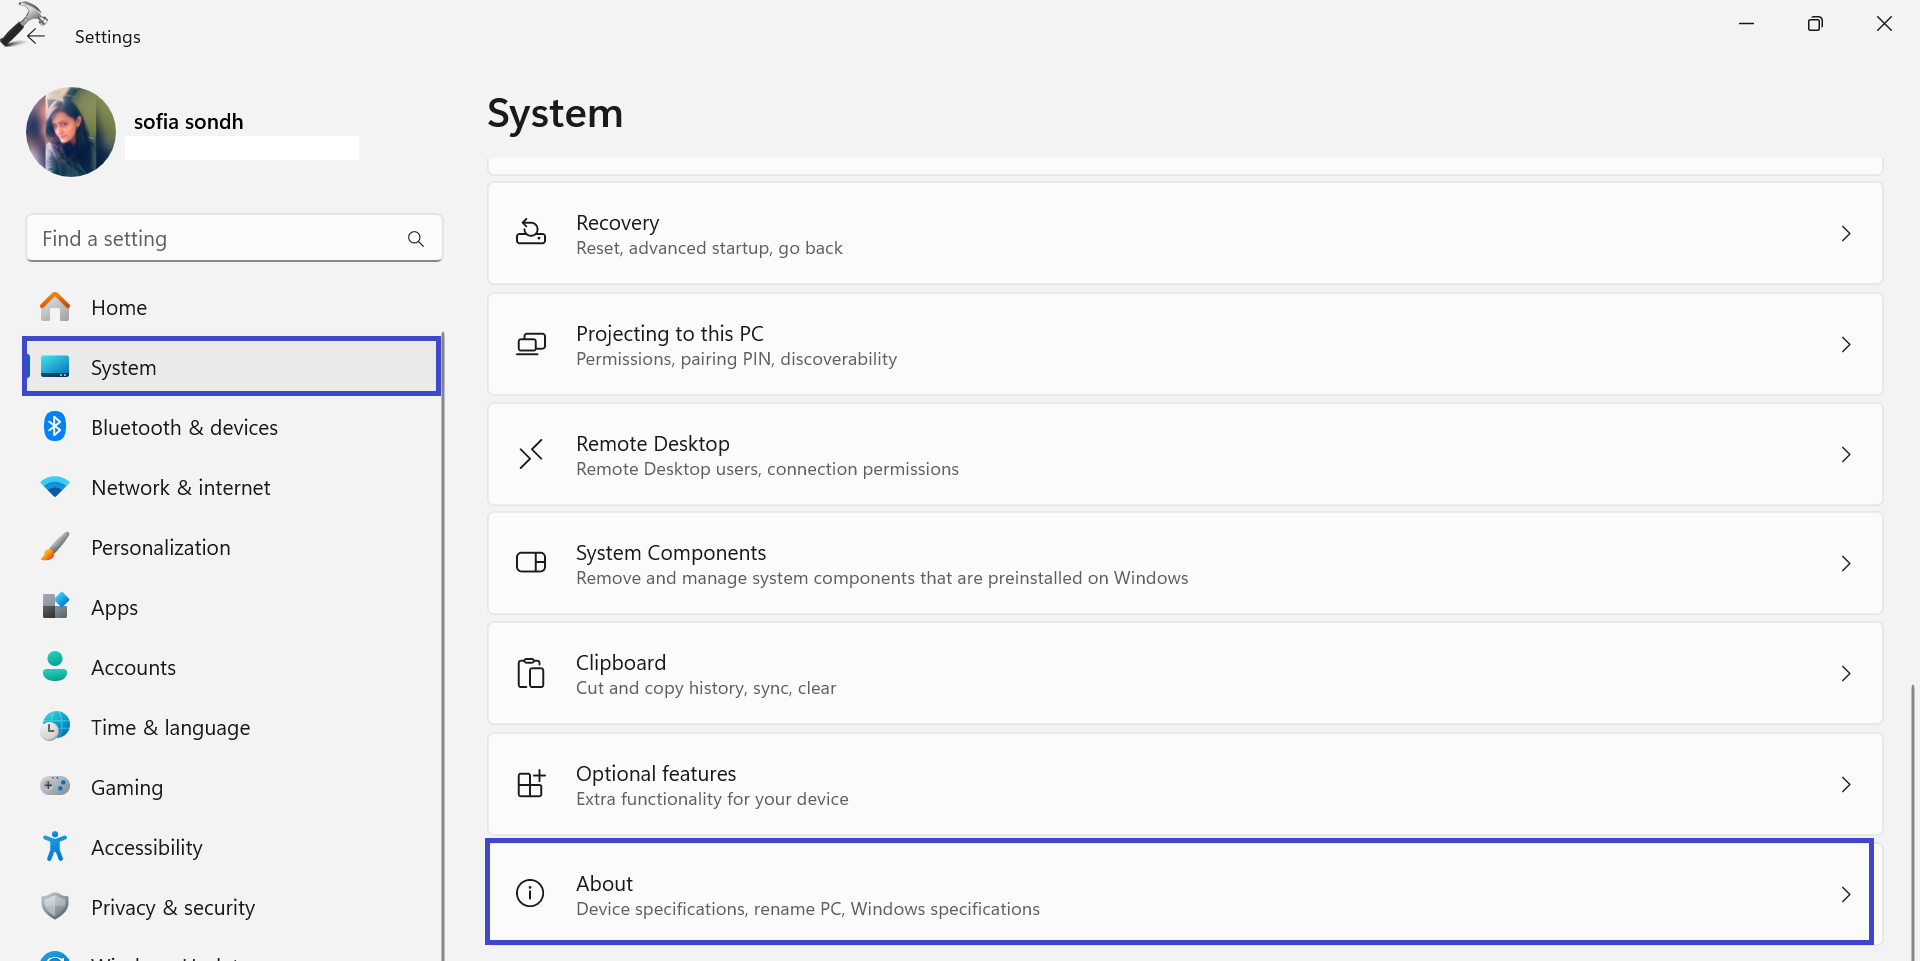 2. Click on “System protection“.
  3. A dialog box will appear. Under the “System Properties” tab, select C: drive (Drive where the Windows is installed).
 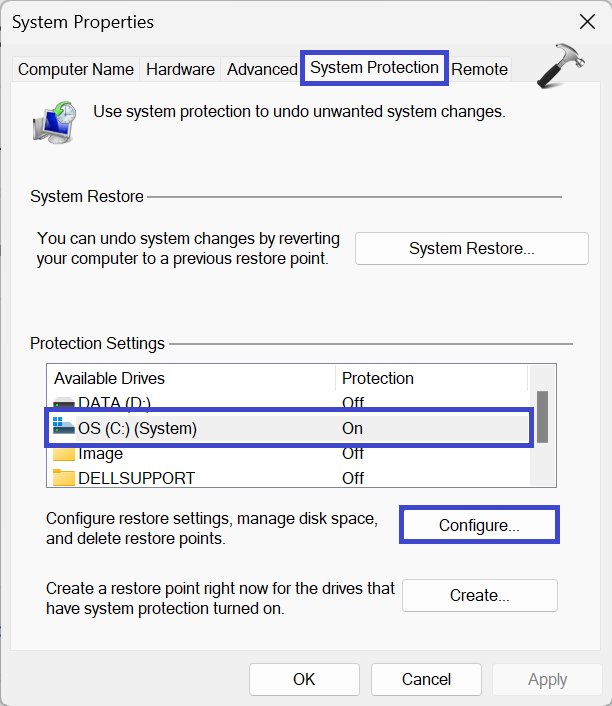 4. After that, click on “Configure” option. 5. A System Protection for Windows (C:) dialog box will appear. Turn on the “Turn on system protection” option.
 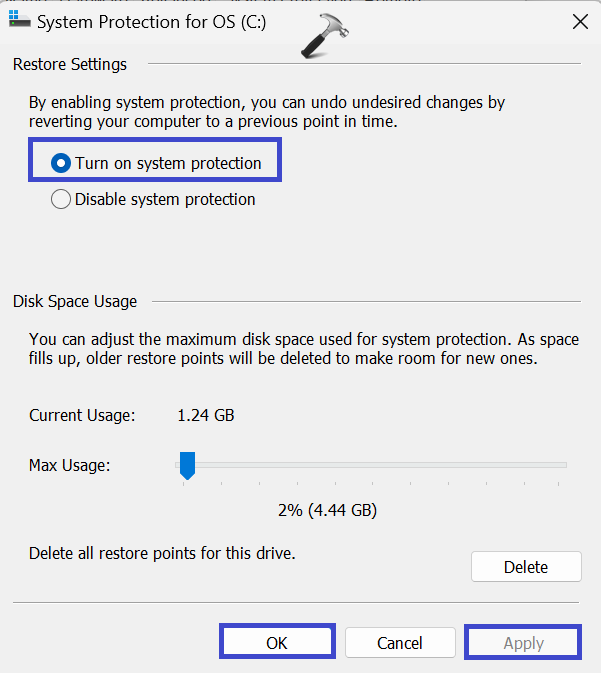 Click OK followed by Apply. 6. Under the “Protection Settings” tab, C: drive protection is turned ON.
 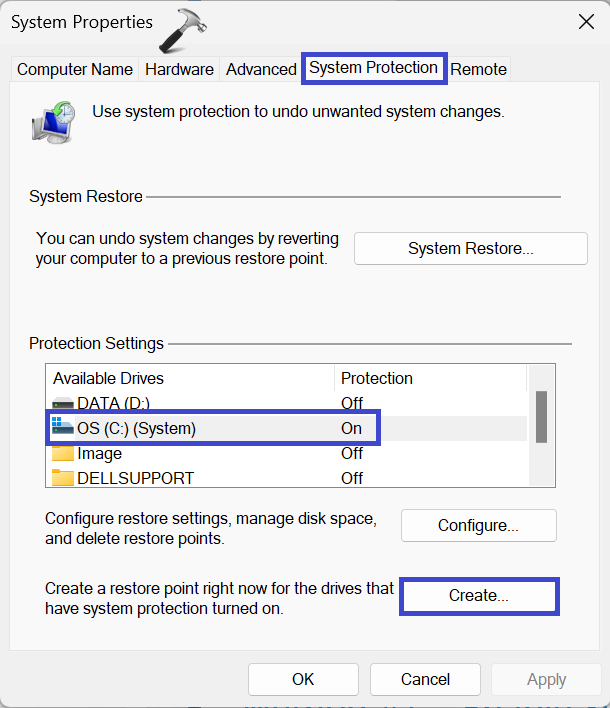 Then, click on “Create“.
Solution 3: Fix using Windows PowerShell
1. Open the Windows PowerShell and run as administrator. 2. Copy and paste the below command, assuming C: is drive where Windows is installed:
Enable-ComputerRestore -Drive "C:\"
 Press Enter. 3. If you want to disable the system protection settings, then use the below command:
Disable-ComputerRestore -Drive "C:\"
Press Enter. That’s It!
