If your system was working perfectly but suddenly you came across an issue, you might want to restore it last known good configuration. The System Restore feature in Windows is there to meet this requirement. If you have earlier created System Restore points, when your system was working fine, you can use the restore point to go back to that state. This restore process will revert all the changes you have made after creating the System Restore point to which you’re restoring. Note that it won’t affect your personal files in user account folder. In this article, we will see step-by-step process to restore your Windows 10 to a System Restore point.
When the system protection is on, Windows will automatically create system restore point when you install an app, Windows Update or a system driver. Also, you can manually create a System Restore point any time you want. Here is how you can restore to our earlier created System Restore point.
Restore your Windows 10 using System Restore point
1. Press  + R to open Run, type
 rstrui.exe command and press Enter key or click OK.

2. In the System Restore window, if you have already created the System Restore point(s), you should be able to click on Next button here. If there are no restore points created earlier, you cannot proceed from here.

3. In the next window, select a System Restore point to which you want to restore your Windows 10 and click Next.

4. Moving on, confirm the details of your selected restore point. Make sure that you select the correct to restore point. Click Finish button here to initiate restore process.

5. Once you start system restore process, it cannot be interrupted. So make sure you have enough battery, if you are on a laptop or tablet. Click Yes, once you are ready for starting the restore process.

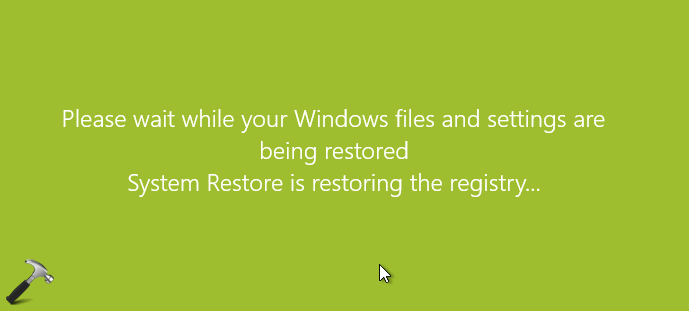
6. Your system will now prepare first for the restore process. After that, it will restart and you will see the screen shown below. The system process restore process may take few minutes, depending upon how much files are being restored. So keep patience, and check back in a while.
7. Once the System Restore process has completed, your system will be doing a final restart. After reboot, you will be notified if the system restore was successful or not. As you can see in the screenshot mentioned below, the restore process was successful.

If you get System Restore did not completed successfully error, see this fix.
So this is how you can restore your Windows 10 to a System Restore point.
That’s it!
Read next: How to create a System Restore point in Windows 11.