
The Software Protection service (SPS) ensures you’re using a genuine, licensed copy of Windows and facilitates the delivery of crucial security updates. However, sometimes you might encounter an error message stating “The Software Protection service has stopped.” This can disrupt important security functions. In this guide, we will provide step-by-step instructions on how to fix the “Software Protection service has stopped” in Windows 11 using built-in Windows tools.
Page Contents
What is a Software Protection Service?
The Software Protection Service (SPS), also known as sppsvc.exe, is a built-in component of Windows that plays an important role in maintaining your system’s security and integrity.
Key functions:
- Genuine Windows Validation: Ensures your copy of Windows is legitimate and activated, preventing the use of pirated software (security risks).
- Windows Update Management: Works behind the scenes to deliver critical security updates that fix vulnerabilities and protect your system.
- Software Tampering Detection: Monitors system files for unauthorized modifications, preventing potential security compromises.
The Error Message “Event ID 903. The Software Protection service has stopped”
The error message “Event ID 903. The Software Protection service has stopped” indicates that the SPS is no longer functioning.
This can happen for various reasons, such as:
- Temporary Glitch: Sometimes, a temporary issue might cause the service to stop unexpectedly.
- Conflicting Software: In rare cases, other software installed on your system might interfere with the SPS.
- System File Corruption: Corrupted system files can also lead to service stoppage.
Fix: The Software Protection service has stopped in Windows 11
Below are different ways to fix it and get the Software Protection service running again.
Fix 1: Using Windows Service Manager
To address the problem, you have two options within the Windows Service Manager:
- Starting the service directly
- Checking service dependencies
Option 1: Start the service directly
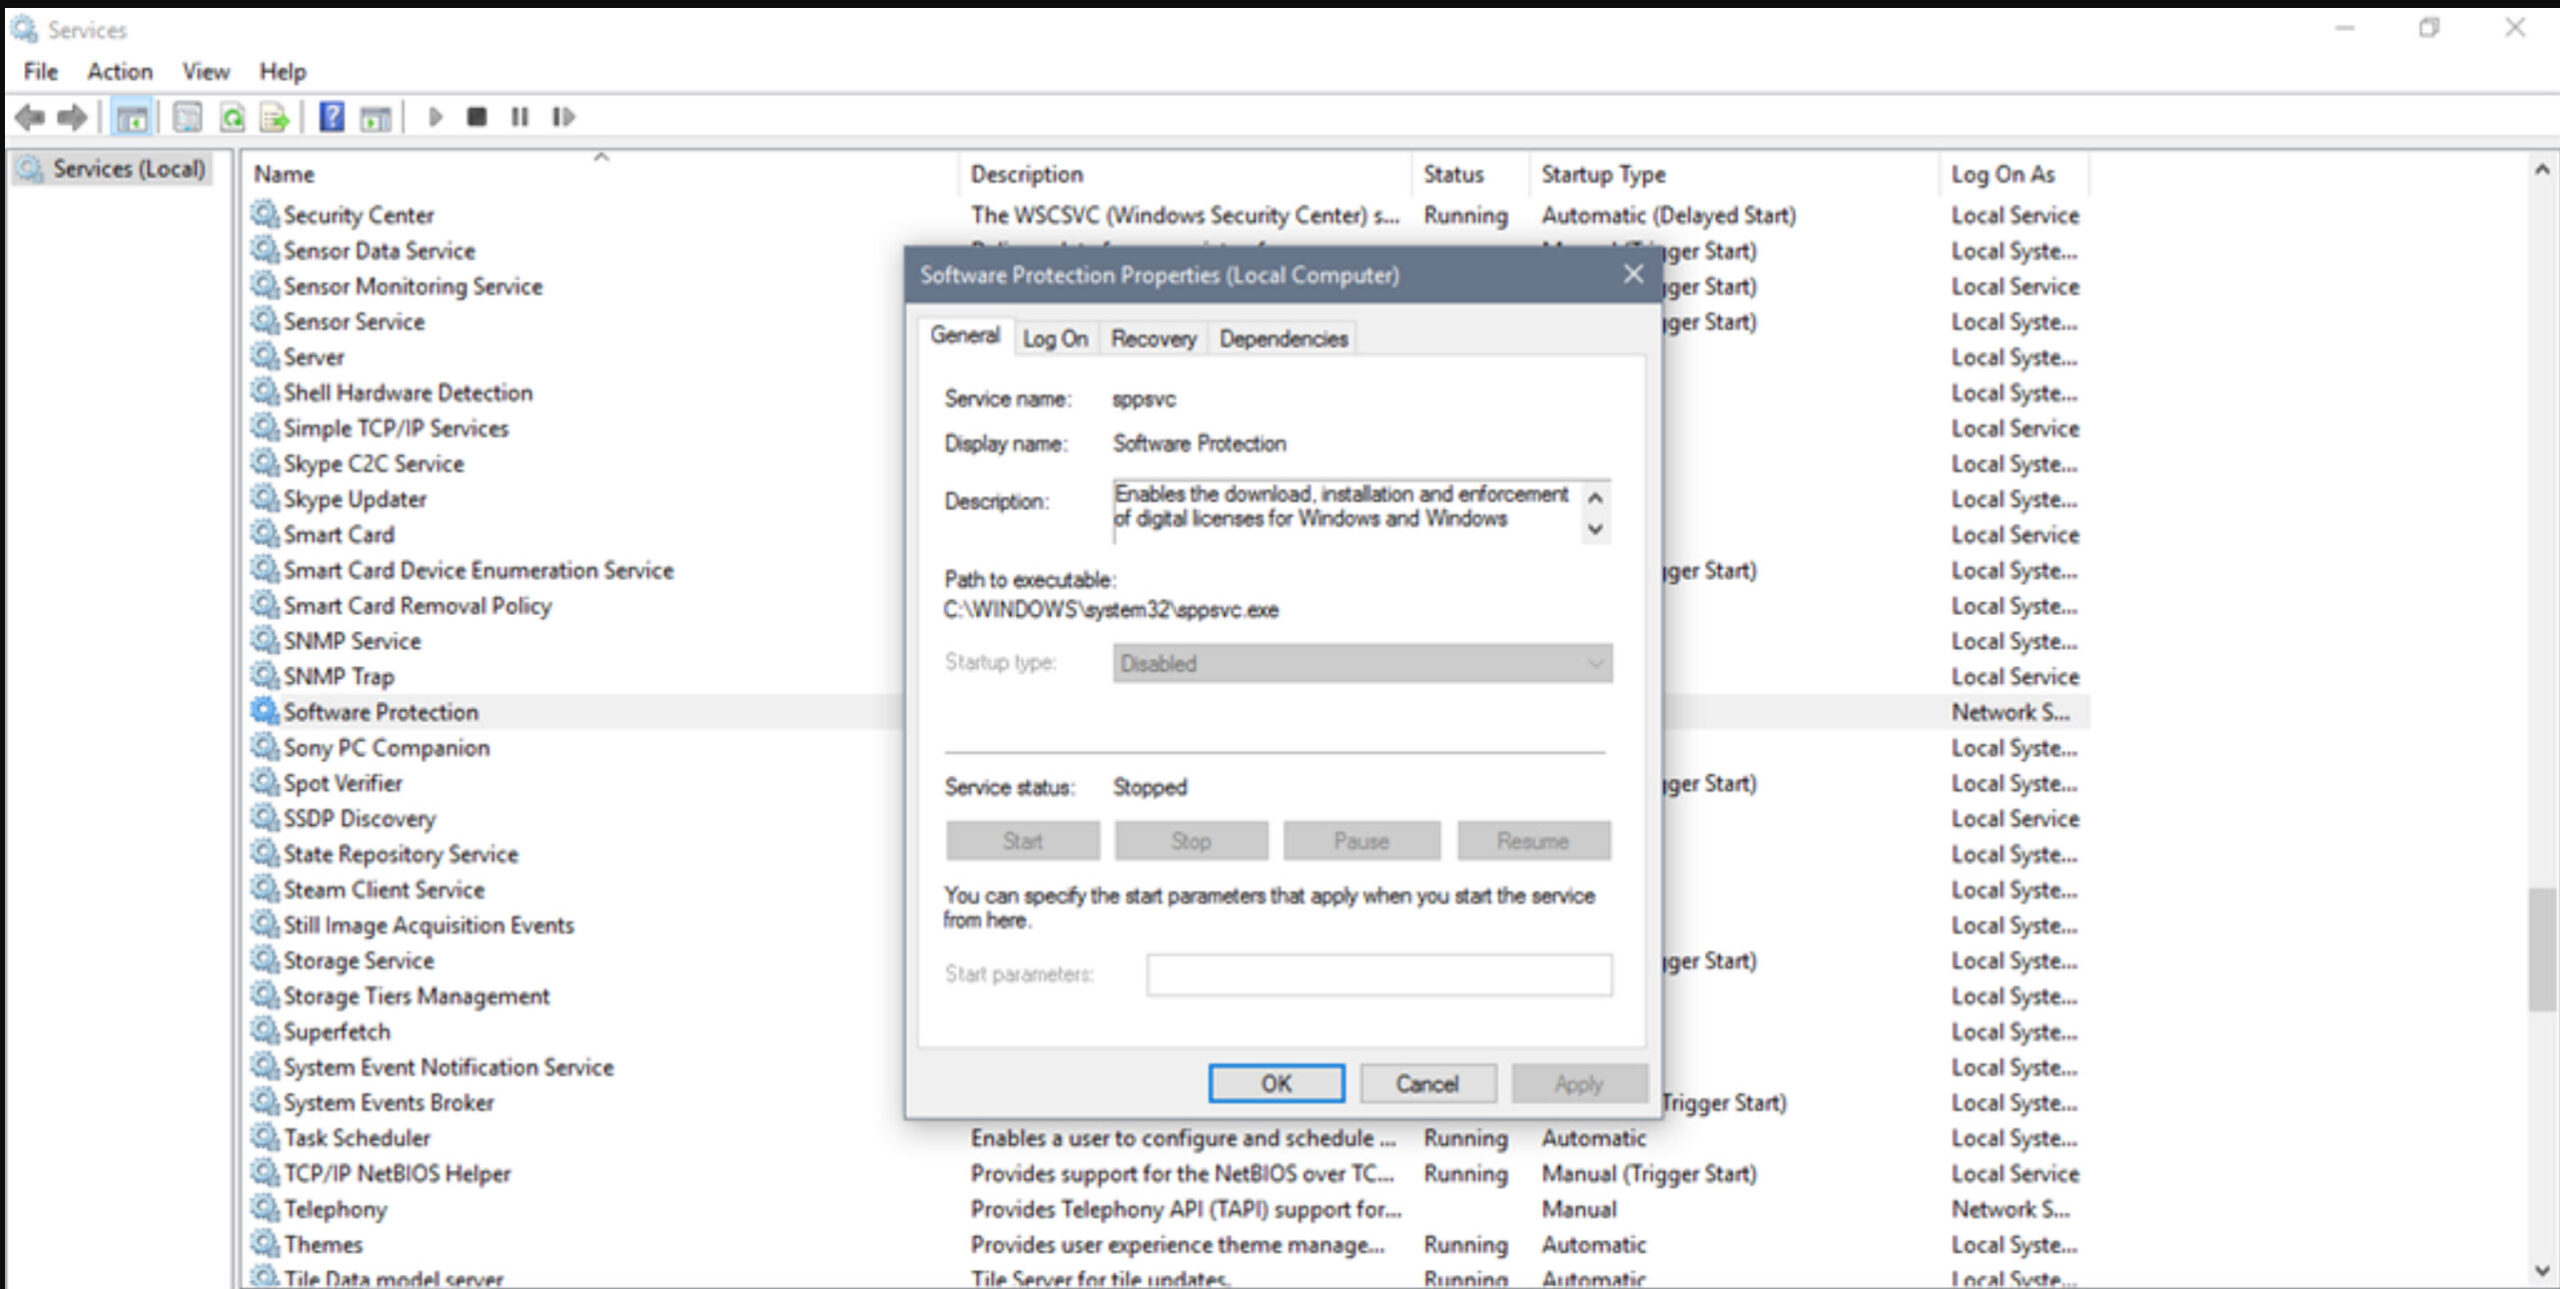
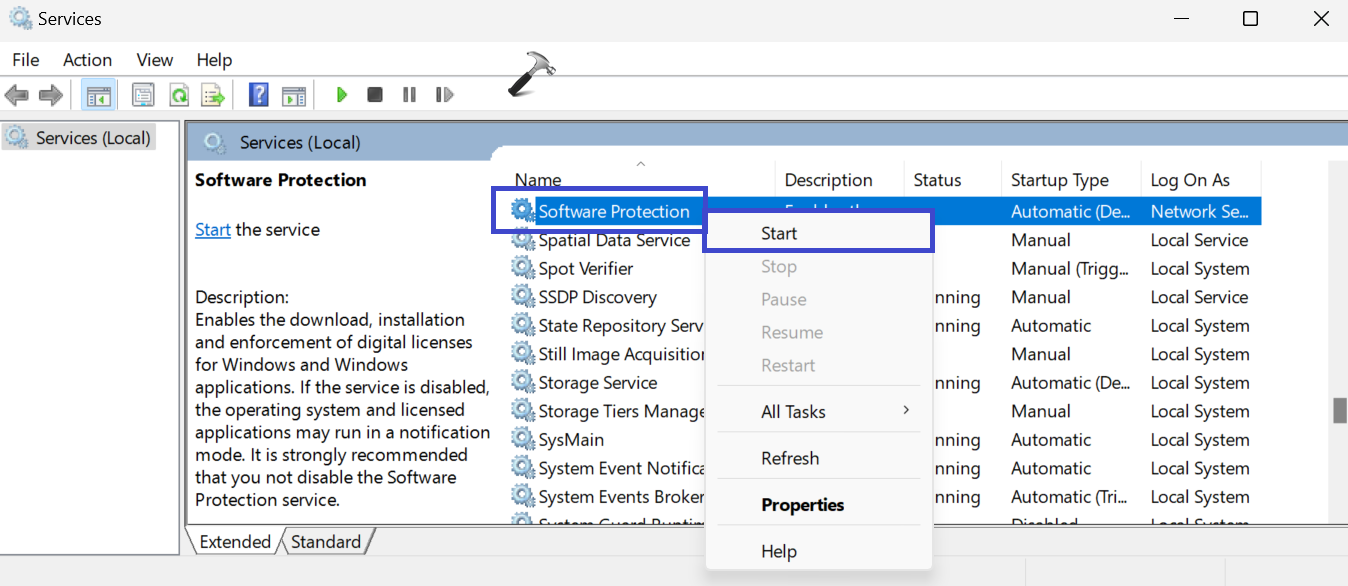
1. Press the Windows key + R. Type “Services.msc” and click OK.
2. Look for the “Software protection” option. Right-click on it and select “Start“.
Option 2: Checking Service Dependencies
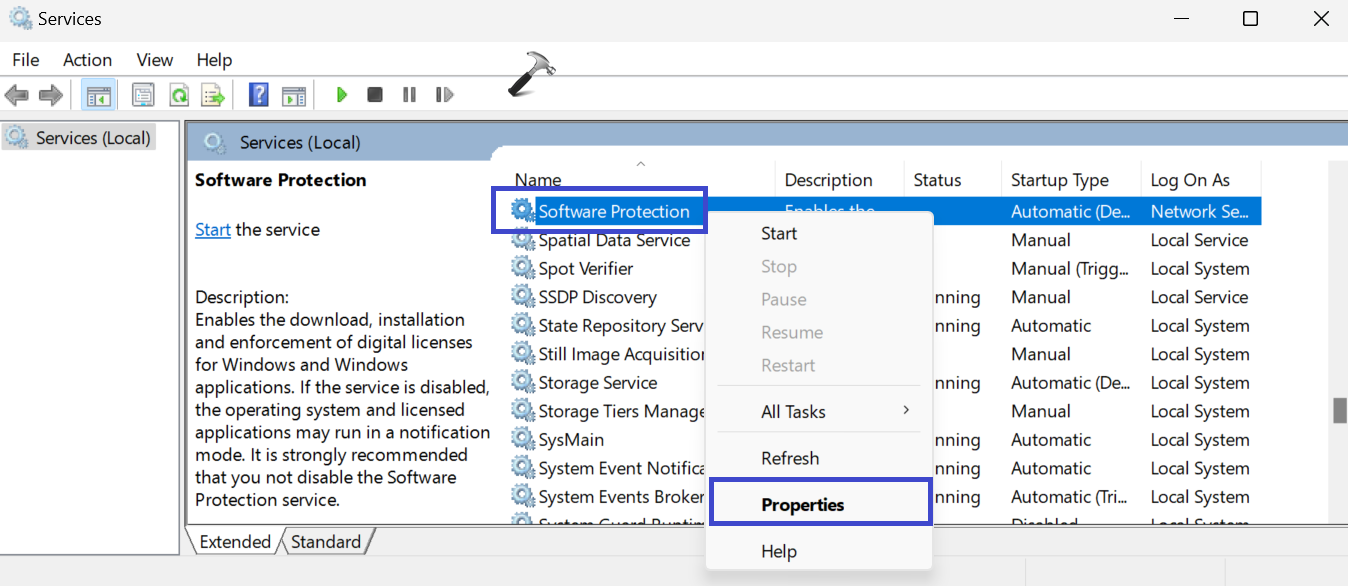
1. Press the Windows key + R. Type “Services.msc” and click OK.
2. Right-click on the “Software Protection” option and select “Properties“.
3. Under the Dependencies tab, expand the “Remote Procedure Call (RPC)” option to check the dependent services with RPC.

Look for services under the “Remote Procedure Call (RPC)” category. In the “Status” column, verify the “Running” status.
If any dependent service isn’t running, right-click on each non-running service and select “Start“.
Fix 2: Using Windows Task Manager
The Software Protection Service is an essential component of Windows security. sppsvs.exe helps to keep your system protected against malware, pirated software, and potential security vulnerabilities.
1. Open the Task Manager.
2. In the left panel, go to services. Search for sppsvs. This is the executable file associated with the Software Protection service.
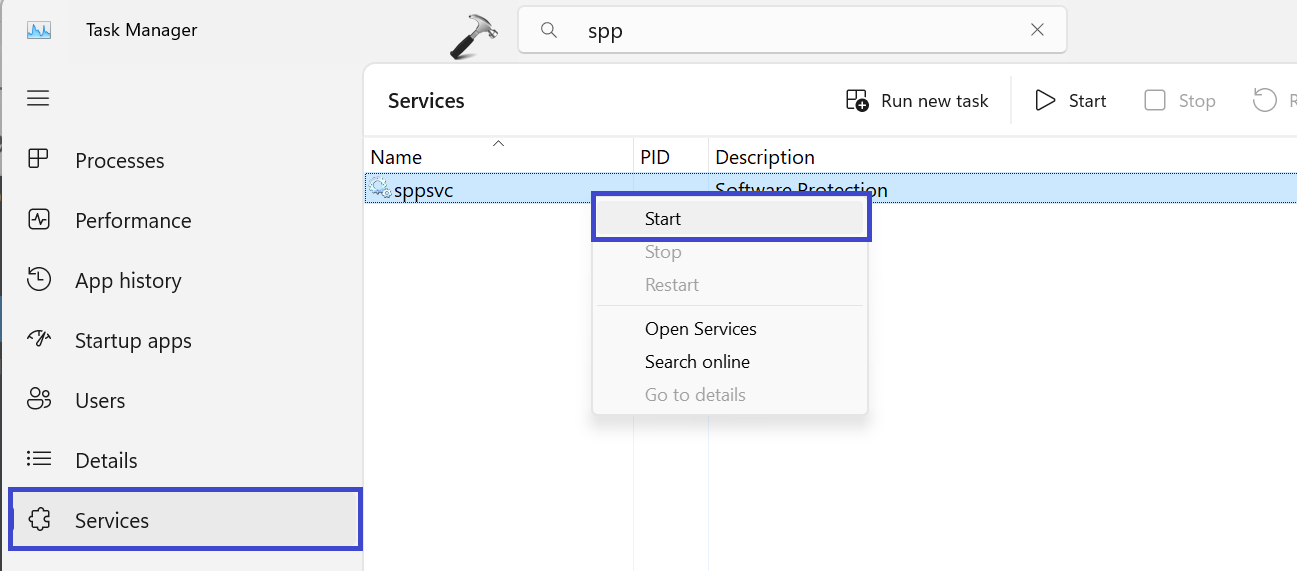
3. Right-click on it and select “Start“.

After starting the service, under the “Status” column, you will see the “Running” option.
Fix 3: Using Registry Editor
The Software Protection service usually functions without needing special permissions. However, in this case, granting network access to a specific registry key might be necessary to resolve startup issues.
1. Press the Windows key + R. Type “regedit.exe” and click OK.
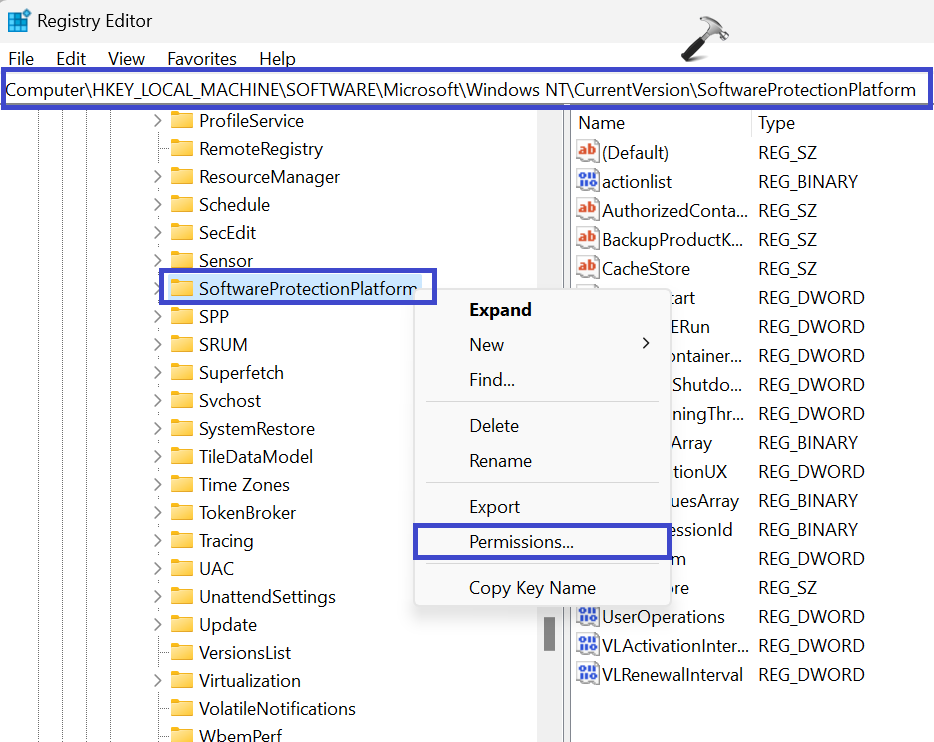
2. Navigate to the following path:
Computer\HKEY_LOCAL_MACHINE\SOFTWARE\Microsoft\Windows NT\CurrentVersion\SoftwareProtectionPlatform
3. Right-click on “SoftwareProtectionPlatform” and choose “Permissions“.
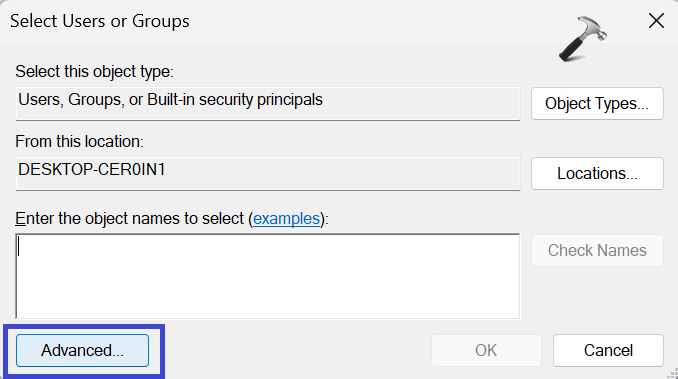
4. Click the “Add” button below the “Group or user names” section.

5. After that, click the “Advanced” option.
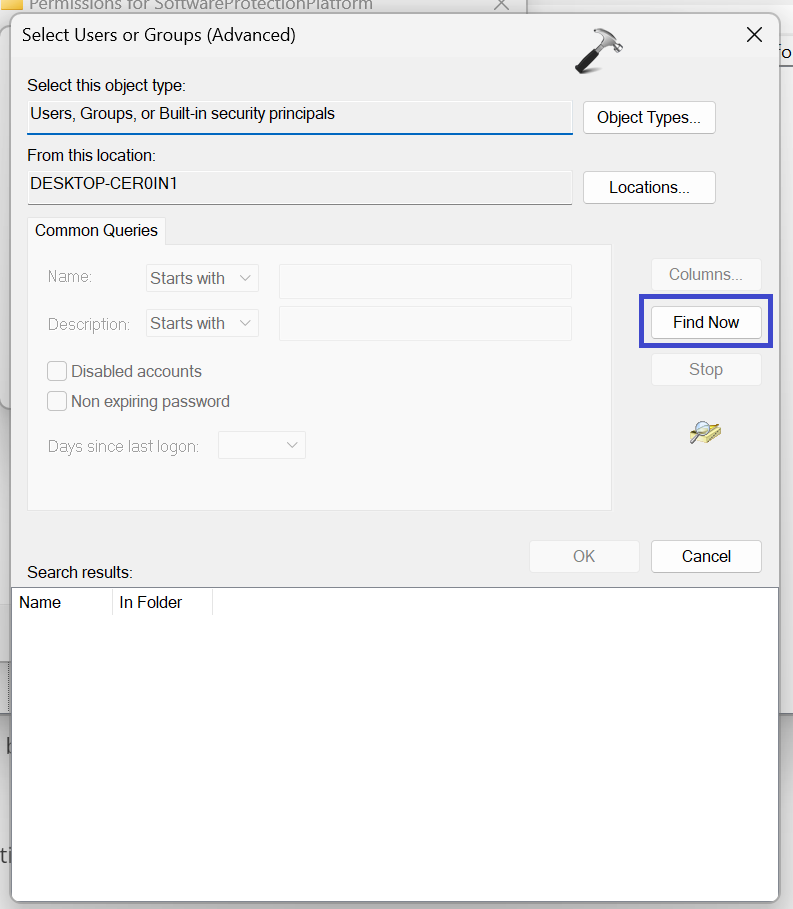
6. A Select User or Groups (Advanced) prompt box will appear. Click on “Find Now“.
7. Select the “NETWORK SERVICE” and click OK.
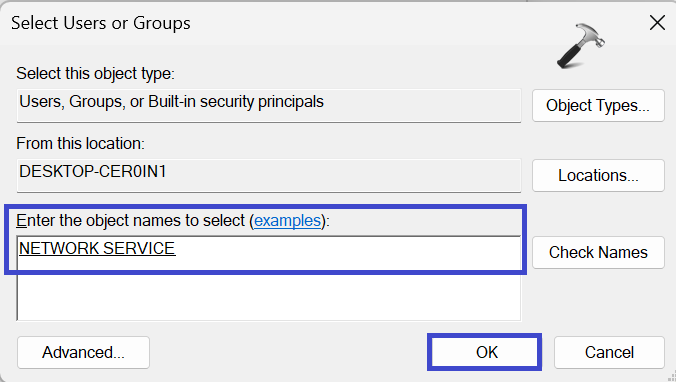
8. Now, you will see the “NETWORK SERVICE” option under the Group or User Names section.

Under the Permissions for NETWORK SERVICE section, tick the “Allow” option for the “Full Control” option.
9. Click OK followed by Apply.
After granting network permissions, try restarting the Software Protection service (SPP service) using the methods mentioned in previous fixes.
That’s It!


Thank you I owe you one.