The USB (Universal Serial Bus) interface is the most common port for data transfer between a host device and a peripheral device. For the majority of computer users, the system merely enables the use of various devices by connecting them via a USB port, such as a mouse, keyboard, portable hard drive, etc. Furthermore, a lot of users utilize portable USBs to transfer data between PCs. However, among the most frequent issues with this, a USB drive not working in Windows 11, is a common one. Even though Windows 11 is a brand-new operating system, it still occasionally has USB device issues.
Page Contents
What happens when the USB drive doesn’t work?
You may occasionally receive a message saying “USB device not recognized” or discover that the USB device is not functioning after plugging a USB drive into your Windows computer. Consequently, you won’t be able to access any saved files on the USB drive and it will become inaccessible from file explorer.
How to fix a USB drive not working in Windows 11?
The USB drive not recognized error frequently has to do with the USB controller or device drivers and certain power-saving features. While it can be challenging to identify the precise cause of your USB device’s failure to work on a Windows 11 computer, you can try the following fixes until it starts working again.
1. Analyze the USB device
You should check for potential damage before attempting any drastic fixes to your computer’s USB. Remove the device and re-connect it. Check the USB port and cable for damage, and repair or replace it if necessary. Plug the device back in and check to see if it resolves the USB not working error on Windows 11 after checking for damages and cleaning the USB port.
2. Restart the PC
First and foremost, restart your computer if you encounter this problem because it can be resolved in this way if your USB device isn’t recognized by Windows 11. After rebooting, Windows should detect your USB device if there’s a software problem and, if necessary, install any missing drivers. Restart your PC by –
- Keep the USB device plugged in
- Right-click on the Start Menu
- Choose Shutdown or sign out → Restart

3. Windows Update
It’s essential to keep your Windows 11 OS up-to-date as the latest Windows updates may contain fixes for defective USB ports or flawed devices in addition to general usability strengthenings. Follow these steps to see if a Windows update is available or not –
- Go to Windows Settings or just press the Windows key + I
- Then, go to Windows Update → Check for updates

After that, Windows will automatically check for the latest available update and download it. When the download is over, you have to restart your PC to accurately install the update.
4. Different USB port
If you are certain that your device is functioning properly and that the issue may be with the USB port, then the solution is straightforward. Simply switch the USB drive from the port you’re using to another port. If Windows 11 recognizes the device and it functions flawlessly, the old port may need some repair.
5. Reinstall the USB Drivers
Another workable method is to make sure that your USB drivers are installed with the latest patch. Or just follow the steps to check for updates and install if available –
- Insert your USB drive into your system
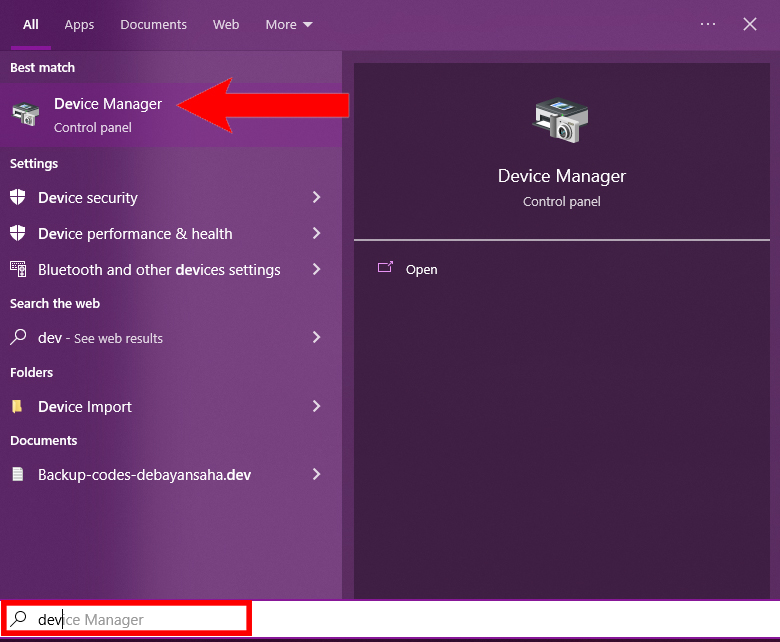
- Open Start Menu
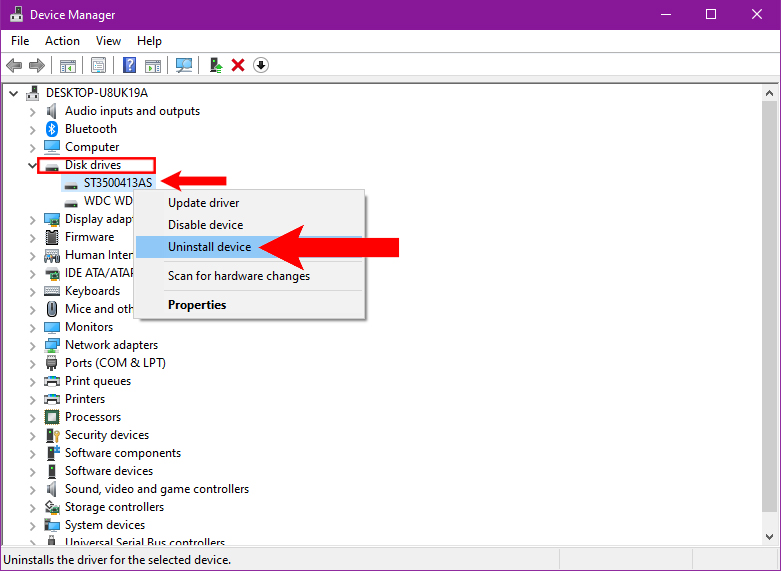
- Search “Device manager” and open it
- In there, locate Disk drives and double-click on it
- Then find your particular USB drive with the error and right-click on it
- Choose Uninstall device
- Again on the next window, choose Uninstall

- Unplug your USB device
After that, wait for 2-3 minutes and plug in your USB device again, and it should fix the issue.
6. Change the USB device
The issue might be with the device you’re using if the USB port appears to be functional. Therefore, if Windows isn’t recognizing your device, at least temporarily, you might need to change it for another one.
For instance, a USB hard drive won’t be recognized if the drive has failed, so check to see if the device works on another PC first before thinking about replacing it. Unfortunately, it can be challenging to pinpoint the exact cause of a USB device malfunction, so check the manual or see if the manufacturer offers any support.
7. Power Management Settings
The power management settings when your laptop is running on its battery may prevent the USB drive from receiving enough power. Modifying your power management settings will help you solve this. Follow these steps –
- Press right-click on Start and open Device Manager

- Expand Universal Serial Bus controllers
- Right-click on USB Root Hub → Properties

- Navigate to the Power Management tab
- Disable the Allow this computer to turn off

- Press OK
8. Update the USB driver manually
You can manually download updates online if you don’t have an OEM tool installed by searching for your manufacturer. You should be able to find drivers and software updates available for download and installation if you simply search with the model number of your device. Although some device manufacturers will release new software and drivers more frequently than others. Follow the steps to update your USB driver manually –
- First, download the latest dedicated driver for your USB device
- Open Run by pressing the Windows key+R
- Search “devmgmt.msc” and then click OK

- Inside Device Manager, search for your USB device and right-click on it
- Choose Update driver

- Then select Browse my computer for drivers

- Then locate your previously downloaded driver and open it
Then the latest driver for your USB should be installed and the issue should be fixed.
9. SFC and DISM Scan
Your local storage will be checked for corrupted system files using the SFC and DISM tools, and those files will be repaired. Therefore, you might want to make sure that your installation of Windows 11 isn’t corrupted at this time. Follow the steps –
- Open Run (Windows key+R)
- Type “powershell” in the search box

- Press Ctrl+Shift+Enter to open as the administrator
- Write the following DISM command in the Powershell and press Enter–
DISM /Online /Cleanup-Image /RestoreHealth

- Wait for several moments and the DISM scan should be completed. Then perform an SFC scan by typing in the following command –
sfc /scannow

After the scan is done, restart your PC and check whether the USB device is working or not.
10. Suspend Power Option
The USB selective suspend power feature is another issue that might arise with USB devices. Putting inactive devices into suspension, helps a laptop’s battery to last longer. Windows will cut power to a device if it believes it is not in use, preventing it from operating, which occasionally interferes with your use of USB devices. Disable the selective suspend option –
- Open the Start Menu
- Search “edit power plan” and open

- Navigate to Change advanced power settings

- In there, go to USB settings → USB selective suspend setting → Disabled

- Click OK
Video guide
For further help, you can also refer this video fix:
Hopefully, it will solve your problem!