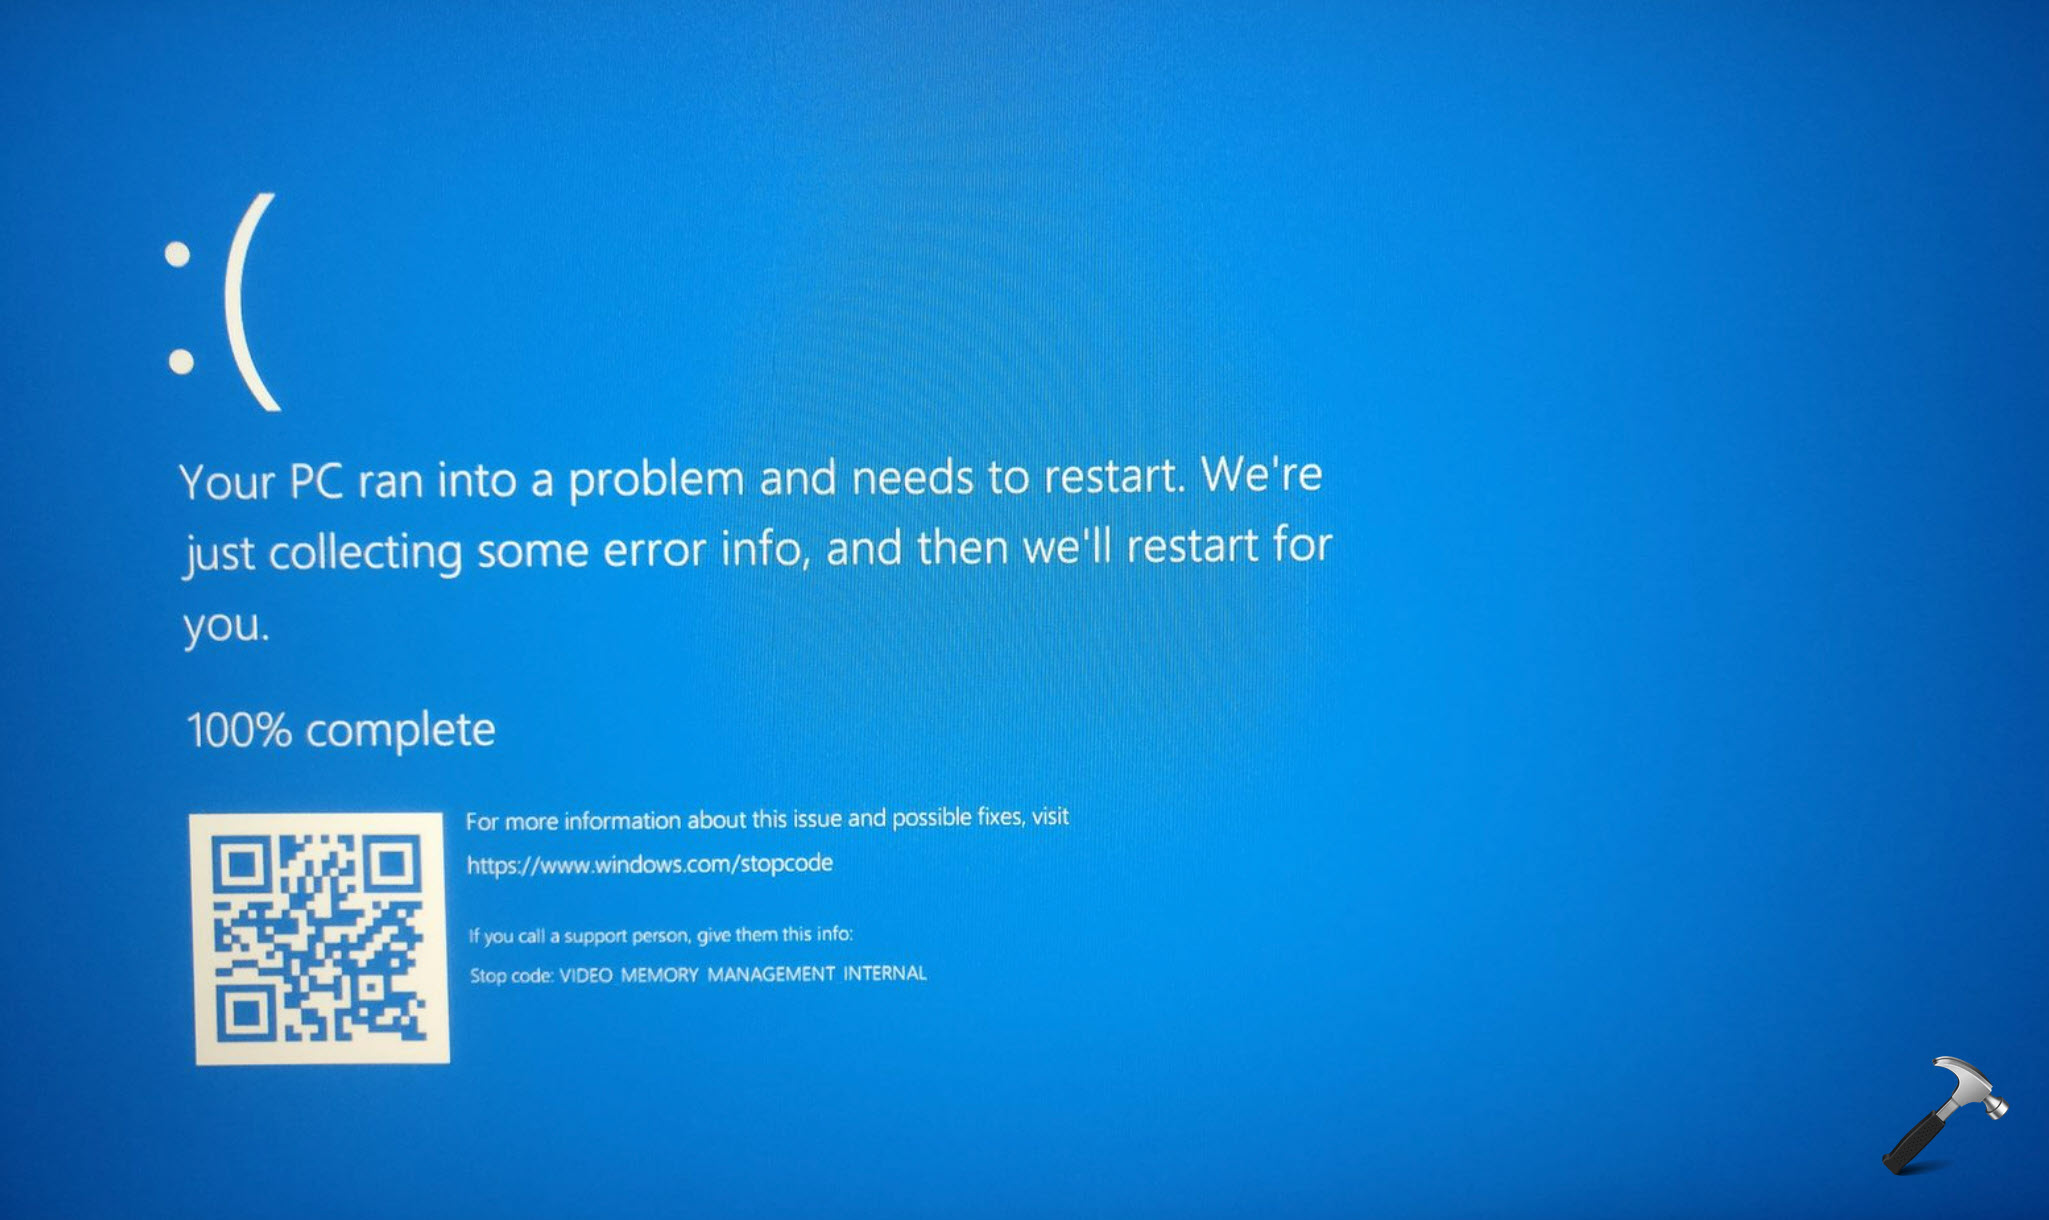
The “Video Memory Management Internal” error cropping up in your Windows 11/10 system indicates a significant glitch in the handling of video memory resources. This error can lead to crashes and weird things happening on your screen. Fixing it involves getting a bit technical, looking into things like outdated graphics drivers, problems with your computer’s boss (BIOS), and issues with the hard drive. This article will guide you to fix Video Memory Management Internal on Windows 11/10.
Page Contents
Common Causes
- Outdated Graphics Drivers: If the software that helps your computer deal with graphics is too old or doesn’t match your system, it can cause the “Video Memory Management Internal” error.
- BIOS Issues: The BIOS is like the boss of your computer’s important tasks. If it’s outdated or doesn’t get along with your system, it can create problems, including errors with video memory.
- Compatibility Mode Conflicts: Sometimes, when you try to make old programs work on your computer, it can cause conflicts and lead to the “Video Memory Management Internal” error.
- Hard Drive Errors: If there are errors or problems with the storage part of your computer (hard drive), it can mess with how video memory works and cause errors.
- Graphics Card Overclocking: Trying to make your graphics card work extra hard for better performance (overclocking) might sound good, but it can make things unstable and bring up the video memory error.
- System File Corruption: If important files in your computer are corrupted or messed up, it can disrupt how different parts, including video memory, work together and trigger the error.
Fix: Video Memory Management Internal on Windows 11/10
Below are the effective solutions to fix the “Video Memory Management Internal” error:
Solution 1: Restart the Computer
This quick fix involves a simple restart of your computer, which can often resolve the “Video Memory Management Internal” error on Windows 11/10.
Here are the steps to quickly restart your system:
1. Press the Windows key and click on the “Power” icon.

2. Click “Restart“.
Solution 2: Run the Application in Compatibility Mode
Implementing Compatibility Mode with the selected Windows version can often alleviate compatibility conflicts, providing a swift resolution to software-related errors on your Windows 11/10 system.
To run the application in compatibility mode, follow the steps below:
1. Go to “This PC” and right-click the program. Select “Properties“.
2. Under the Compatibility tab, check the “Run this program in compatibility mode for” box.
3. Select the “Windows 8” option.
4. Click OK followed by Apply.
Solution 3: Check the Hard Drive for Errors
Maintaining the health and integrity of your computer’s hard drive is required for a smooth and error-free computing experience. The “Video Memory Management Internal” error on Windows 11/10 can sometimes be attributed to issues within the hard drive’s file system.
Below are the simple steps to check the hard drive for errors:
1. Open the Command prompt and run as administrator.
2. Copy and paste the below command:
chkdsk /f /r D:
Press Enter.

3. After executing the above command, restart the PC.
Solution 4: Update Your Graphics Driver
Outdated or incompatible graphics drivers can contribute to system errors, including the “Video Memory Management Internal” issue. To ensure optimal performance and resolve such errors, updating your graphics driver is a key step.
Here are the steps to update your graphics driver:
1. Press the Windows key + X and select “Device Manager“.
2. Now, expand the “Display adapter” option.
3. Right-click on the driver and select “Update driver“.

4. A dialog box will appear. Select “Search automatically for drivers“.
Solution 5: Rollback Display Driver
Rolling back your display driver is a practical solution if you’ve recently updated to a version causing compatibility issues or errors.
Below are the steps on how to rollback display driver:
1. Press the Windows key + X and select “Device Manager“.
2. Expand the “Display adapter” option. Double-click on the driver.
3. Under the Driver tab, click on “Roll Back Driver“.

4. Click OK.
Solution 6: Update BIOS
The BIOS (Basic Input/Output System) serves as a critical firmware component stored on a motherboard’s chip. It produces hardware initialization and facilitates the OS boot process. Essentially, it acts as the computer’s brain, overseeing fundamental hardware operations.
One prevalent issue associated with an outdated BIOS version is the occurrence of compatibility issues, such as the “Video Memory Management Internal” error. Fortunately, this problem can be rectified by updating your BIOS to the latest version available on the motherboard manufacturer’s website.
Solution 7: Repair System Files
Repairing the system files becomes an important step to ensure a stable and error-free computing environment. Here are the steps to repair the system files:
1. Open the Command prompt and run as administrator.
2. Copy and paste the below command:
DISM /Online /Cleanup-Image /RestoreHealth
Press Enter.
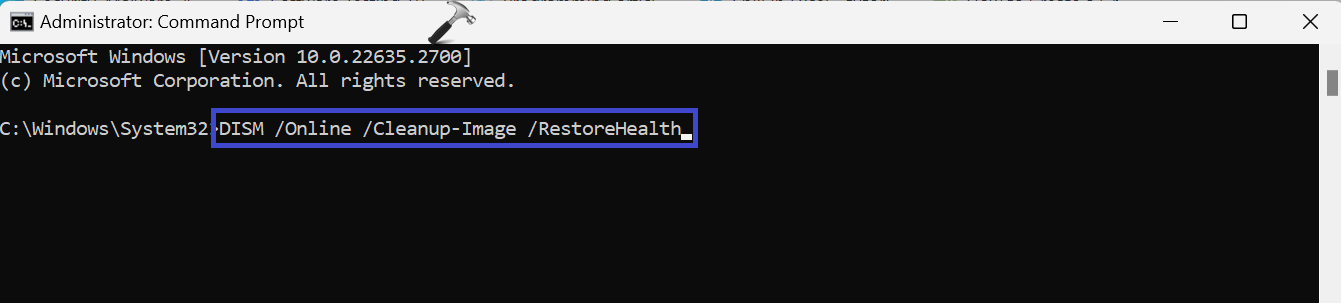
The DISM (Deployment Image Service and Management Tool) will initiate the repair process for the Windows image. Allow the process to complete; this may take some time.
3. After executing the above command, restart the PC.
Solution 8: Test Your RAM
System errors can sometimes be linked to problems with your computer’s RAM (Random Access Memory). To ensure the health and reliability of your RAM, performing a diagnostic test is a valuable step.
Follow the below steps to test your RAM:
1. Press the Windows key + R. Type “mdsched.exe” and click OK.
2. Choose the “Restart now and check for problem (recommended)” option.

Solution 9: Disable Overclocking
Overclocking, while a popular method to enhance performance, can sometimes lead to system instability. If you’ve overclocked your system and encountered problems, disabling overclocking may be a practical solution.
Below are the steps to disable overclocking through the UEFI firmware settings:
1. Type “Recovery options” in the search bar and click “Open“.
2. Click the “Restart now” option next to the “Advanced startup“.

3. A dialog box will appear. Click “Restart now“.
4. Your PC will restart. After that choose “Troubleshoot“.
5. Then select “UEFI Firmware Settings“.
6. Click the restart button to reboot the PC and access the BIOS system.
7. Press F9 to choose Setup Defaults and press F10 to exit the BIOS screen to save the changes.
That’s It!