Is your Windows 11 PC keep booting into the BIOS menu, preventing you from accessing your computer? If so, this guide can help. This boot issue can happen due to varying reasons, everything from incorrect boot order, loose SATA cable, faulty hard drive, and misconfigured BIOS settings. In this article, we’ll show you 9 different ways to fix this booting issue, no matter the cause.
Page Contents
Fix: Windows 11 PC Keeps Booting into BIOS
Method 1: Check Your BIOS Boot Order
1. Turn on your PC and restart your computer if it’s already on.
2. When the computer boots, press the key specific to your PC to access the BIOS menu (it’s usually Delete, F1. F10, F12, or Esc).
3. After entering the BIOS menu, navigate to the “Boot” or “Boot Order” section. Here, you’ll notice a list of devices that your devices can boot from. The Boot order determines the sequences in which your computer tries to find a bootable device.
4. Check which device is set as the primary boot device. If your hard drive that contains Windows 11 isn’t set as the first priority in the boot sequence, your Windows 11 PC might not boot properly and could end up in the BIOS menu.
5. If the hard drive with Windows 11 is not the main boot option, use the up and down arrow keys or the + and – keys to change the boot order.
6. Then, press F10 to save the changes and restart your computer.
7. When your computer restarts, it will probably boot properly this time.
Method 2: Disable Fast Bootup in BIOS
1. Open your BIOS settings and navigate to the “Boot” or “Boot Options” tab.
2. Look for a “Fast Boot” option. It may be called Fast Boot, Quick Boot, or something similar. If you see it, use the arrow keys to select it.
3. Then, change the setting next to it to “Disabled” or “Off“.
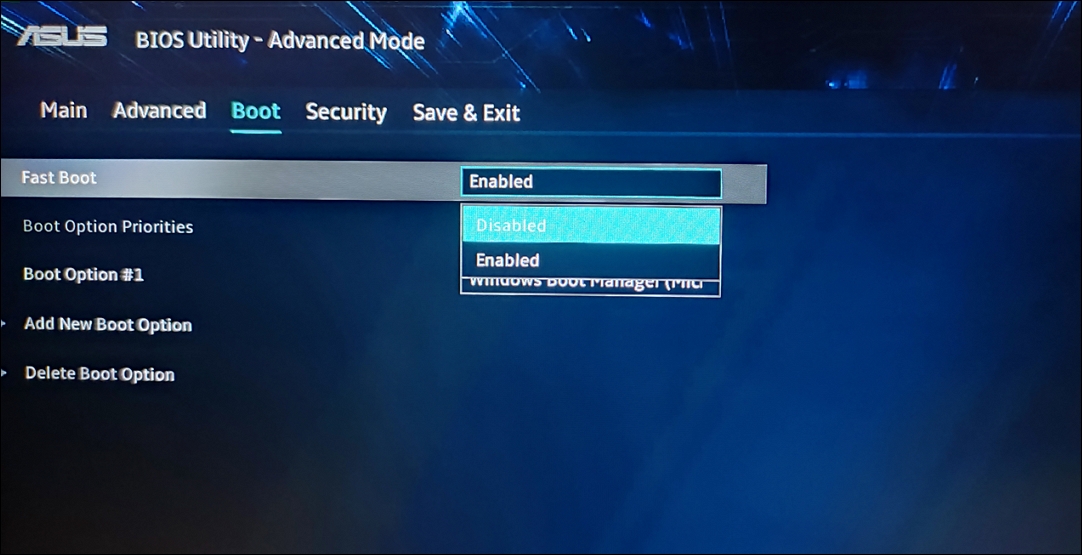
4. Save the changes with “F10” and reboot your computer.
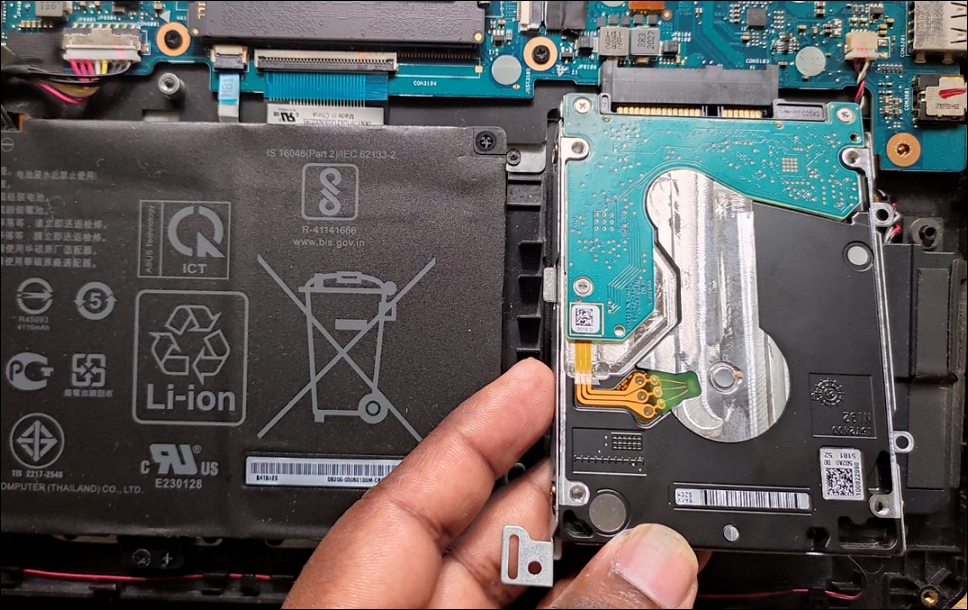
Method 3: Check the SATA Cable Connections
If the SATA cable is faulty, has a loose connection, or the drive isn’t properly connected to the motherboard (in laptops), you might experience boot issues.
1. Turn off your computer and unplug it from the power outlet.
2. Open your computer panel and locate the hard drive.
3. There should be two cables connected to your hard drive, one is a power cable (usually thick and multi-colored), and the other is a SATA cable (flat).
4. Follow the cable to where it’s connected to the Motherboard.
5. Then, disconnect it on both ends and reconnect it. Make sure they’re properly plugged in. If you have more than one SATA port in the motherboard, switch the cable to the other port and see if it works.
6. If you have an SSD or HDD directly plugged into the motherboard, carefully remove it and then reinsert it firmly into the SATA connector.
7. Close the computer case and plug in the power cable.
8. Turn on your PC and check if the Windows still keeps booting into the BIOS.
Method 4: Disconnect All Other Hard Drive
Follow the same steps from the above method, disconnect all hard drives except the one where you installed Windows. Then, turn on your computer and see if the booting issue persists. If your computer boots normally, then one of the disconnected drives must be causing the issue.
Method 5: Reset BIOS Settings
If you recently made changes to your BIOS settings and your Windows started booting into BIOS afterward, then resetting the BIOS to its default settings might fix the problem.
1. Open your BIOS menu, and press the “F9″ key to load default settings.
2. Then, click “Yes” to reset the BIOS.
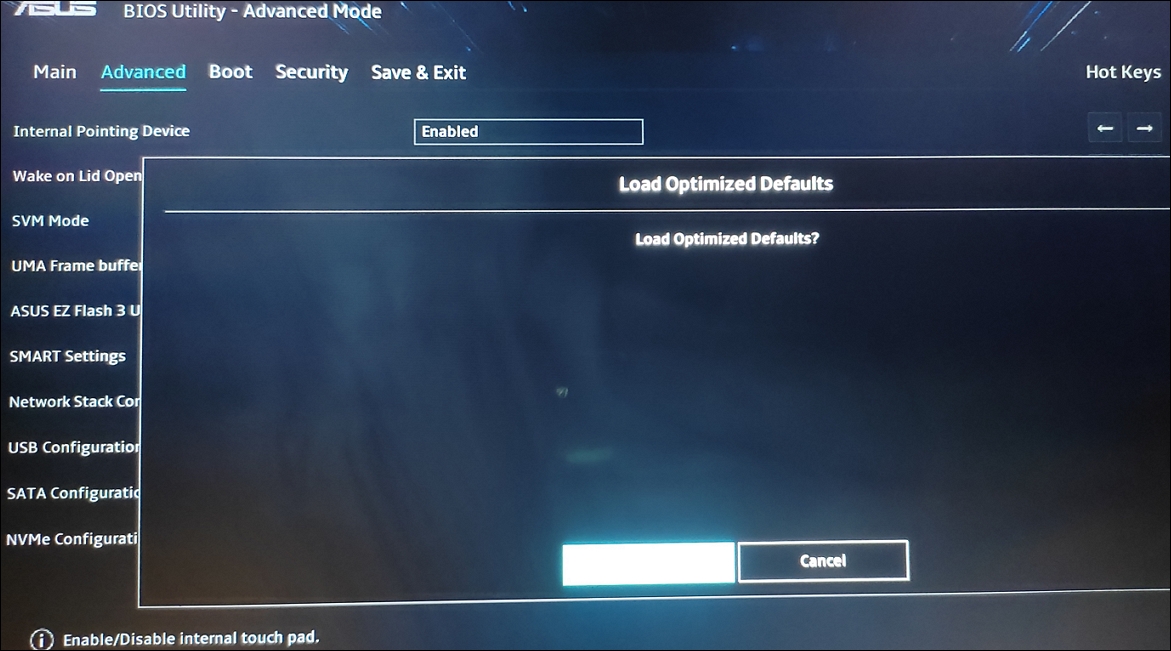
3. Finally, press “F10” to save and exit the BIOS. Then, turn your computer and see if the Windows still boots into BIOS.
Method 6: Reseat the RAMs
1. Turn off your PC and unplug the power cable.
2. Open up your computer case and remove the RAM stick out of the memory slot carefully.
3. Then, clean the RAM modules with compressed air or soft-bristled brush.
4. Reseat the RAM back into its slot. Close the case, start the computer, and see if it boots normally.
Method 7: Check the SATA Controller Status
1. Open your BIOS Settings and look for an option named “SATA Controller Mode“, “AHCI Mode“, or something similar.
2. If the SATA controller is disabled, reenable it.
3. Save your BIOS changes and restart the system.
Method 8: Clear the CMOS Memory or Settings
1. Shut down your computer and unplug the power cable.
2. Open up the computer case and ground yourself against shock.
3. Find the CMOS battery in the motherboard (usually a coin-shaped battery). You can also identify it with CMOS, RTC, or Battery markings.
4. Carefully remove the CMOS battery with your fingernail or non-conductive screwdriver.
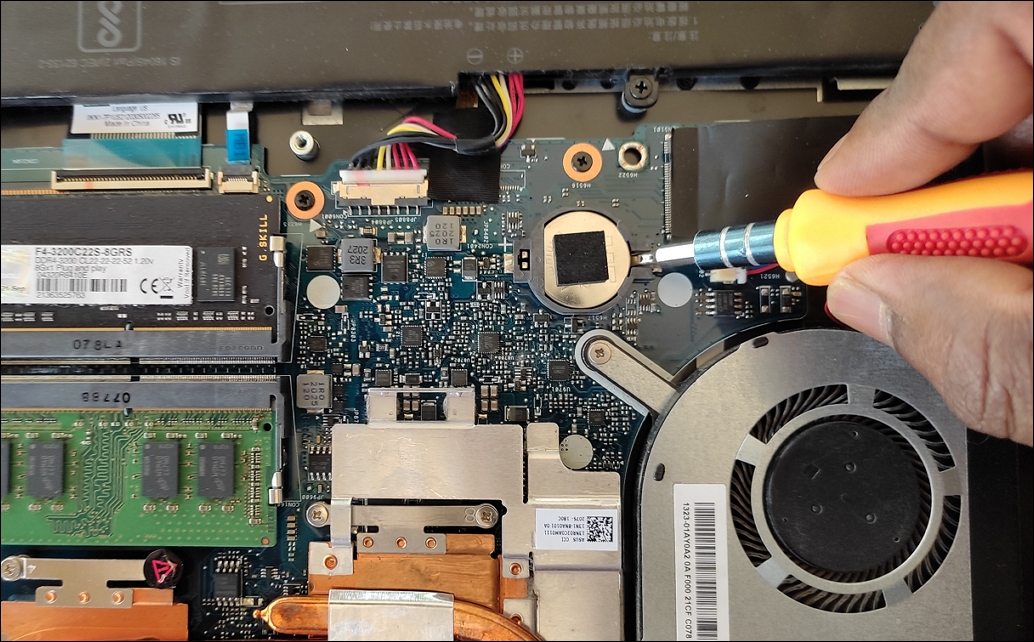
5. Wait for 10-15 seconds and then gently put the battery back into its slot.
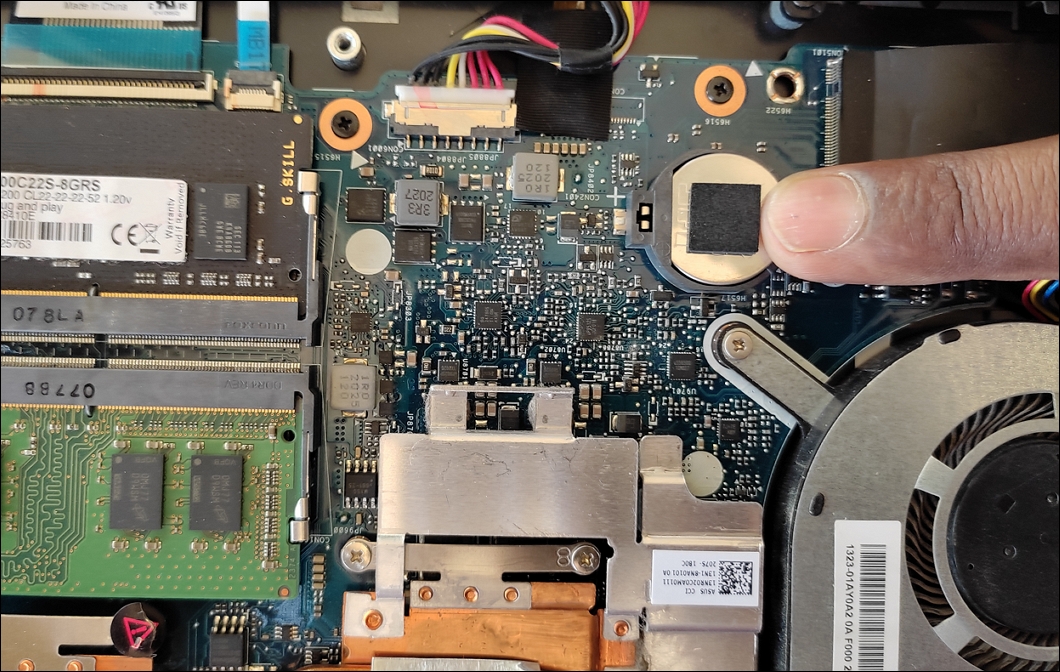
6. If you have CMOS jumpers instead of the battery, move the jumper cap from the first and second pins to the second and third pins. If you only have a two-pin jumper, remove the jumper cap for a while and put it back.
7. Some motherboards have a dedicated CMOS button, labeled Clear CMOS or CLR_CMOS. Simply pressing it will reset the memory.
8. After resetting the BIOS, turn on your computer.
Method 9: Update the BIOS firmware
1. Visit your manufacturer’s website and check if there are any BIOS updates available. If there are, download the latest version.
2. Copy the downloaded BIOS update file to the USB drive with the FAT32 file system.
3. Restart the computer and enter the BIOS menu.
4. Find the “Update BIOS” option or something similar in the BIOS menu.
5. Select the BIOS update file from the USB drive and follow the instructions to start the update process.
6. Once the update is complete, your computer will restart automatically.
If none of these methods work, it’s also possible your hard drive might be faulty and need professional repair or replacement.