Sometimes, uploading and downloading on the OneDrive website take a lot of time. It is possible to cancel or stop sync in OneDrive if you want to. Also, you can stop sync in case if you have selected the wrong files. So, how to cancel or stop sync in OneDrive in Windows 11?
In this post, learn how you can cancel or stop OneDrive sync in Windows 11.
Page Contents
How to cancel or stop sync in OneDrive in Windows 11
Method 1: Pause Syncing
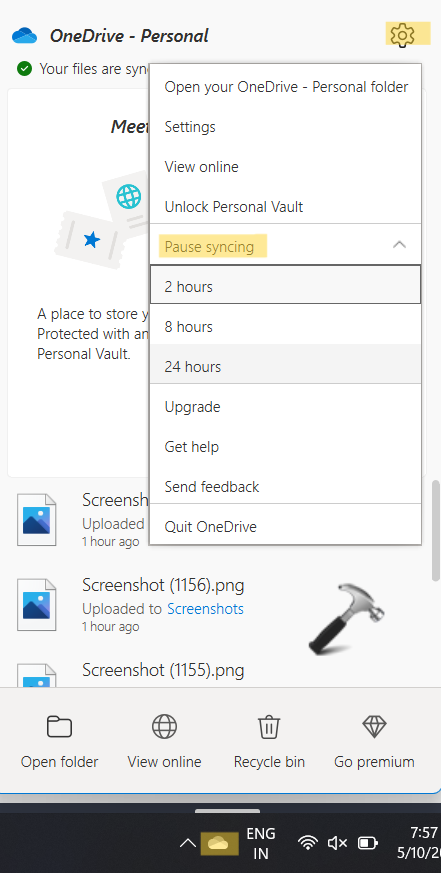
1. Click on the icon of OneDrive present on the taskbar. After that, click on the gear button of Help & Settings present at the top right.
2. Now, expand the Pause syncing option and choose the time you like to pause the sync – 2 hours, 8 hours or 24 hours.
Method 2: Quit the OneDrive App
1. Click on the icon of OneDrive present on the taskbar. After that, click on the gear button of Help & Settings present at the top right.
2. Now, click on the Quit OneDrive option.
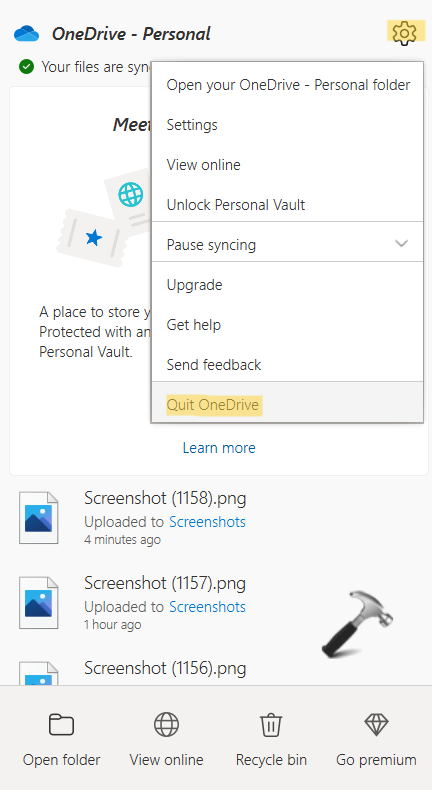
The app will stop all the running tasks and will be closed.
Method 3: Unlink your Computer from OneDrive Account
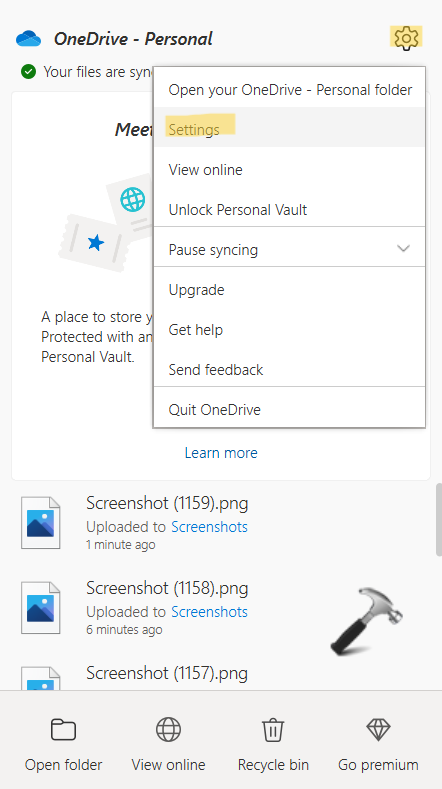
1. Click on the icon of OneDrive present on the taskbar. After that, click on the gear button of Help & Settings present at the top right.
2. Now, click on the Settings tab.
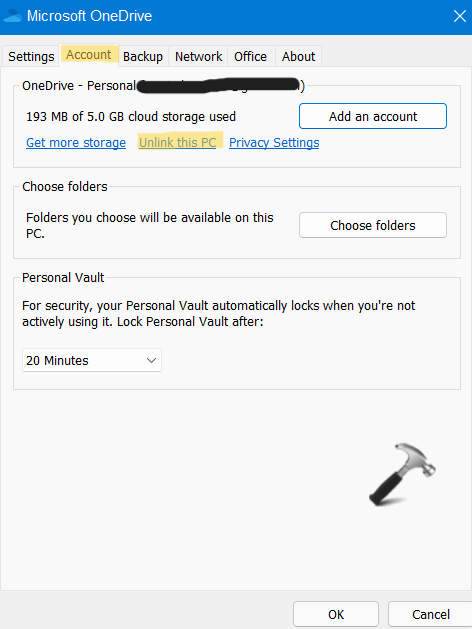
3. Once opened, go to the Account tab and click on Unlink this PC.
Method 4: Change Automatically Sync Settings
1. Click on the icon of OneDrive present on the taskbar. After that, click on the gear button of Help & Settings present at the top right.
2. Now, click on the Settings tab.
3. Once opened, go to the Backup tab and uncheck the boxes present next to Automatically save photos and videos to OneDrive whenever I connect a camera, phone, or other device to my PC and Automatically save screenshots I capture to OneDrive.

Method 5: Select the OneDrive Folders to Sync
1. Click on the icon of OneDrive present on the taskbar. After that, click on the gear button of Help & Settings present at the top right.
2. Now, click on the Settings tab.
3. Once opened, go to the Account tab and click on Choose folders.

4. Now, uncheck any folders you do not want to sync to your computer.
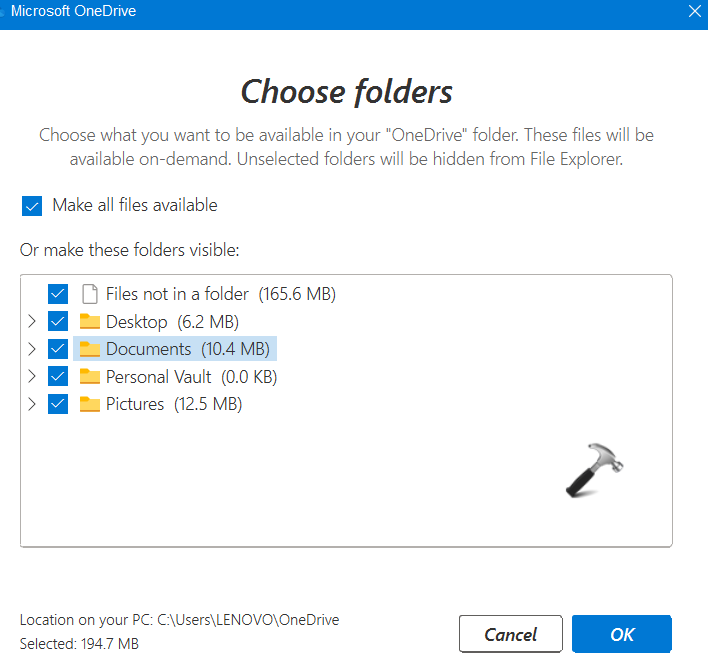
5. Once done, press OK.
So, this is how to cancel or stop sync in OneDrive in Windows 11.