
An IP Address holds the information about your device, location, your internet service provider (ISP) and browser information. In this article, we will guide you how to change IP Address in Windows 11.
You can change your IP Address when an invalid address is accidentally configured or you have malfunctioning router that is providing addresses used by different computer on the network. It is also helpful when you want to install a new router and re-configure your network to use the default IP address range.
Page Contents
How to change IP Address in Windows 11
Method 1: Using Command Prompt
First you need to find the network name for the interface you want to change.
STEP 1: Open Command Prompt using Search bar and click on “Run as Administrator”.
STEP 2: Now, type “netsh interface ipv4 show config” in the Command Prompt and then press enter. This Command will show you the information of your device.
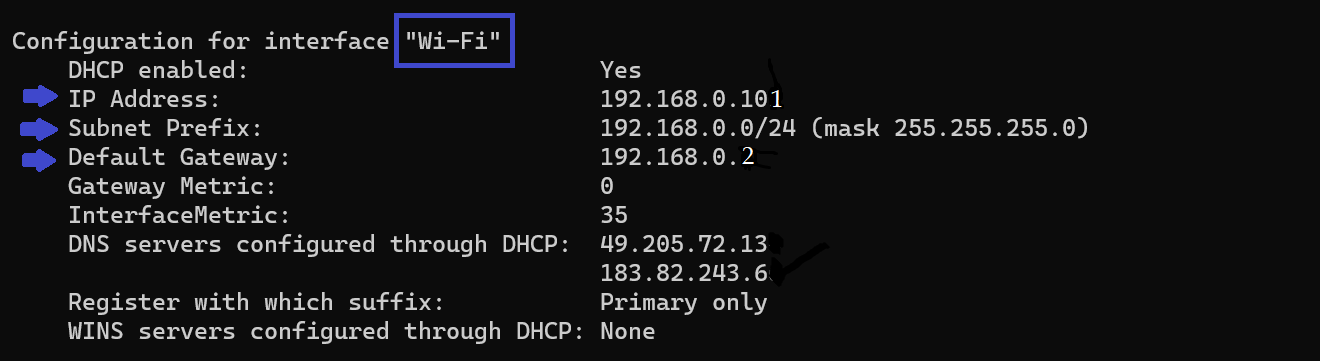
You should know your IP Address, Subnet mask (or prefix) and default gateway.
STEP 3: Type the below command and press enter.
netsh interface ipv4 set address name="Your Interface Name" static IP_Address Subnet_Mask Gateway.
For example,
netsh interface ipv4 set address name="Wi-Fi" static 192.168.0.106 255.255.255.0 192.168.0.1

STEP 4: If you want to switch IP Address which is automatically assigned by DHCP server instead of static IP Address, use the below command:
netsh interface ipv4 set address name "Your Interface Name" source=dhcp
For example,
netsh interface ipv4 set address name "Wi-Fi" source=dhcp.
Method 2: Using Settings App
STEP 1: Go to Settings App and click on Network & Internet.
STEP 2: On the right panel, click on the type of network you are using (Wi-Fi or Ethernet).
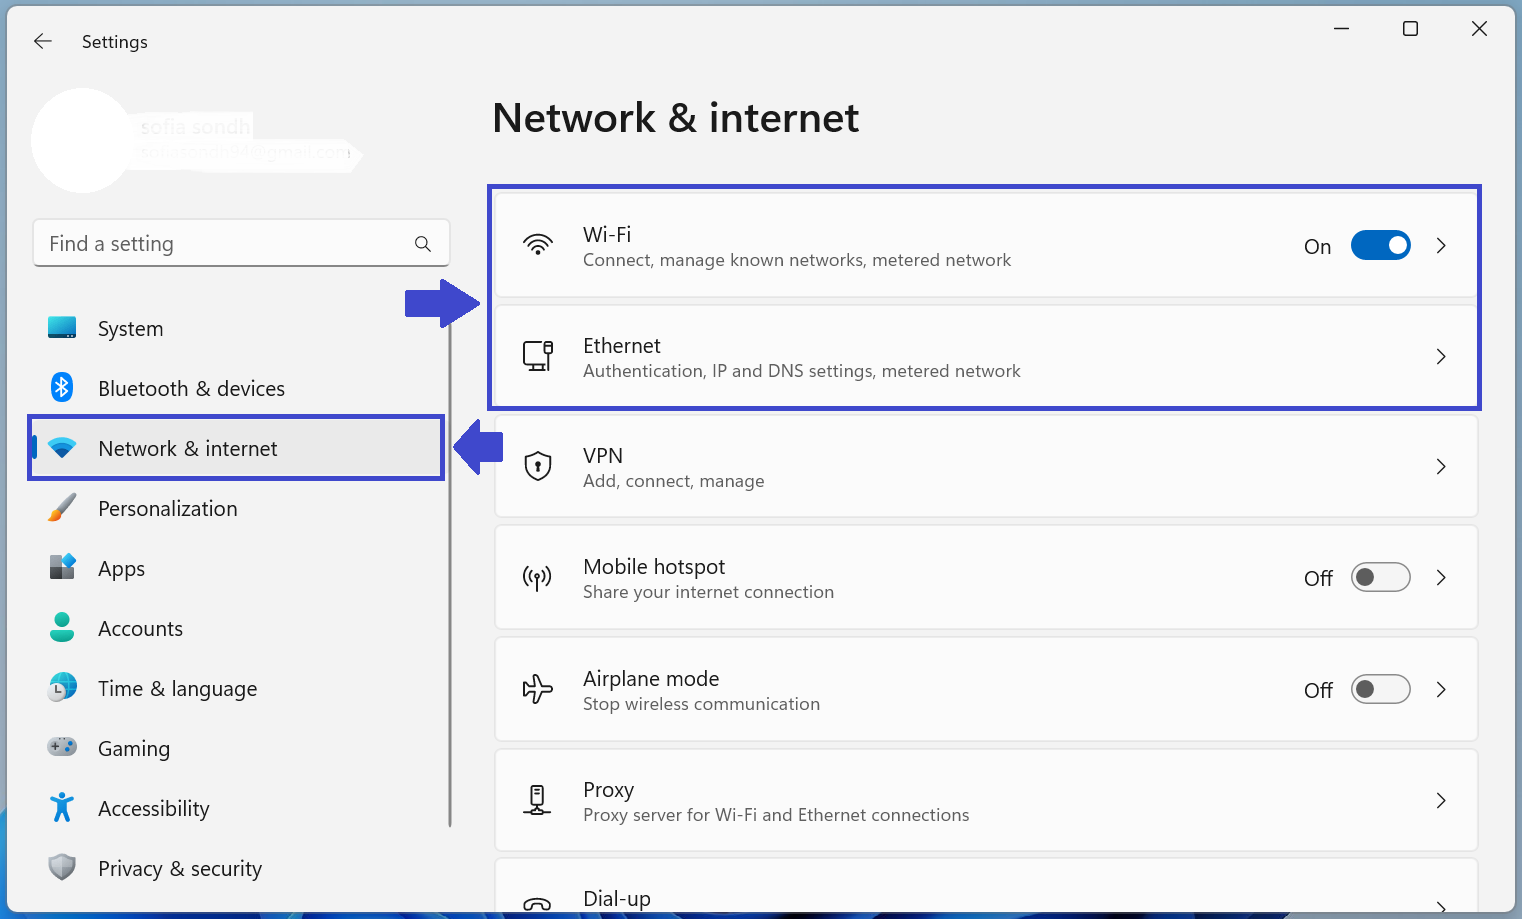
If you are using internet (LAN) using wireless card, select Wi-Fi.
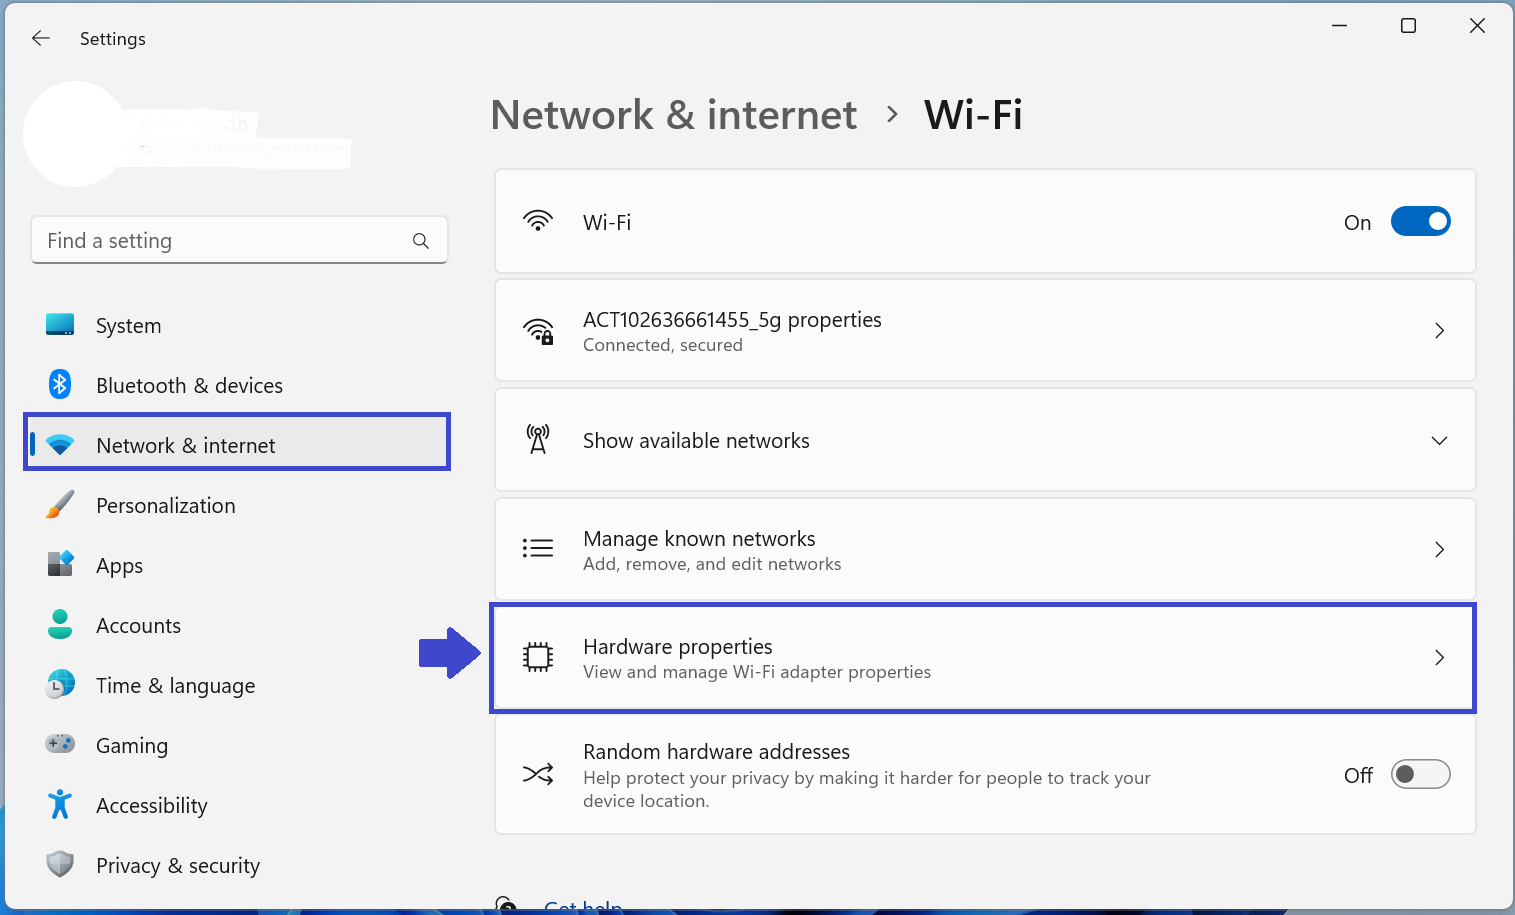
After selecting Wi-Fi, Click on Hardware properties.
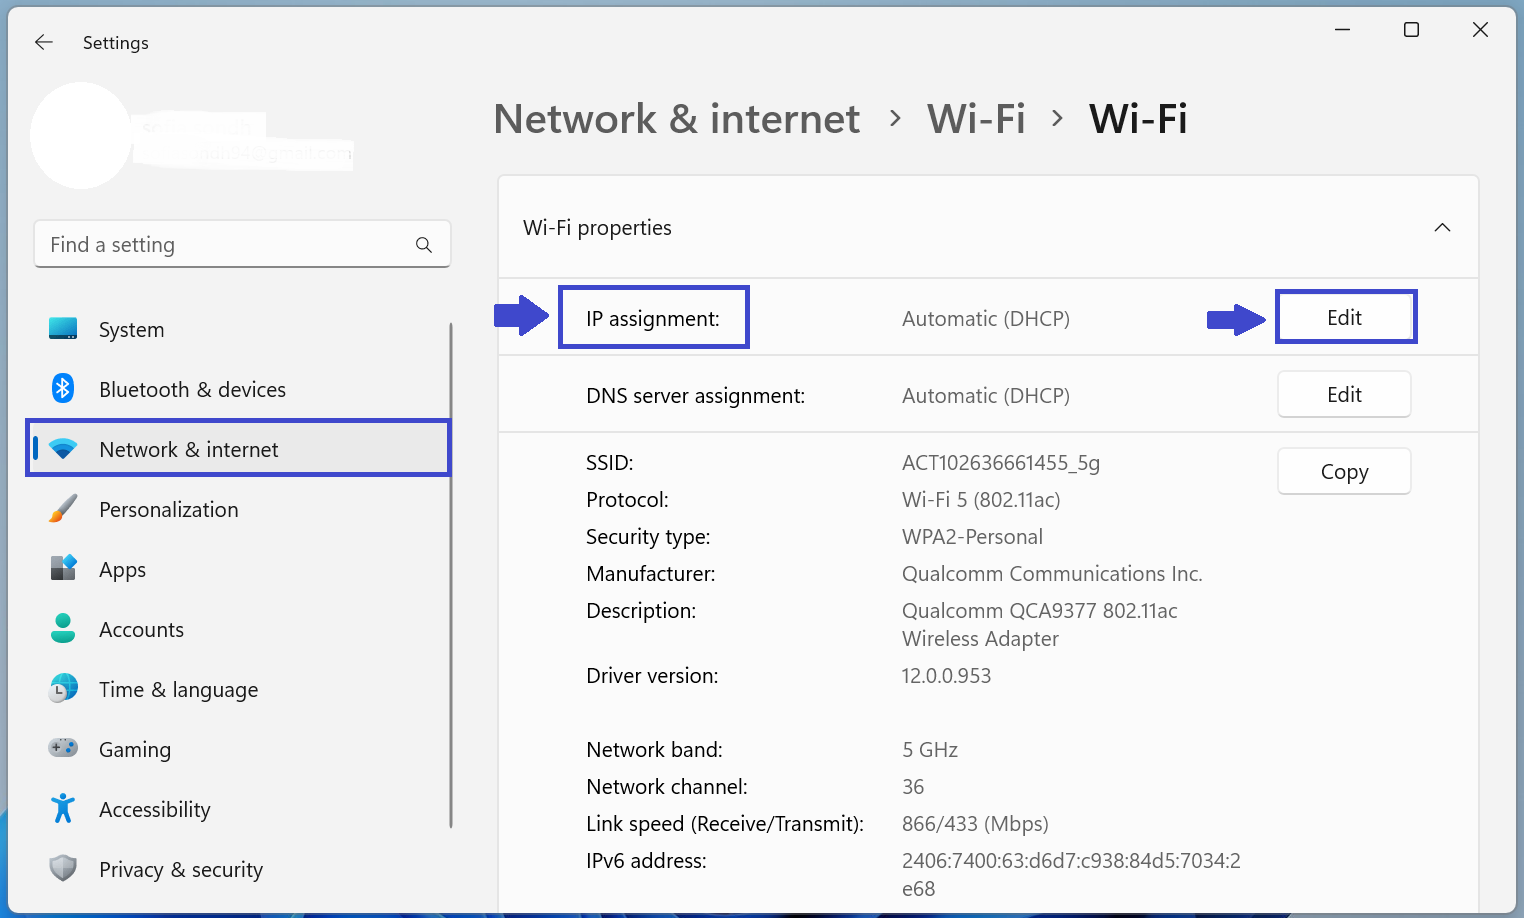
Now, go to IP Assignment => Edit.
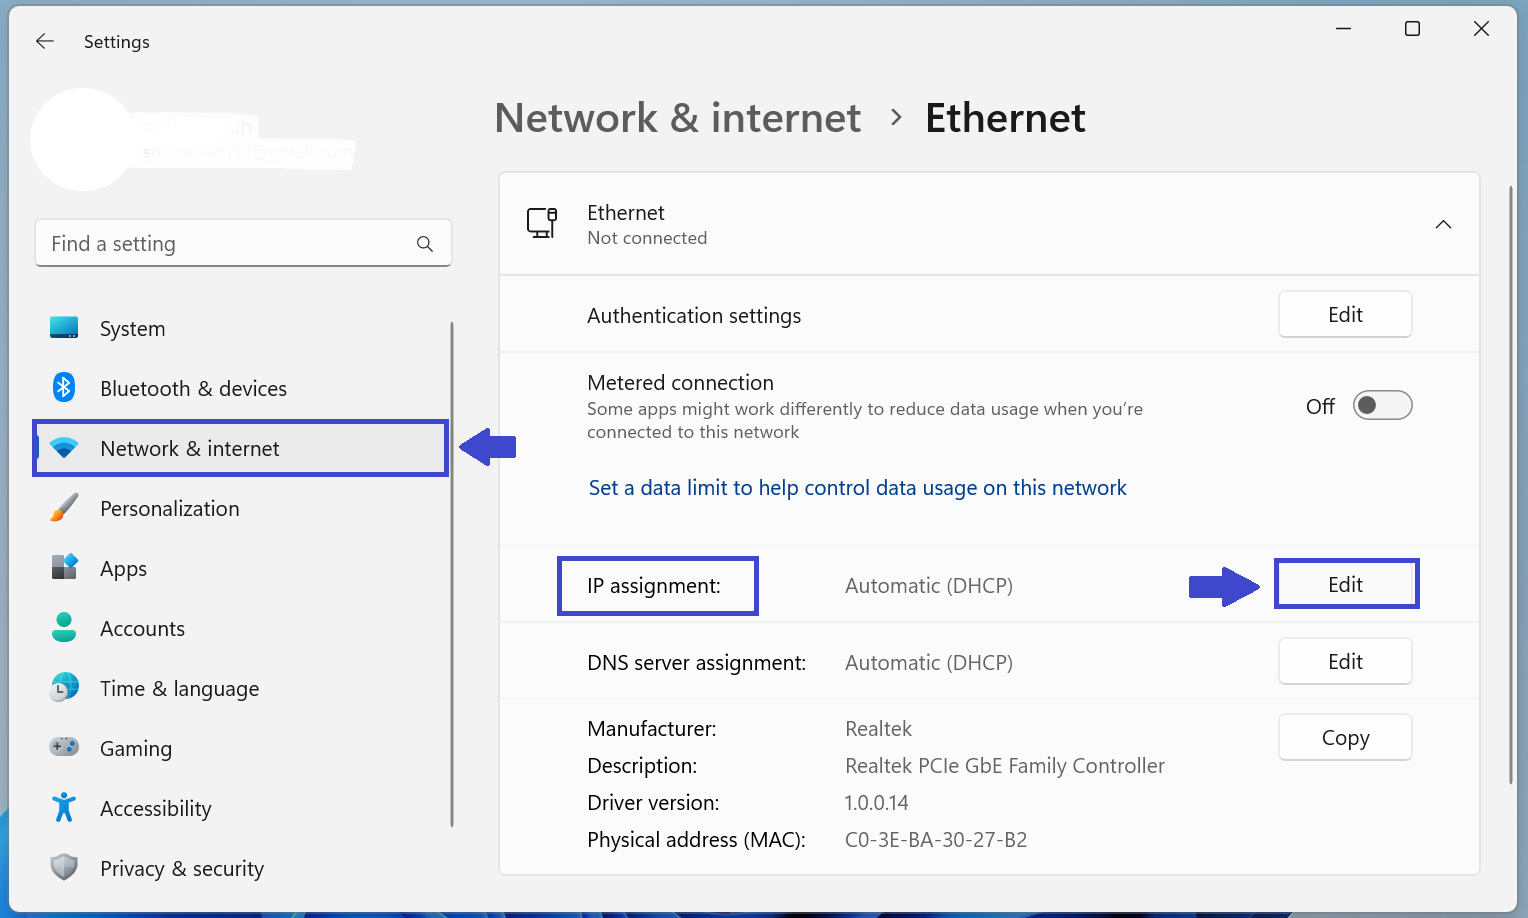
If you are using Internet (LAN) using wired connection, click on Ethernet.
After selecting Ethernet, Click on IP assignment => Edit.
STEP 3: When you will click on Edit, prompt box will appear in which you have to select whether you want to do Manually or Automatic (DHCP).
STEP 4: When you will select Automatic (DHCP), you just need to click on Save. That’s it.
STEP 5: If you select Manually, prompt box will appear (See the below image).
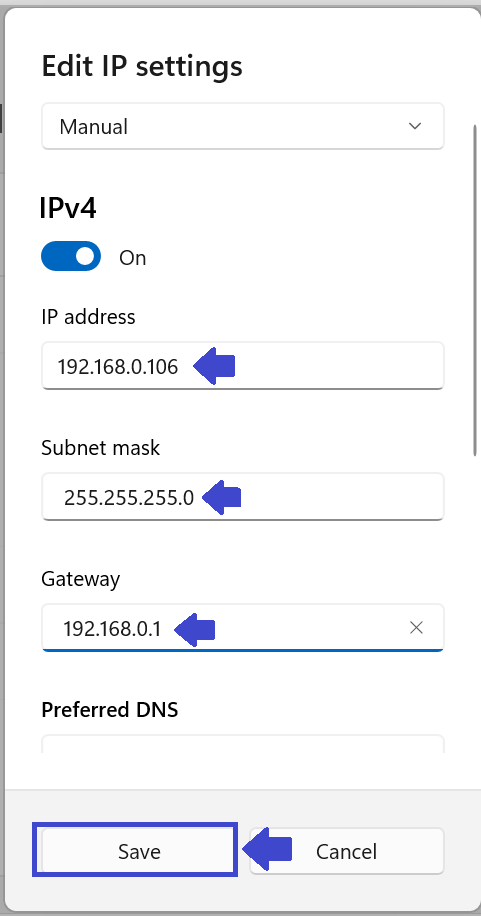
STEP 6: Enter the IP Address, Subnet mask and Gateway. You will get these details from the Command Prompt, you have to type – netsh interface ipv4 show config .
STEP 7: Then Click Save.
That’s it!


![The mapped network drive could not be created [Detailed fix]](https://www.kapilarya.com/assets/Network-Drive-768x511.jpg)

![Stop sharing a folder in Windows 11 [Guide]](https://www.kapilarya.com/assets/Network-768x522.png)