
Windows Search enables users to search from their taskbar to find what they are looking for, whether it is on their device, on the web, or in the cloud. Also, Windows Search can personalize your results by incorporating your content from SharePoint, Bing, OneDrive, Outlook and other such services. So, how to enable/disable Cloud content search in Windows 11?
In this post, learn how Windows users can turn on or off Cloud content search for Microsoft account or Work or School account hassle-free!
Page Contents
How to enable/disable Cloud content search in Windows 11
Method 1: Enable/Disable Cloud Content Search for Current User through Settings
1. Open Settings by pressing the Windows + I keys together on your keyboard. After that, go to Privacy & security and then, select the Search Permissions tab.

2. Under Cloud content search, toggle the switch On for Microsoft account and Work or School account as you like. This will enable Cloud content search.

3. To disable Cloud content search, toggle the switch Off for Microsoft account and Work or School account.

Method 2: Enable/Disable Cloud Content Search for Current User through Registry Editor
1. In the first place, open Run by pressing the Windows + R keys simultaneously on your keyboard. In the Run dialog box, type regedit to open Registry Editor.

2. After that, navigate to the following location:
HKEY_CURRENT_USER\Software\Microsoft\Windows\CurrentVersion\SearchSettings
3. For Microsoft account:
Now, double-click on IsMSACloudSearchEnabled REG_DWORD and change its value to 1 to enable Cloud content search.

To disable Cloud content search, change the value of IsMSACloudSearchEnabled REG_DWORD to 0.

For Work or School account:
Double-click on IsAADCloudSearchEnabled REG_DWORD and change its value to 1 to enable Cloud content search.
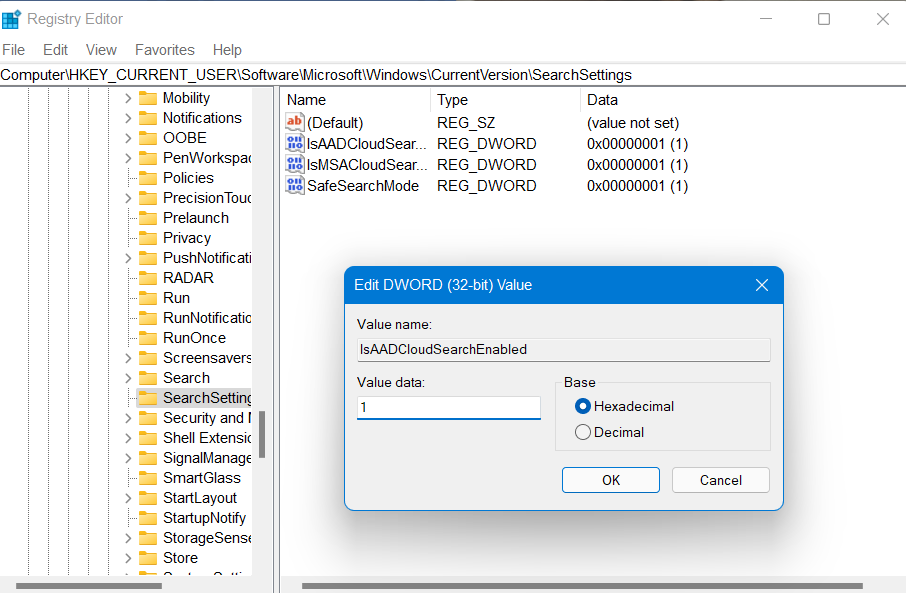
To disable Cloud content search, change the value of IsAADCloudSearchEnabled REG_DWORD to 0.

4. Once done, close Registry Editor.
Method 3: Enable/Disable Cloud Content Search for All Users through Registry Editor
1. In the first place, open Run by pressing the Windows + R keys simultaneously on your keyboard. In the Run dialog box, type regedit to open Registry Editor.
2. After that, navigate to the following location:
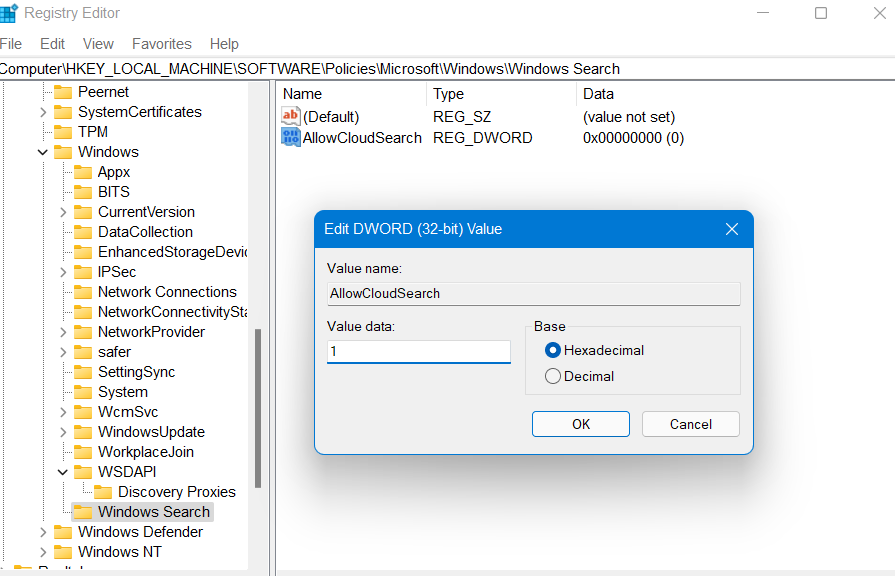
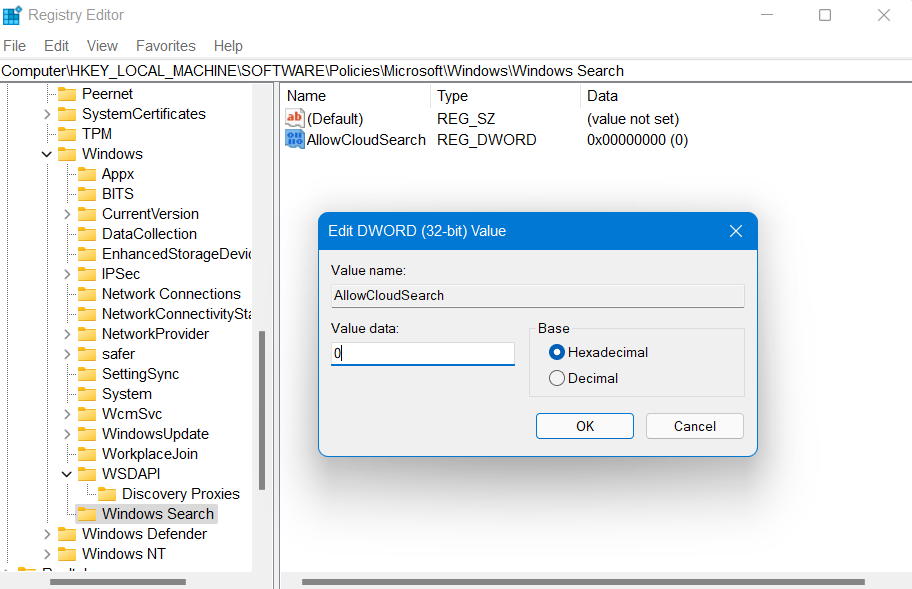
HKEY_LOCAL_MACHINE\SOFTWARE\Policies\Microsoft\Windows\Windows Search
3. Now, double-click on AllowCloudSearch REG_DWORD and change its value to 1 to enable Cloud content search for all users.
4. To disable Cloud content search for all users, change its value to 0.
5. Once done, close Registry Editor.
So, these are some effective methods if you are wondering how to turn on or off Cloud content search in Windows 11.

