
In Windows 11, search is the feature you will use for sure. With the help of search, it is really easy to locate any content on your system or on cloud. Additionally, Windows 11 also have a personal assistant, known as Cortana, which is independent of search. Now, in case, if you are an IT admin and you want to disable search for your clients, this article should help you. We all know that the search is enabled by default. Now let us see how you can disable search in Windows 11.
Some of the IT admins may have a special requirement of disabling search. The purpose may be completed with the help of below mentioned solutions. You can use either of the below mentioned methods in order to disable search and restrict clients with this feature.
Page Contents
How to enable or disable Search in Windows 11
Method 1: Using File Explorer
1. Press  + I keys to open Run.
2. Paste this and press Enter key:
C:\Windows\SystemApps
3. In the SystemApps folder, locate and rename the Microsoft.Windows.Search_cw5n1h2txyewy folder to Microsoft.Windows.Search_cw5n1h2txyewy.old.

4. Restart your system.
If this method doesn’t works, you can next try the Group Policy method.
Method 2: Using Group Policy
1. Open GPO Editor by running gpedit.msc in Windows client edition and by using gpmc.msc command in Windows Server. In Windows Server, you need to create a relevant GPO and then right click on it and select Edit.
2. Next, in the GPO Editor window, navigate here:
Computer Configuration > Windows Settings > Security Settings > Software Restriction Policies

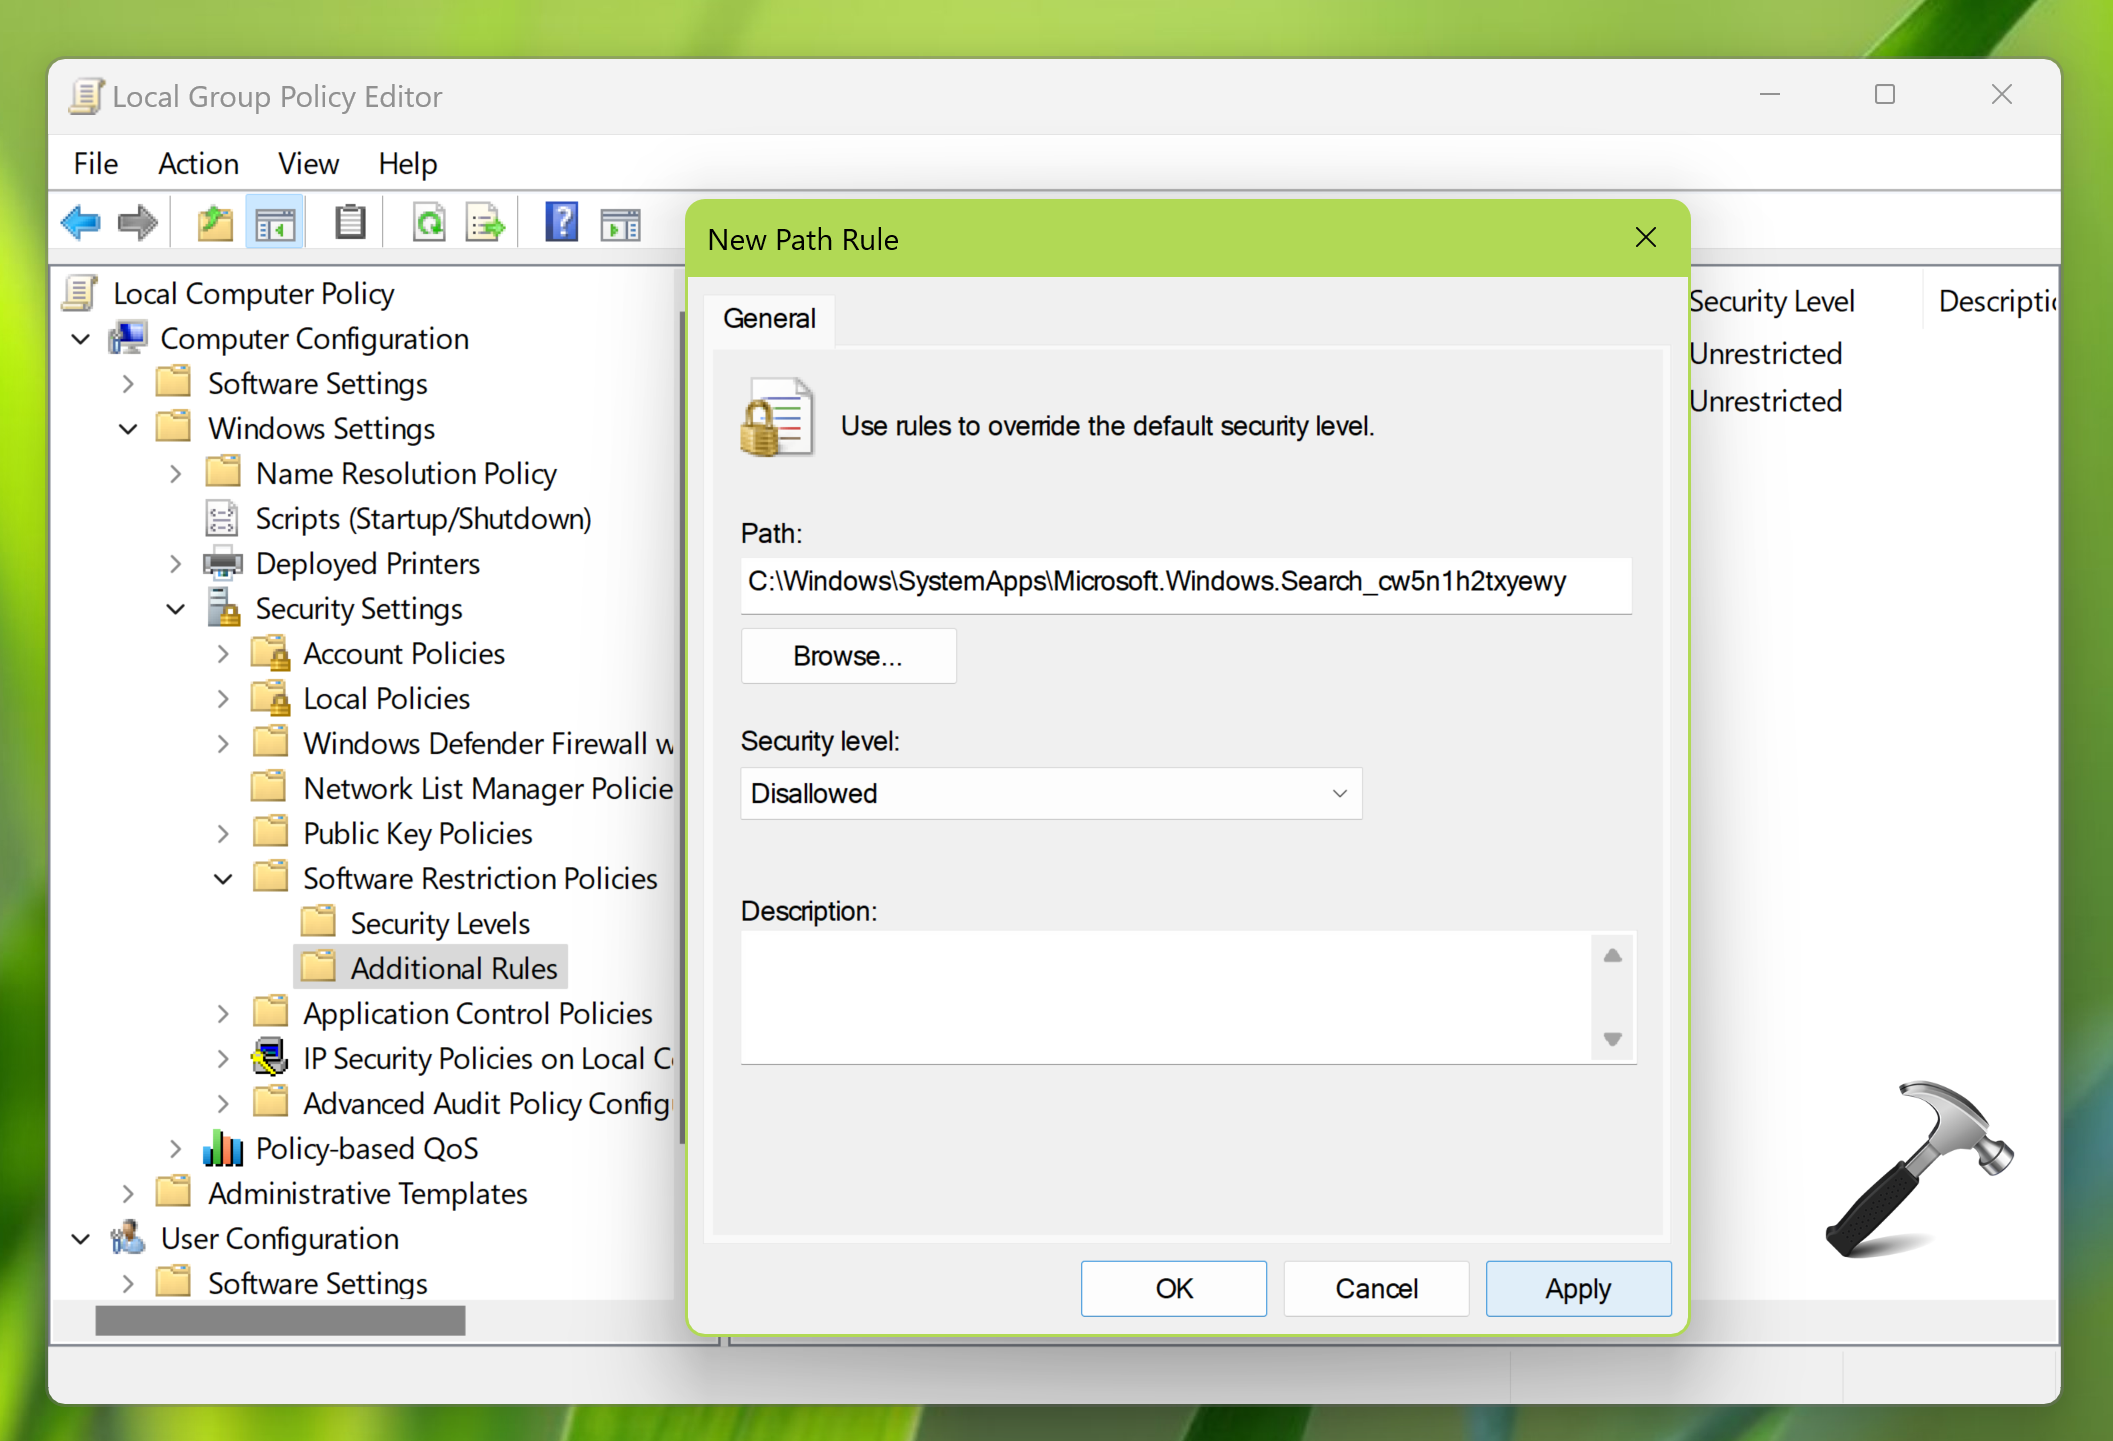
3. If no software restriction policies are defined, click Action > New Software Restriction Policies. Then go to Software Restriction Policies > Additional rules. In the right pane, right click and select New Path Rule. Enter path as C:\Windows\SystemApps\Microsoft.Windows.Search_cw5n1h2txyewy. Click Apply, OK.
4. Close Group Policy Editor and update Group Policy engine using gpupdate /force command to make changes effective.
That’s it!

