
OneDrive is the cloud storage service developed by Microsoft to keep all your files securely in one place. The service comes built-in with your Windows 11 operating system and offers to backup and synchronize your data across all devices running on the same OneDrive account. In this article, we will show you how to enable or disable OneDrive in Windows 11.
What if we Disable the OneDrive:
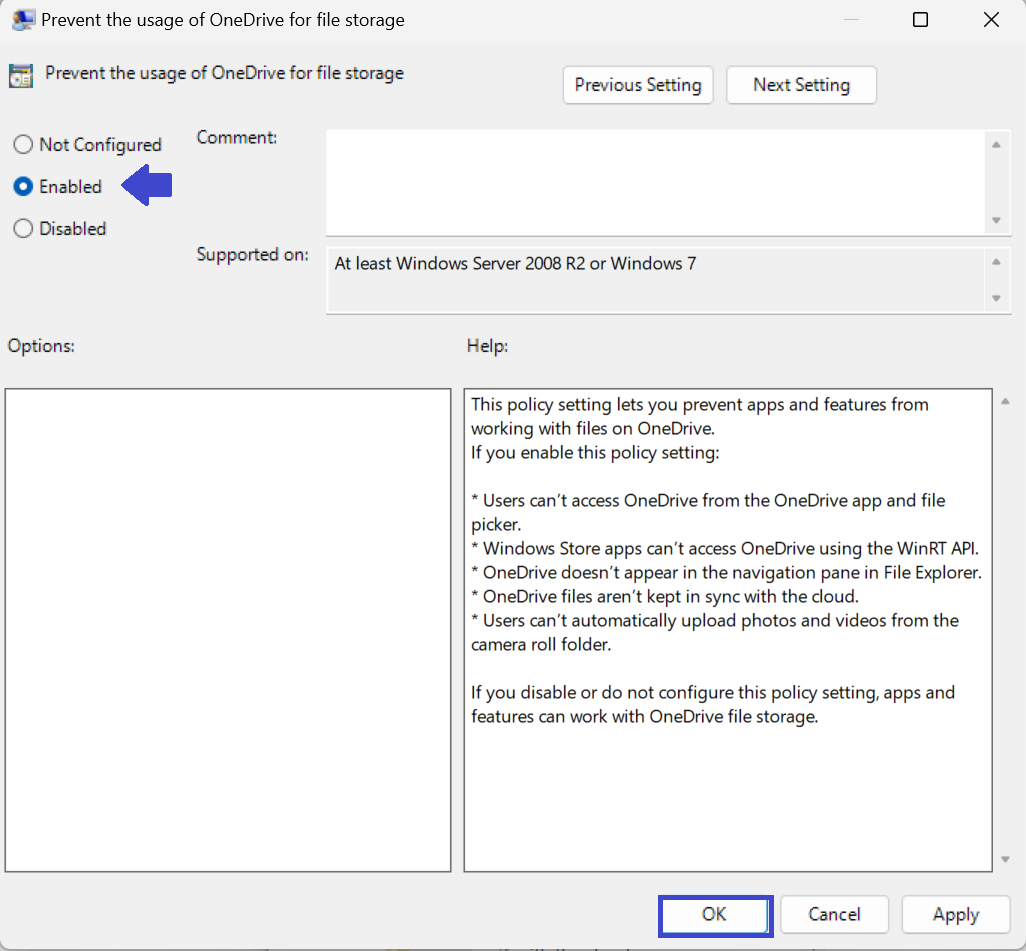
- Users can’t open the OneDrive app.
- The OneDrive app will not run at startup for all users.
- Microsoft Store apps can’t access OneDrive using the WinRT API.
- OneDrive doesn’t appear in the navigation pane in File Explorer for all users.
- OneDrive files aren’t kept in sync with the cloud.
- Users can’t automatically upload photos and videos from the camera roll folder.
Page Contents
Enable or Disable OneDrive in Windows 11
Below we have three methods through which you can Enable or Disable OneDrive:
Method 1: Enable or Disable OneDrive using Settings App
1. Open the Settings App.
2. Click on Apps => Startup.
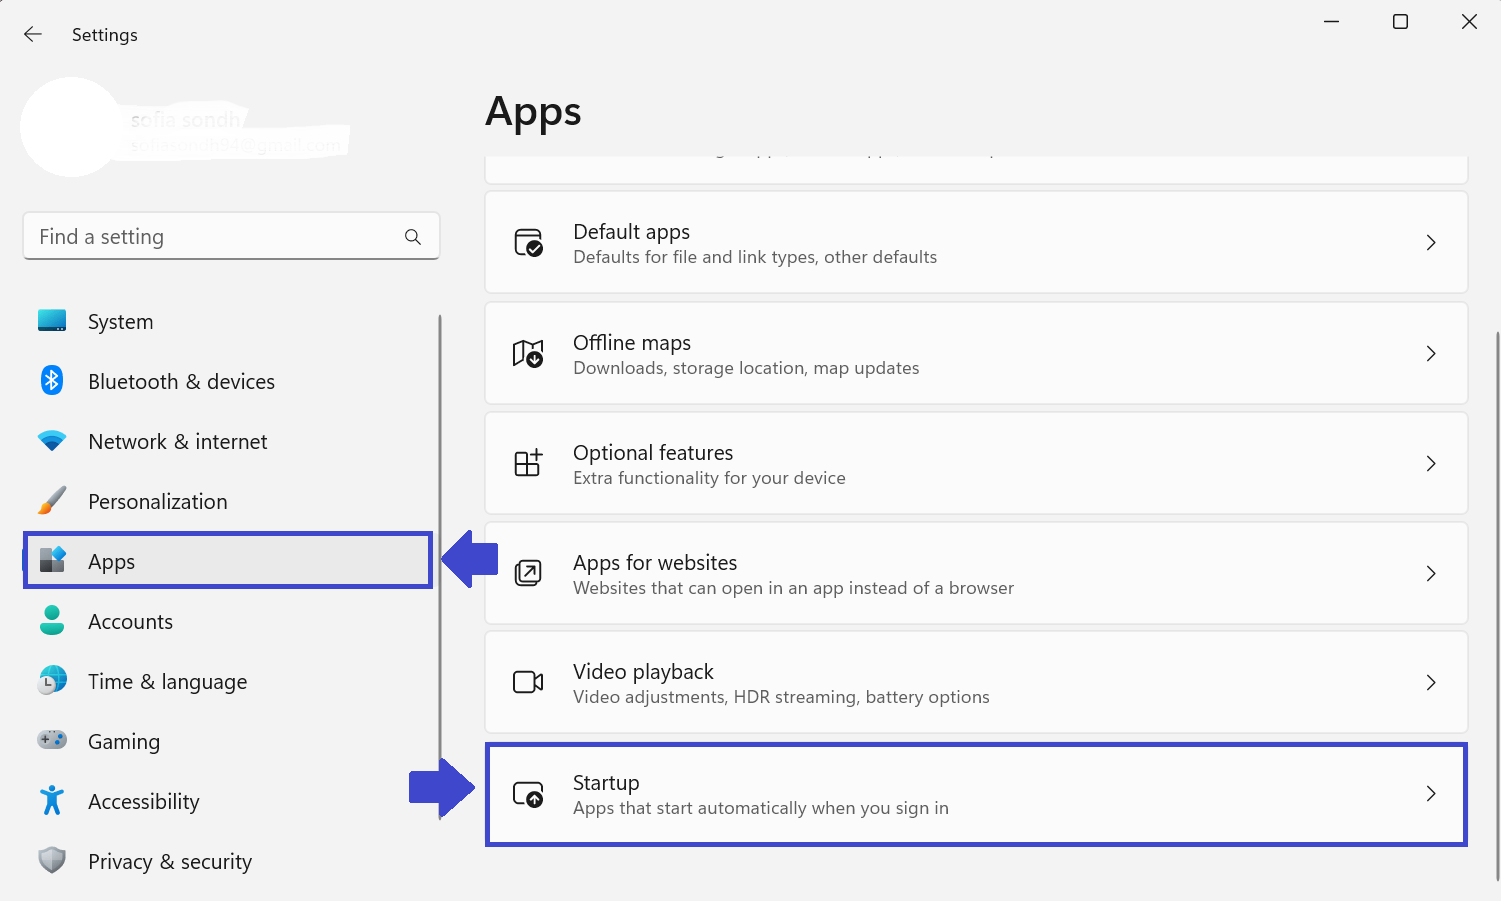
3. Now, you can Enable or Disable OneDrive (see the below image).
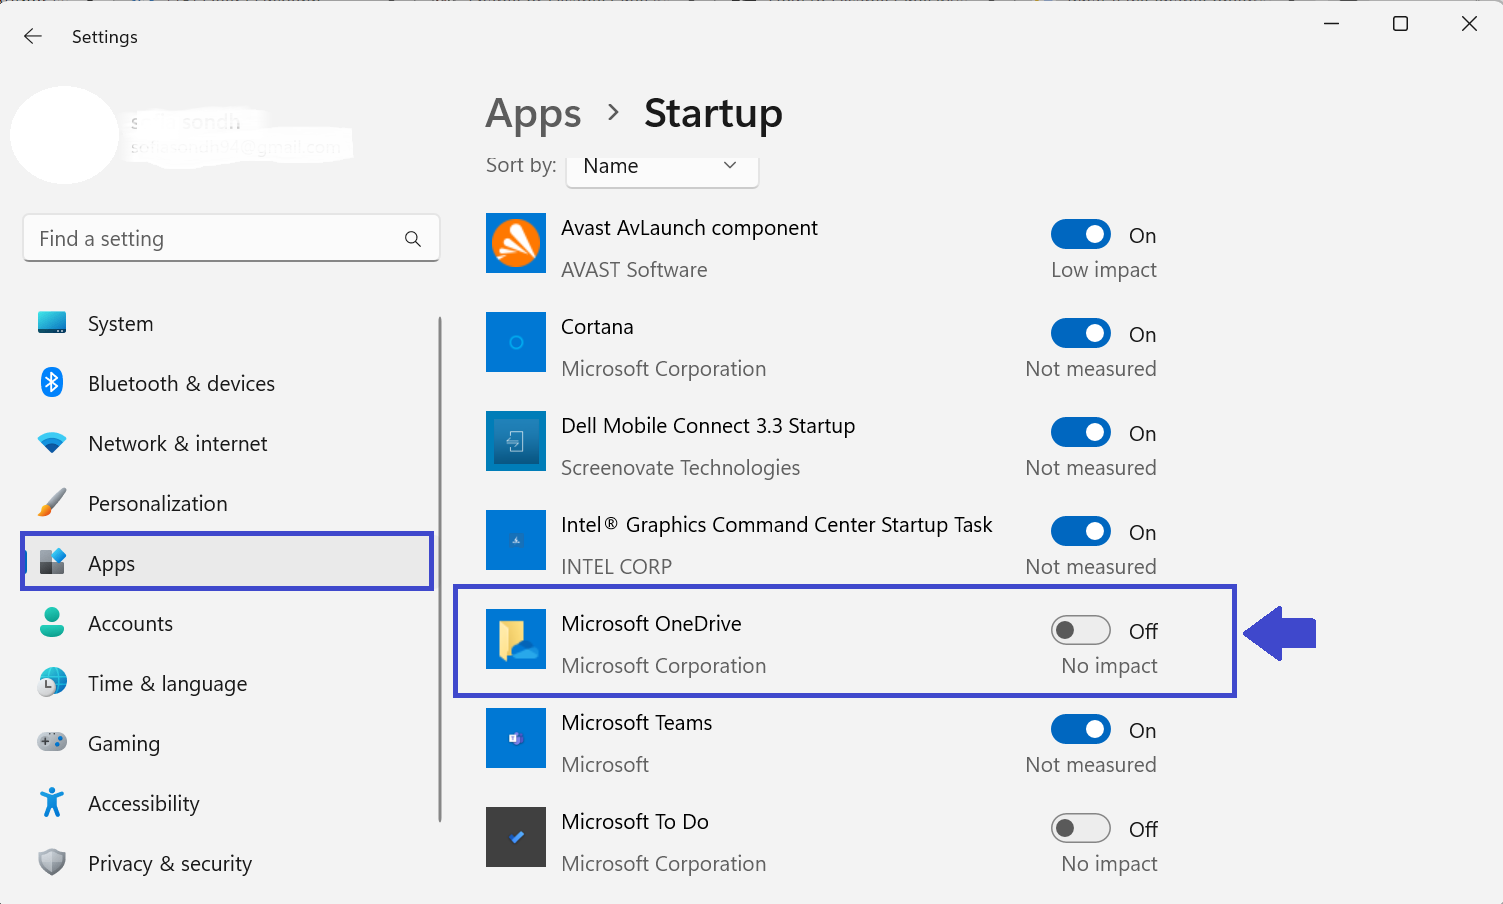
4. You can restart the computer to apply the changes.
Method 2: Enable or Disable using Registry Editor
1. Press Windows key + R. Type Regedit.exe and click OK.

2. Navigate the following path:
Computer\HKEY_CURRENT_USER\Software\Microsoft\OneDrive
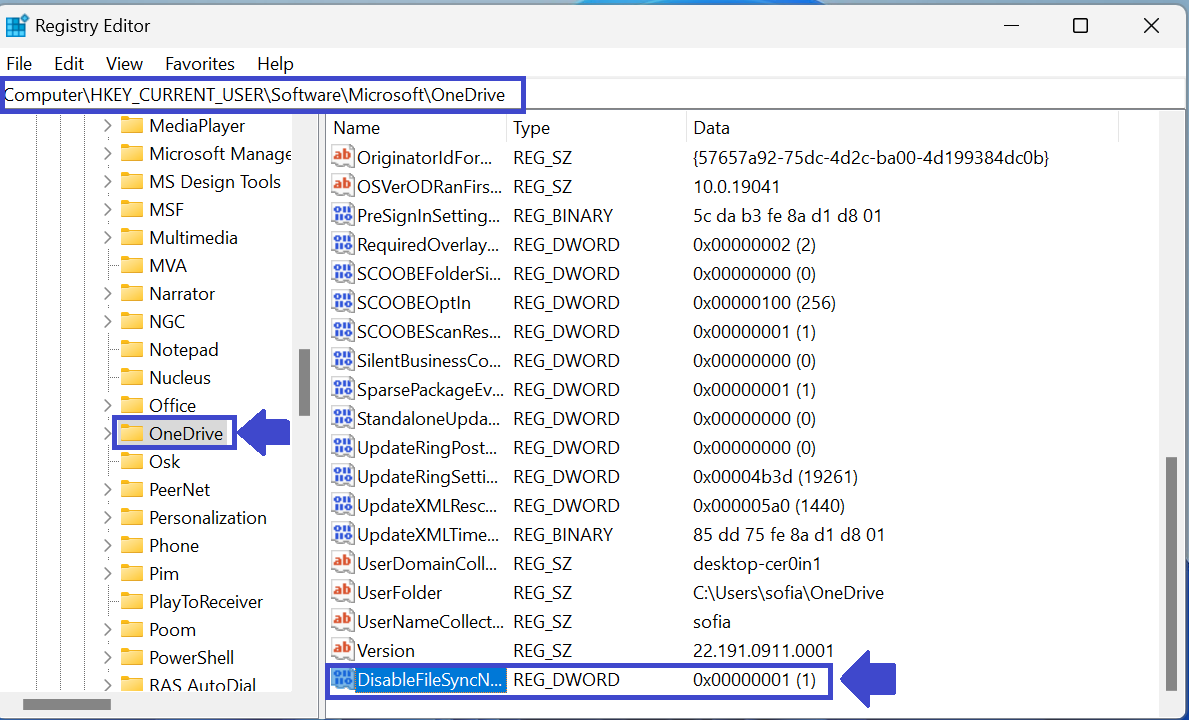
3. In OneDrive, Search for DisableFileSyncNGSC. If you don’t have the key, you can create a new one.
Right-click on OneDrive => New => DWORD (32-bit) value. Then type “DisableFileSyncNGSC” and click OK.
4. Double-click on “DisableFileSyncNGSC”. Prompt box will appear.

Enter value 1 to Enable and 0 to Disable the OneDrive. Then click OK.
5. Close the Registry Editor and Restart your computer to apply the changes.
Method 3: Enable or Disable using Local Group Policy Editor
1. Press Windows key + R. Type gpedit.msc and click OK.

2. Navigate the following path:
Computer Configuration\Administrative Templates\Windows Components\OneDrive
3. In the Right-pane, Double-click on “Prevent the Usage of OneDrive for file storage“.
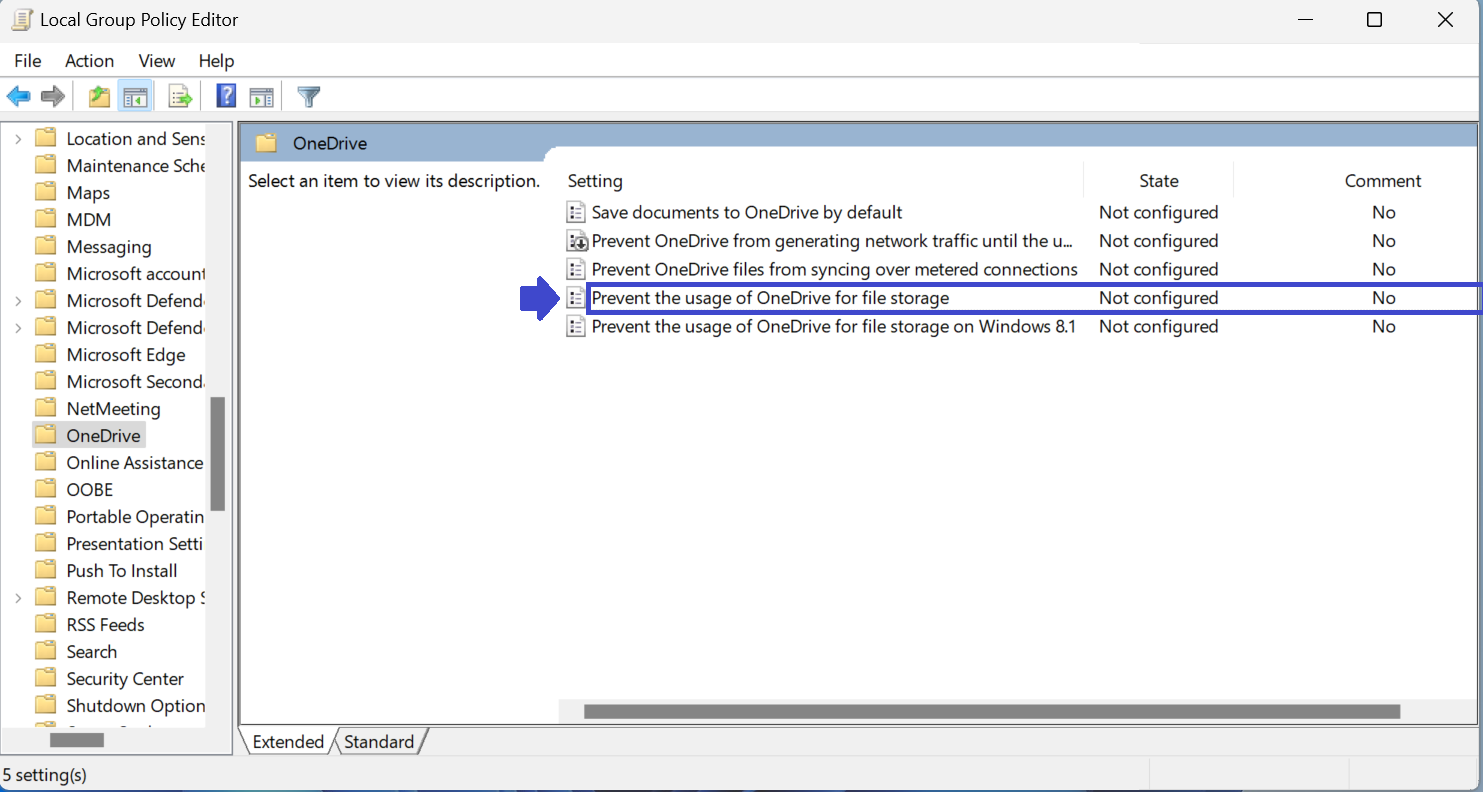
4. Prompt box will appear.
Select Enabled to disabled the OneDrive. Click OK followed by Apply.
Select Disabled to enable the OneDrive. Click OK followed by Apply.

5. Restart the computer to apply the changes.
That’s It!


In method 3,
Choice enabled to disable one drive, and reverse.
^^ Updated, thanks!