Tamper Protection in Windows Security helps prevent malicious apps from changing important Microsoft Defender Antivirus settings, including real-time protection and cloud-delivered protection. In this articles, we will provide you step by step guide to How to enable Tamper Protection in Windows 11.
When enabled, Tamper Protection prevents changes to important system security configuration settings especially changes that are not made directly through the Windows Security application. The goal is to prevent malicious software or even third-party applications from changing important security settings in Windows Defender Antivirus and other tools.
Page Contents
What if Tamper Protection is disabled?
If Tamper Protection is turned off, users will see a small yellow warning symbol in the Windows Security application by the Virus & Threat Protection entry.
How to enable Tamper Protection in Windows 11
Method 1: Using Settings App
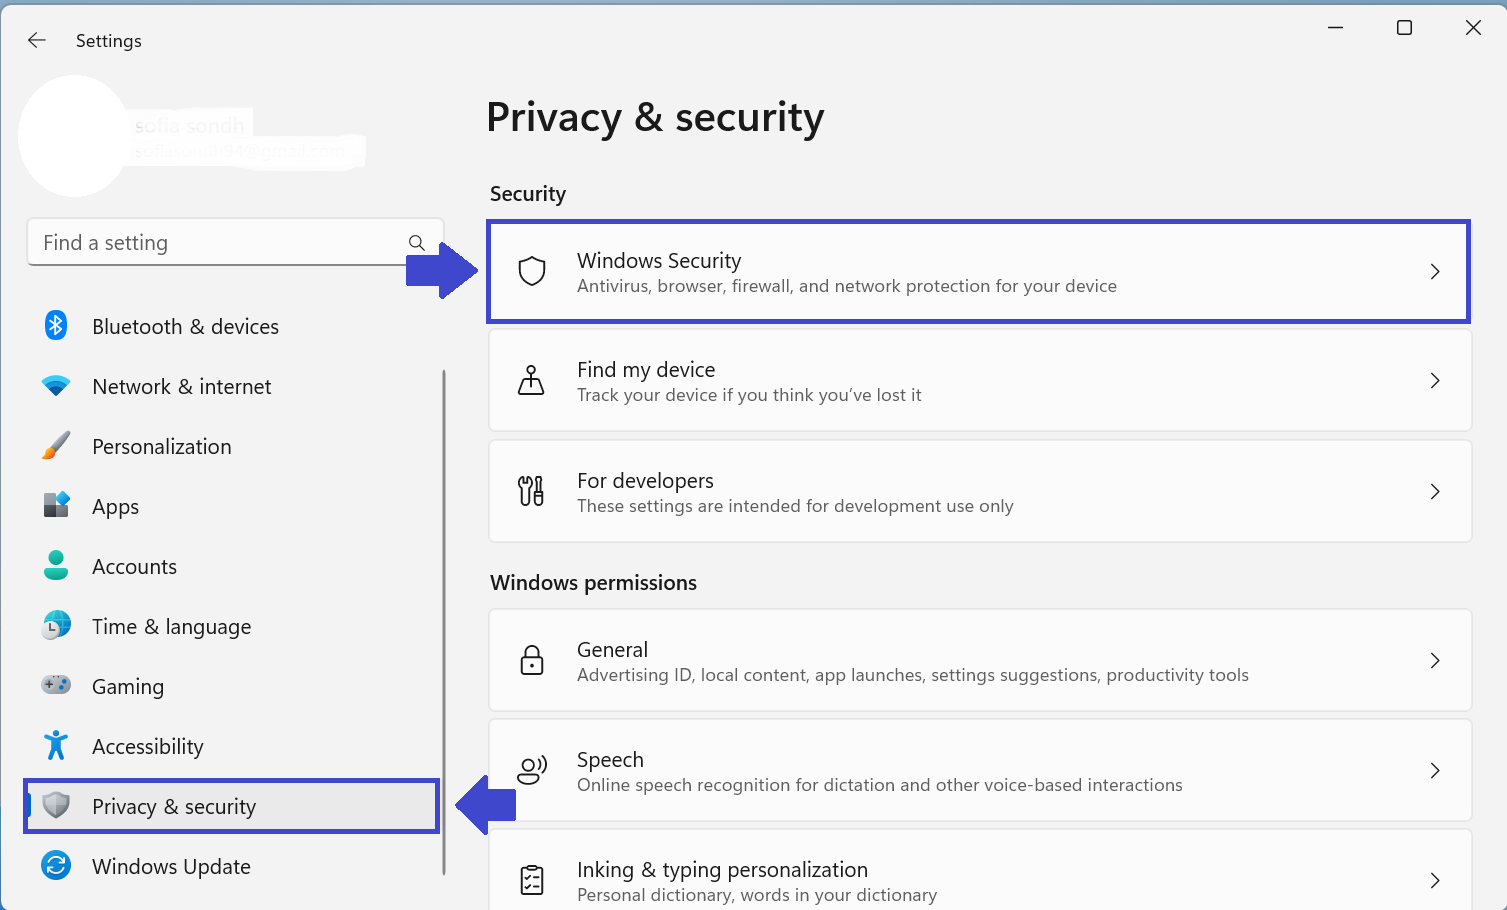
STEP 1: Open Settings and go to Privacy & Security. Click on Windows Security.
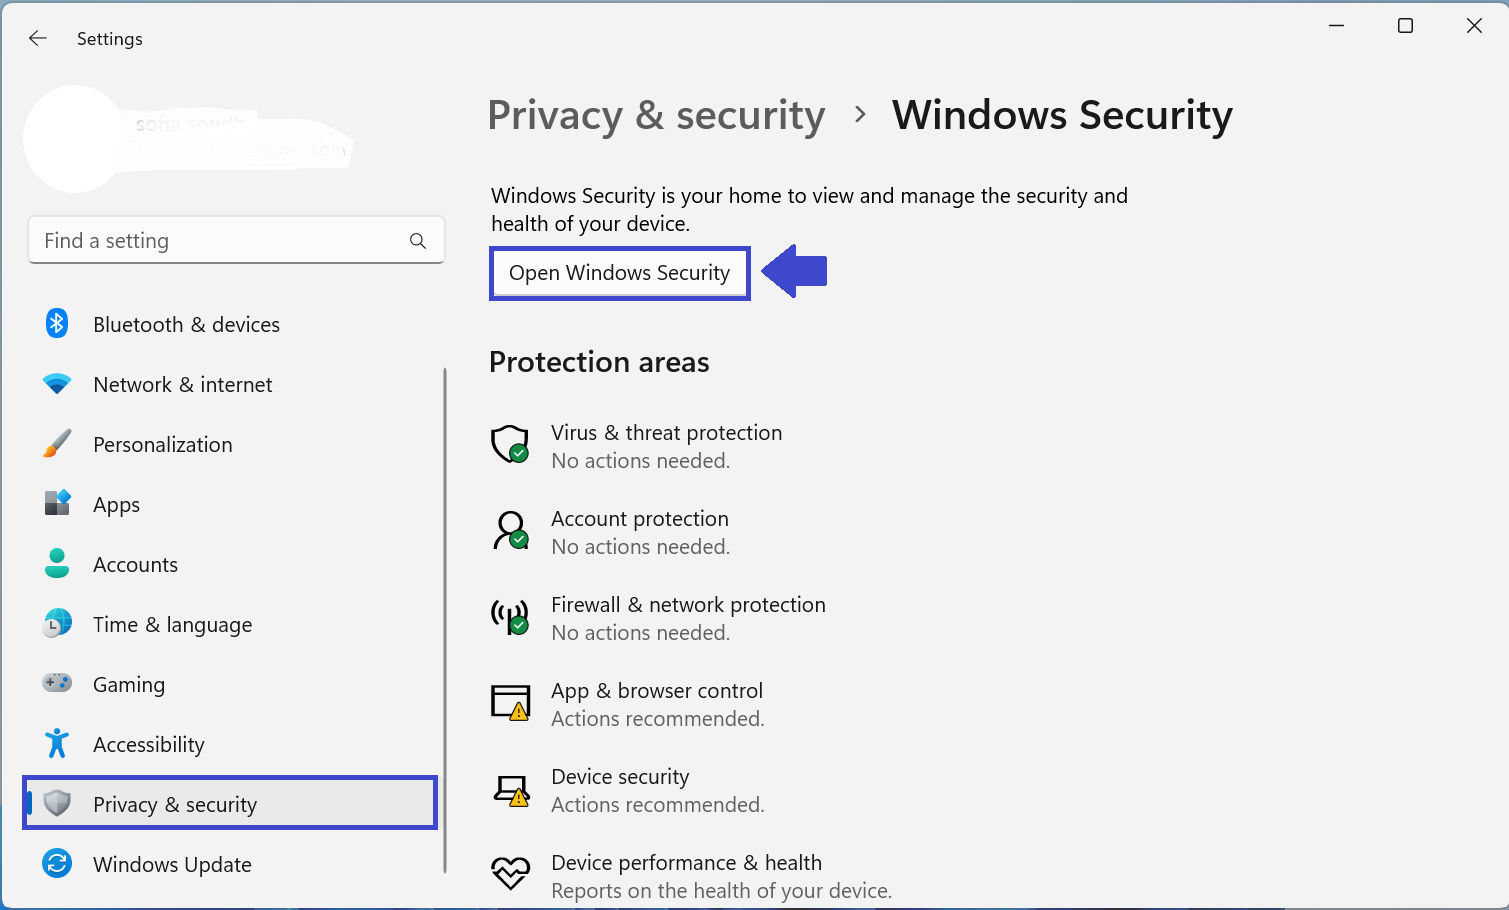
STEP 2: Now click on Open Windows Security.
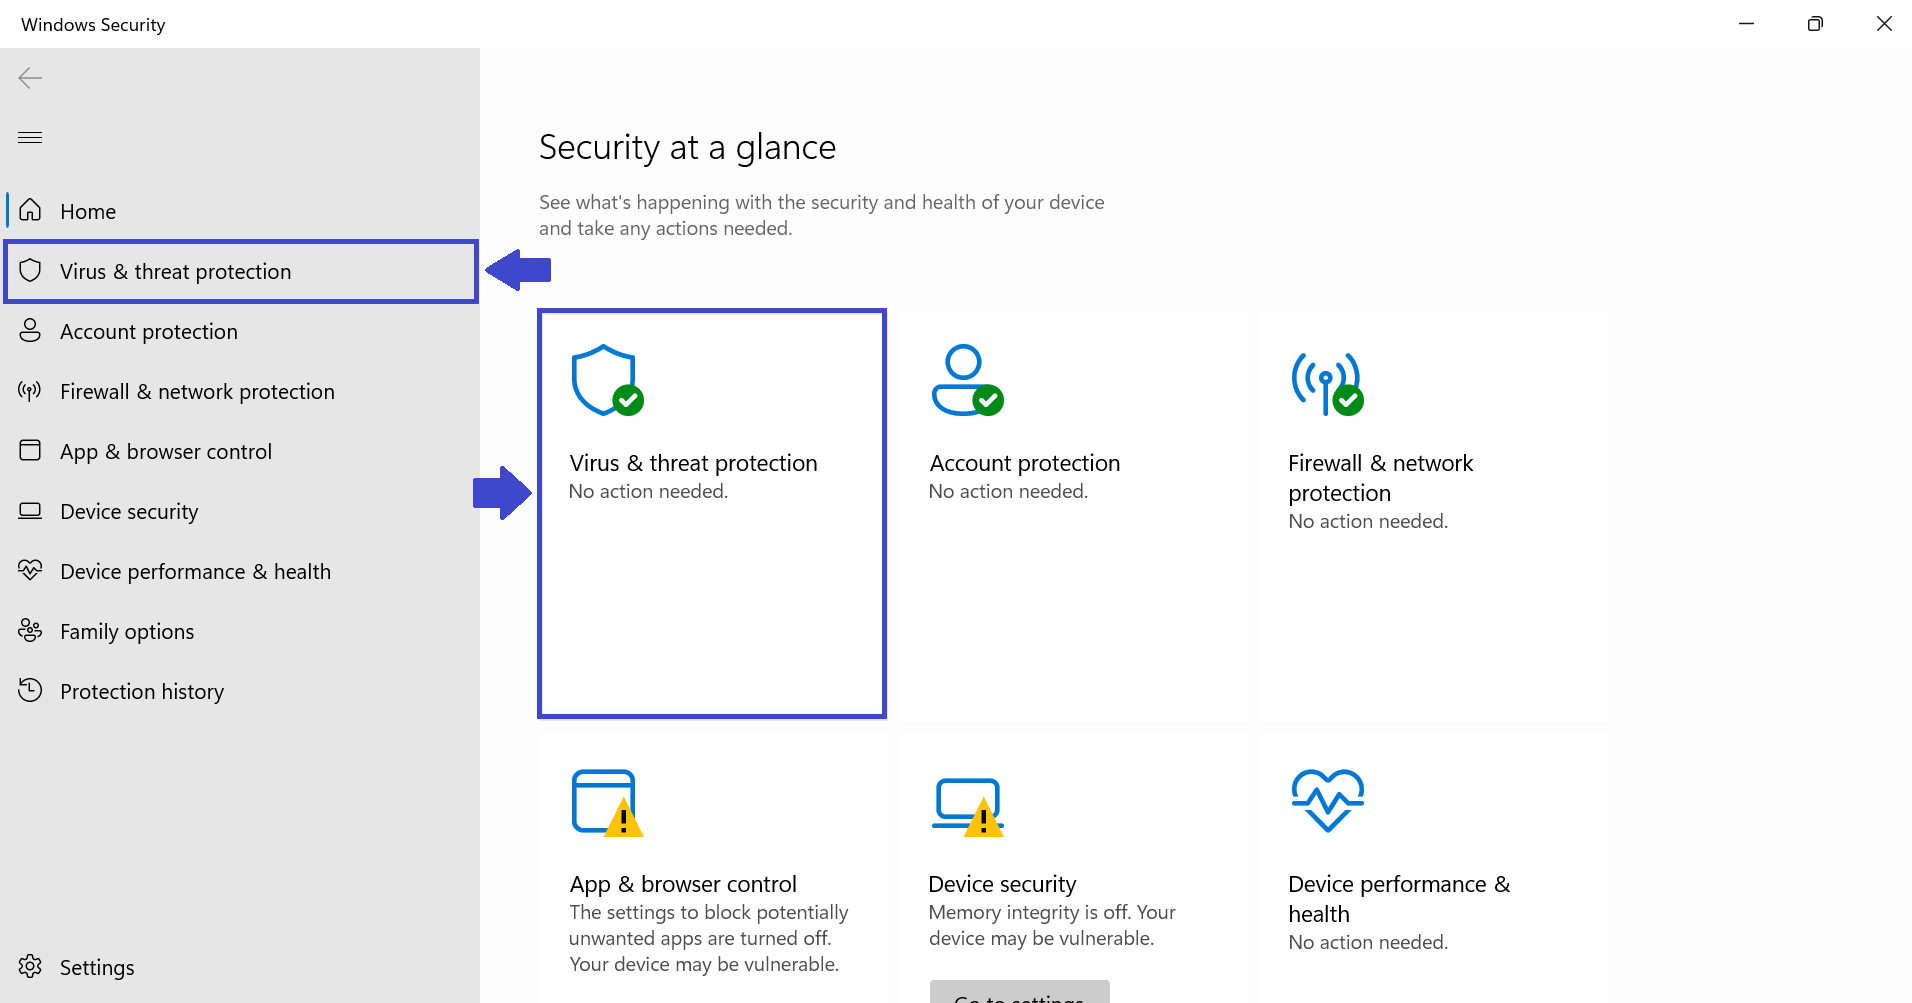
STEP 3: Here in Windows Security, go to Virus & threat protection. Either you can click on “Virus & threat protection” in the left panel or in right panel.
STEP 4: Now, consider the below image. Click on Manage Settings link under the Virus & threat protection settings.
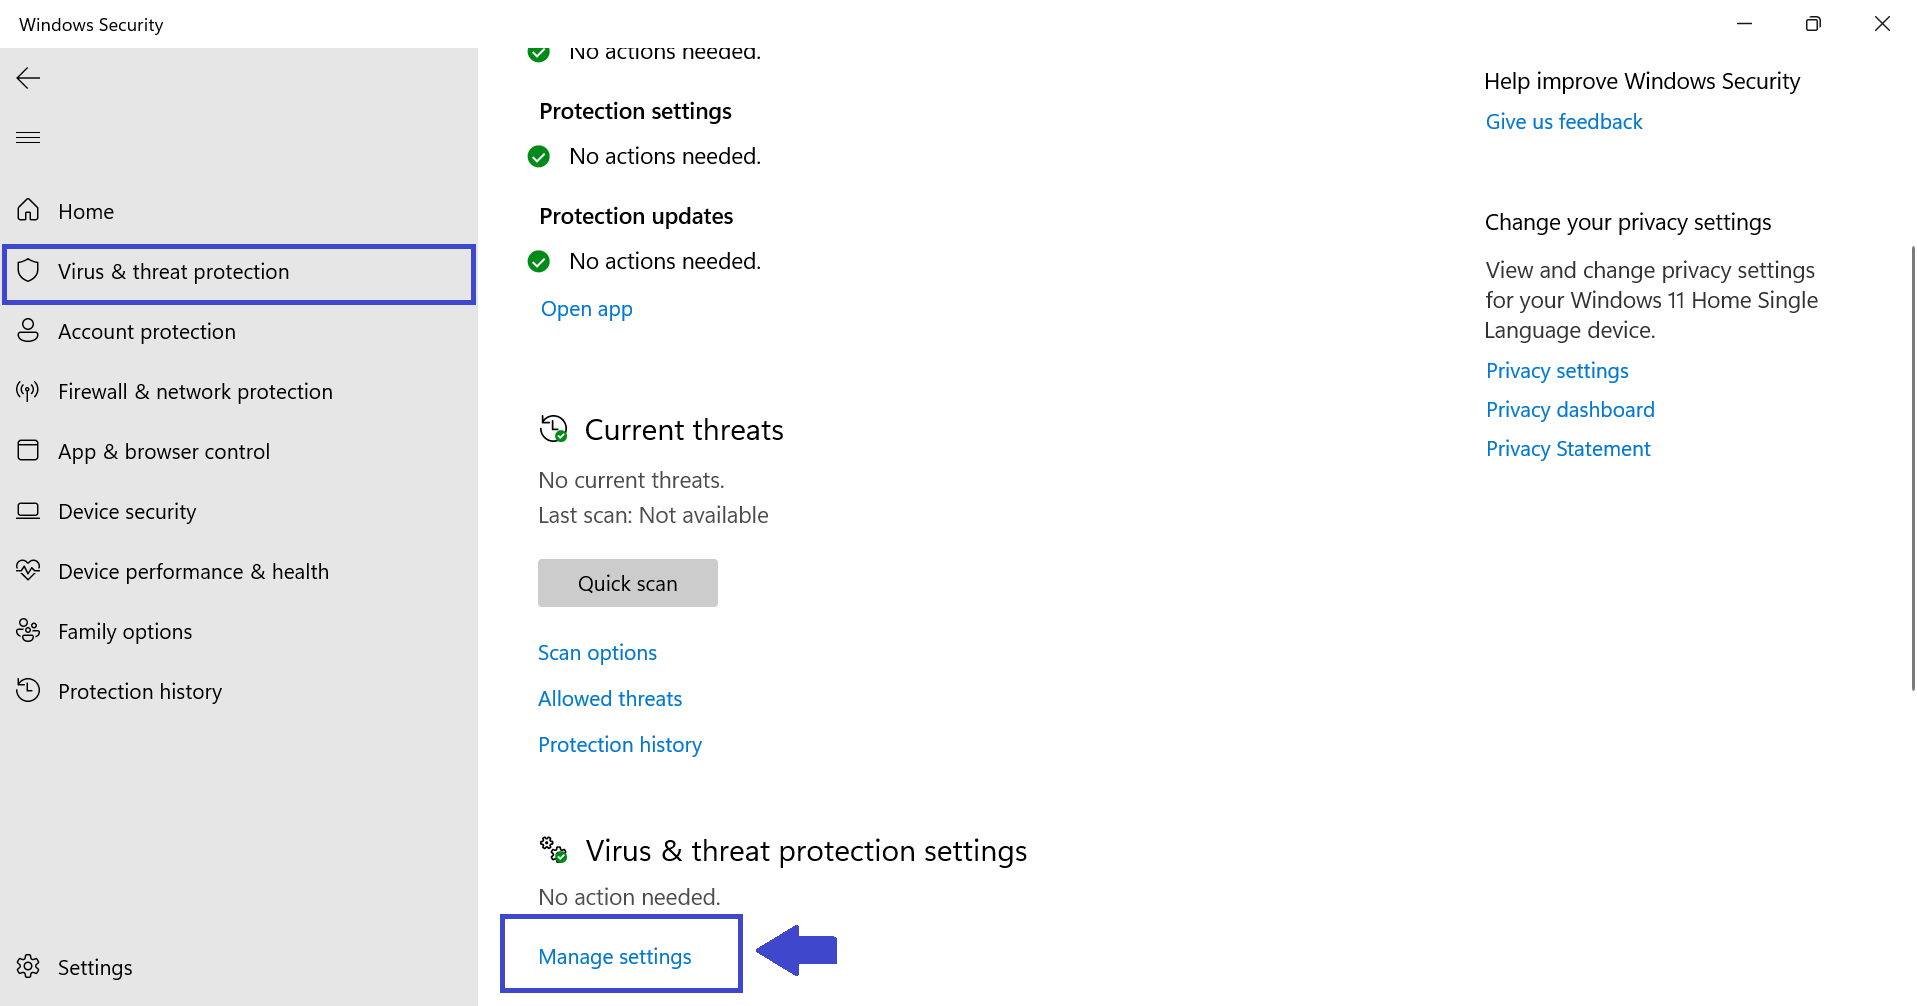
STEP 5: Here you can Enable or Disable the Tamper Protection.

Method 2: Enable Tamper Protection Using Registry Editor
STEP 1: Press Windows key + R. Type “regedit”. Prompt box will appear and click Yes.

STEP 2: Now consider the navigation below:
Computer\HKEY_LOCAL_MACHINE\SOFTWARE\Microsoft\Windows Defender\Features
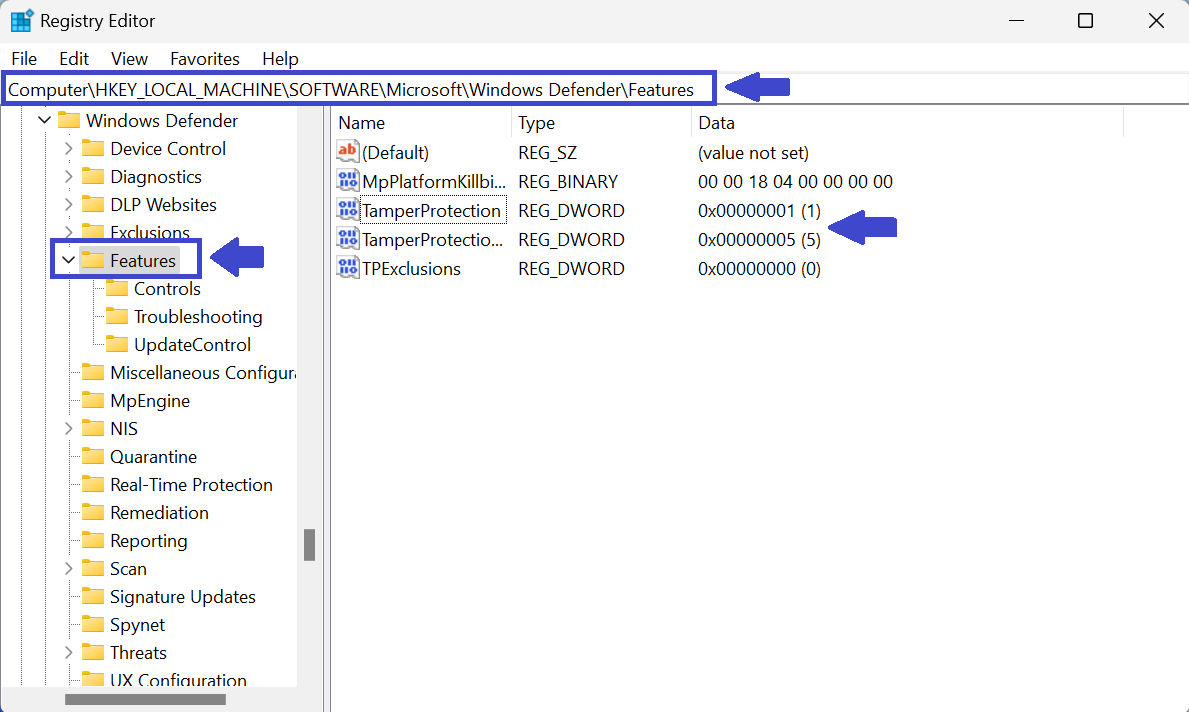
STEP 3: Click on Features. In the right panel, you will see the key “TamperProtection”. (See above image).
Right click on Tamper Protection and set the value. If you want to enable then type 5 and if you want to disable then type 0. After setting the value click OK.

STEP 4: If you don’t have Tamper Protection key. Don’t worry. You can create a new one.
In the left panel, right click on Features => New => DWORD (32-bit) value. Then type TamperProtection and click OK.
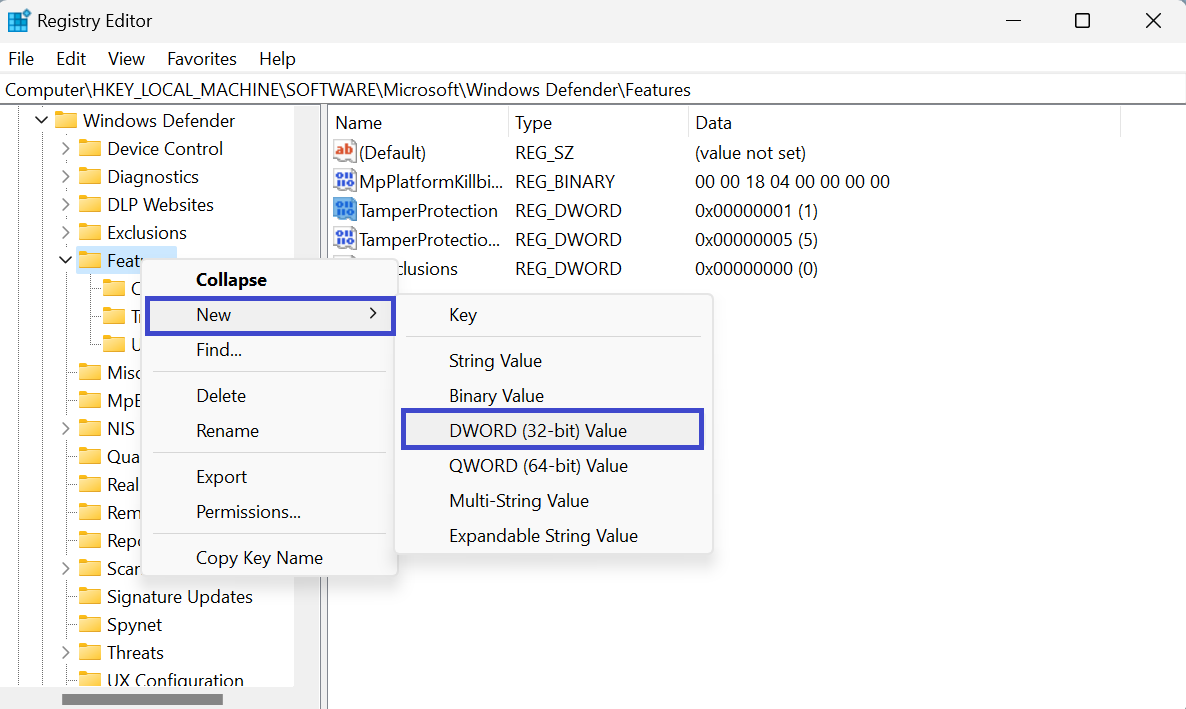
New TamperProtection key will be create and you can follow the STEP 3 to enable the Tamper Protection.
That’s it!