The Optional Features are parts of Windows 11 that you can use to add extra functionality to your computer and not simply run it. Other functions like Internet Explorer mode, Notepad, Print Management, Windows Media Player, and others, are preinstalled on the system by default.
Nevertheless, you can always add more (such XPS Viewer, Wireless Display, Microsoft Quick Help, Windows Storage Management, etc.) or take away the ones you don’t require.
Accordingly, if the feature you wish to add isn’t available in the Settings app, you may also add alternative components like Hyper-V, Windows Subsystem for Linux,.NET, and many others using the old “Windows Features” tool.
This manual will walk you through the process of adding extra features to Windows 11. Also, you will discover how to remove any optional features that you don’t use.
Page Contents
Install Optional Features on Windows 11
You can use the Settings app if you need to install a specific feature.
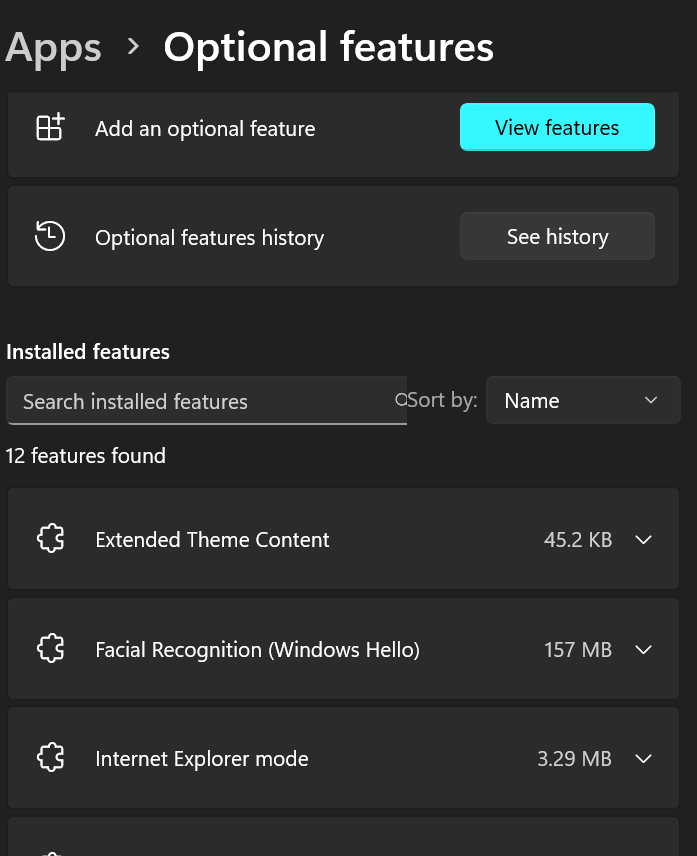
Add optional features
Follow these steps to install optional features on your computer:
- Step 1 – Open Settings app
- Step 2 – Click on Apps
- Step 3 – Tap on the Optional features tab
- Step 4 – Click “View Features” in the ‘Add an optional feature” setting
- Step 5 – Select the optional feature to install on Windows 11
- Step 6 – Click the Next button
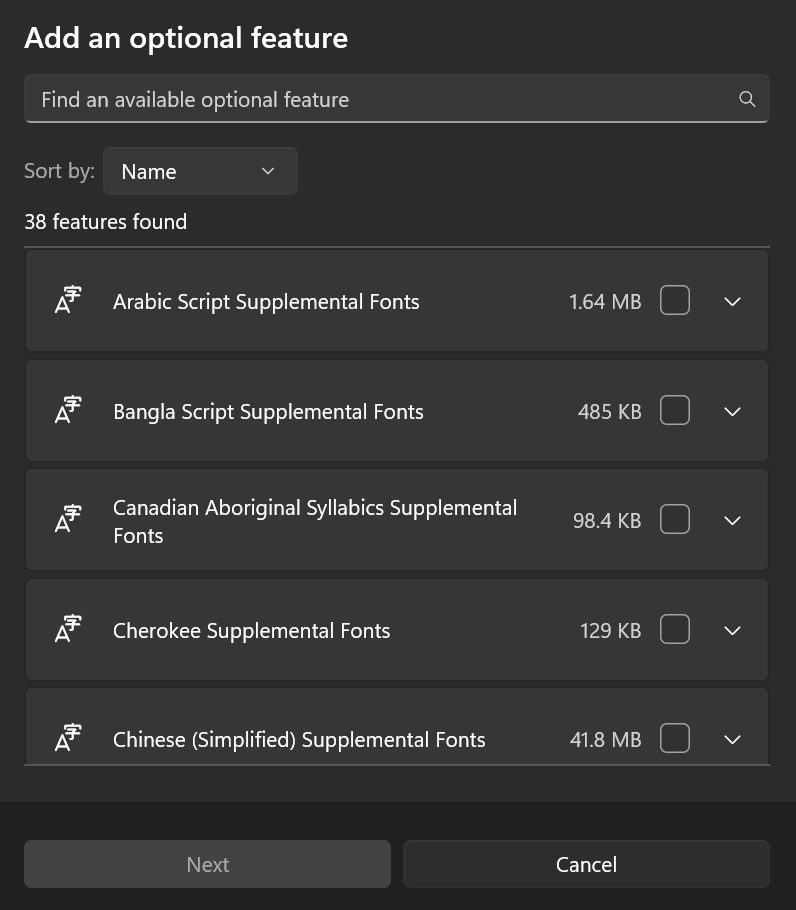
- Step 7 – Tap the Install button
The components will download and install on your computer once you’ve finished the procedures. You can checkout this video for more details:
Uninstall Optional Features on Windows 11
Similar to adding features, you can use the Settings app if you need to uninstall a specific feature.
Remove optional features
Follow these steps to uninstall optional features from your computer:
- Step 1 – Open Settings.
- Step 2 – Click on Apps.
- Step 3 – Click the Optional features tab.
- Step 4 – Choose the optional feature under the “Installed features” section.
- Step 5 – Click the Uninstall button.
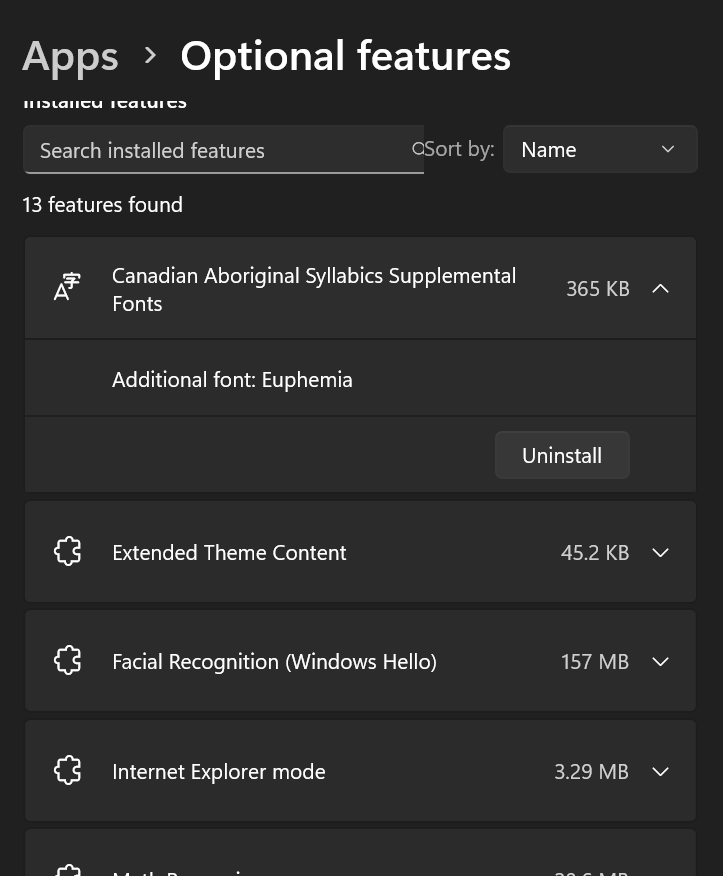
Windows 11 will no longer have the feature when the process is completed.