
A bootable USB is particularly required to make clean install of Windows operating system. Additionally, it may be helpful to recover or repair your Windows installation via recovery environment. You’ll need the Windows operating system ISO file to make the bootable USB drive. You can make any working USB drive as bootable USB, if it is higher in capacity. For earlier operating systems, you can create bootable USB drive using Command Prompt. In this guide, we’ll see how to create bootable USB to install Windows 11.
Though, you can easily upgrade from Windows 10 to Windows 11 using Windows Update, but sometimes a clean install may be the need of the hour. A clean install can be made easily via bootable USB. If you’ve just bought a new disk for your system, it will also require a clean install of Windows operating system. Additionally, if you want to create a dual boot system, you can install Windows 11 on a parallel drive to your existing operating system with bootable USB.
Now, let us see how you can create bootable USB to install Windows 11.
Create bootable USB to install Windows 11
As of this writing, we don’t have any official tool from Microsoft for creating a bootable USB. However, there are many third-party tools available on the Internet which can help you to make bootable USB in few minutes. Microsoft recommends using the Rufus tool to create a bootable USB. In this guide, I’ll also use Rufus to create Windows 11 bootable USB. Note that use of third-party software is completely at your own risk. I recommend to create a System Restore point first, before trying such tools.
You must backup all the data on the USB drive as it will be first formatted and then created as bootable drive. The USB drive must be above 8GB in capacity. We will create bootable USB in accordance with Windows 11 system requirements.
Follow these steps:
1. Download Windows 11 ISO file using this guide.
2. Download Rufus latest version from https://rufus.ie/en.
3. Install and then launch Rufus on your system. Now make following selections:
- Device: Select the USB drive which you want to make bootable.
- Boot selection: Locate Windows 11 ISO file.
- Image option: Select Standard Windows installation.
- Partition scheme: Make sure you select GPT here.
- Target system: Select UEFI (non CSM).
- Volume label: Enter the name for bootable USB or you can leave it with default name.
- File system: Select NTFS.
- Cluster size: Let Default value selected.
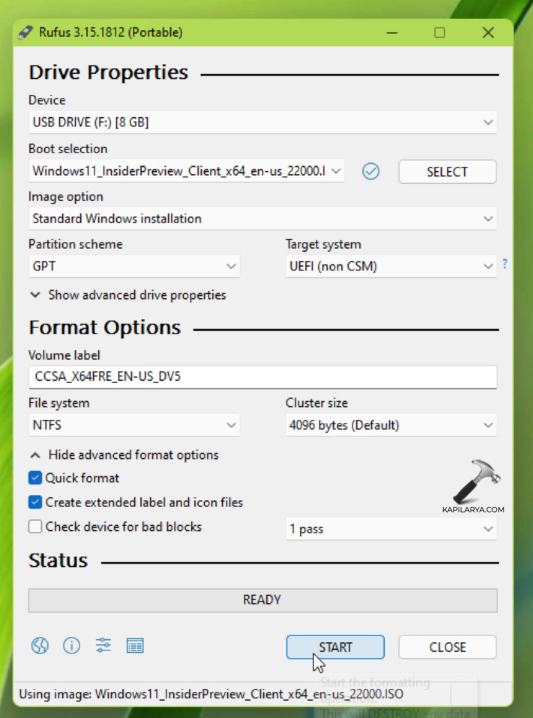
4. Click START to start creating the bootable USB. You’ll next receive a warning that all data on USB will be formatted. If you already backup-ed your data, click OK to proceed.

5. Let the process completely finish. Once it is done, click CLOSE.
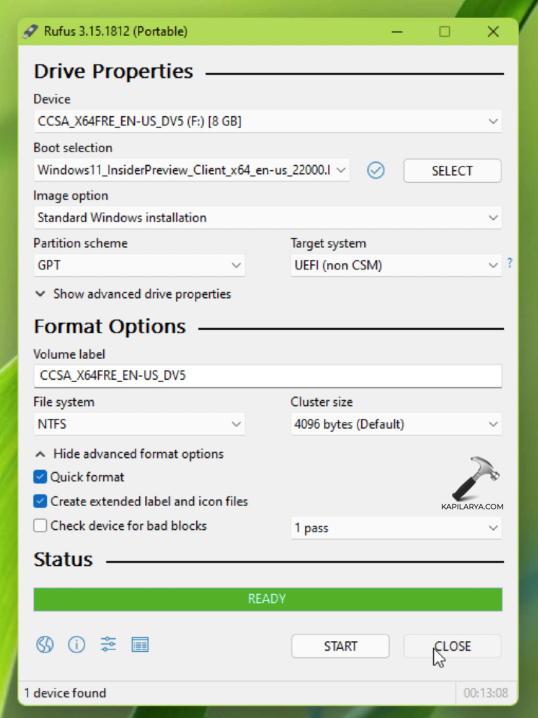
Your Windows 11 bootable USB drive is now ready. Proceed with steps to make clean install of Windows 11.
That’s it!


