System File Checker (SFC) is an in-built tool inside Microsoft Windows operating system that helps us to repair system files in times of crisis, and solving issues without reinstalling whole OS. It basically allows users to scan the corrupted files and fix or restore them with default ones. This means if a third-party software has modified native system files, System File Checker will restore them. This works for all Windows editions starting from Windows XP to latest Windows 11.
Now some technical information about System File Checker. It is basically the part of Windows Resource Checker tool of Windows operating systems. According to Microsoft, “it scans the integrity of all protected system files and replaces incorrect versions with correct Microsoft versions“.
The overall syntax for System File Checker commands goes like this:
Where, you can use the different parameters according to your need. Here are the specialty of these different parameters:
/SCANNOW : Scans integrity of all protected system files and repairs files with problems when possible.
/VERIFYONLY : Scans integrity of all protected system files. No repair operation is performed.
/SCANFILE : Scans integrity of the referenced file, repairs file if problems are identified. Specify full path by substituting it with <file> placeholder.
/VERIFYFILE : Verifies the integrity of the file with full path <file> placeholder. No repair operation is performed.
/OFFBOOTDIR : For offline repair specify the location of the offline boot directory.
/OFFWINDIR : For offline repair specify the location of the offline Windows directory.
Of all these parameters, /SCANNOW is one of the most popular and used syntax. So let us discuss the various scenarios when you run SFC /SCANNOW and different results are obtained with it:
Page Contents
How To Use System File Checker To Repair Windows 11/10
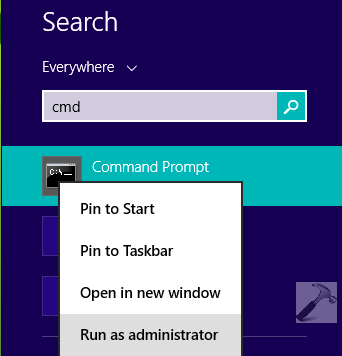
1. To use SFC /SCANNOW command, you have to open administrative or elevated Command Prompt aka Command Prompt with administrative privileges. In the Windows search box, type cmd and pick Command Prompt from results, right click it and select Run as administrator.
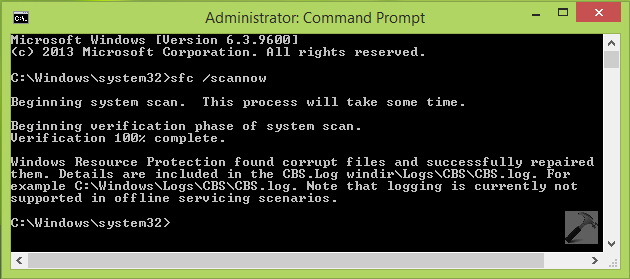
2. Then simply type sfc /scannow command and hit Enter key. You’ll see this message:
Beginning system scan. This process will take some time.
Beginning verification phase of system scan.
Verification <0-100>% complete.
The time of scan to complete depends upon the capabilities of your system. Now following results may possible:
a. If the scan has completed with founding some corrupted or missing files and it fixed them also, you’ll see this message:
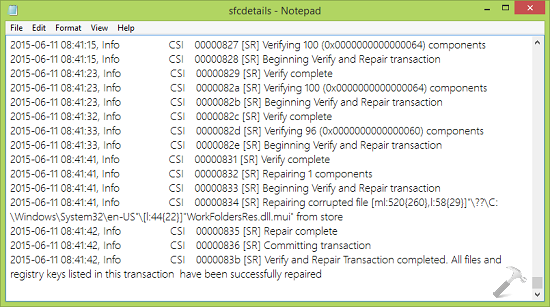
Windows Resource Protection found corrupt files and successfully repaired them. Details are included in the CBS.Log %WinDir%\Logs\CBS\CBS.log.
You can run this command to extract the scan log in a Notepad file (sfcdetails.txt) at Desktop:
findstr /c:"[SR]" %windir%\Logs\CBS\CBS.log >"%userprofile%\Desktop\sfcdetails.txt"
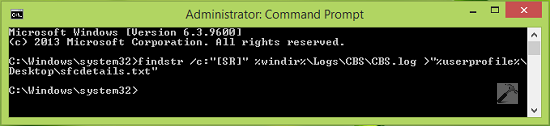
The resulted scan log can be viewed in Notepad for analysis purpose:
b. If the scan has completed with founding some corrupted or missing files but it can’t fix them, you’ll see this message:
Windows Resource Protection found corrupt files but was unable to fix some of them. Details are included in the CBS.Log %WinDir%\Logs\CBS\CBS.log.

You can refer this fix to deal with this message:
FIX: Windows Resource Protection Found Corrupt Files But Was Unable To Fix Some Of Them
c. If the scan didn’t found any integrity violations or corrupted files, you’ll receive this message:
Windows Resource Protection did not find any integrity violations.
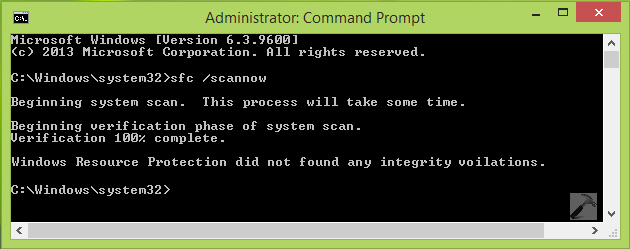
It means your system native files are safe and original and you’re good to go.
d. Sometimes the scan may not be initiated, because the background services on which scan depends are not running. Then you’ll see this message:
Windows Resource Protection could not perform the requested operation.
or
Windows Resource Protection could not start the repair service.
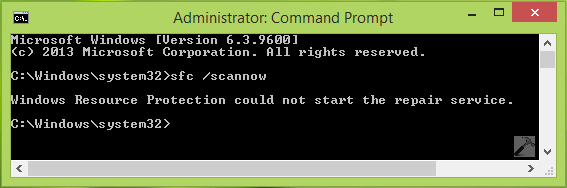
In this case you can refer this fix:
Fix: Windows Resource Protection Could Not Perform The Requested Operation
So this is all about System File Checker corruption repair commands. Hope they helps you and fix your system, Good luck!