Many times we have to use Microsoft Word for manipulating sensitive data. When the data is highly confidential, we must protect it from others, so that it can’t be accessible by all. For a multiple user system, this becomes the matter of important concern and thus you must be able to restrict your file data with some credentials.
Recommended : How To Repair Office 2013 Offline
Good thing is that Microsoft Word is already shipped to you with some in-built security features. Using them, you can make your files more secure and confidential. There are various ways using which can protect your documents by:
- Making document read-only
- Encrypting with password
- Restricting editing
- Restricting access
- Adding a digital signature
Out of these ways, we’ll see here how to make the files password protect and encrypt them with suitable case sensitive credential. Thus, whenever you’ll open this password encrypted file, you’ll get this prompt asking you the credential. Enter the correct password and you’re good to go.
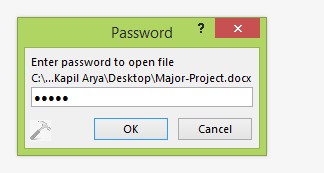
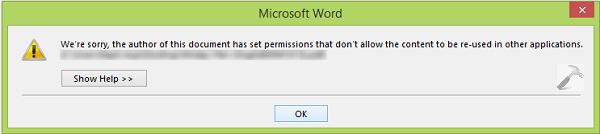
In case if you have provided wrong credentials, following message may appear:
Page Contents
We’re sorry, the author of this document has set permissions that don’t allow the content to be re-used in other applications.
So here is how to make your document password protect so far:
How To Make Files Password Protected In Word 2013
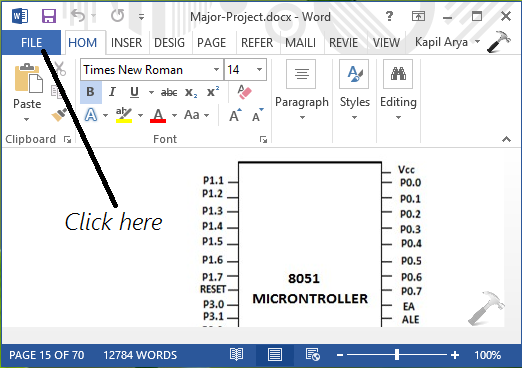
1. Open the document in Word 2013, which you want to encrypt with password and click FILE.
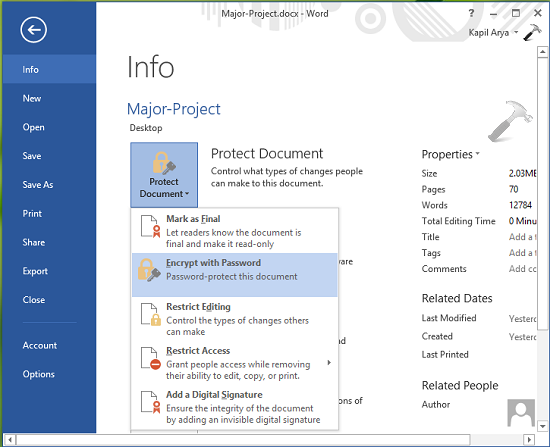
2. In the next screen, you must be able to Protect Document options. Click on the drop-down as shown in image below and select Encrypt with password.
3. Moving on, enter your desired password in the following box and click OK. You’ll be asked to re-confirm entered password, so please do the needful.
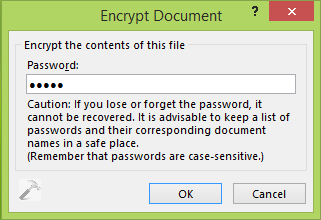
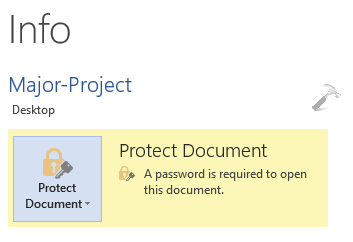
Once both password are matched, your document will be password protect. You’ll also be able to see A password is required to open this document message as a part of confirmation.
In this way you can password protect your files and secure the sensitive data carried way by them. Hope you find the tip useful. Go here to learn how to edit PDF files in Word 2013.