
Add-ins are the additional supportive programs that helps Office components to have custom features. For example, if an Office component like PowerPoint need a temperature conversion behavior, it would require that specific converter add-in to have this functionality. Thus it shows that if we want to add more productivity to Office components, we can add desired add-ins to these programs.

By default, PowerPoint came with some add-ins included. You can add or remove add-ins according to your need. In this article, we’ll tell you the ways to remove these add-ins completely, so that you can get rid of unwanted add-ins which may cause issues with PowerPoint to load it correctly.
Page Contents
Manually Remove Add-ins For PowerPoint 2013
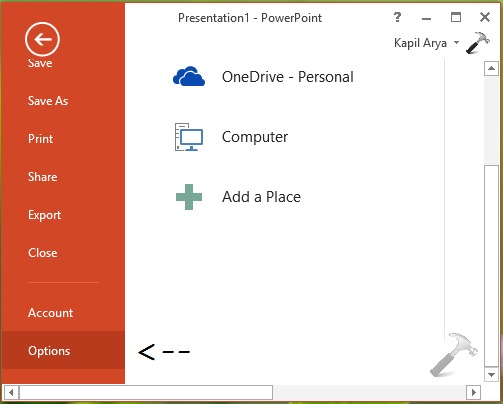
1. Open PowerPoint and enter into blank presentation. Click FILE option then.

2. Next, click Options in the following window:
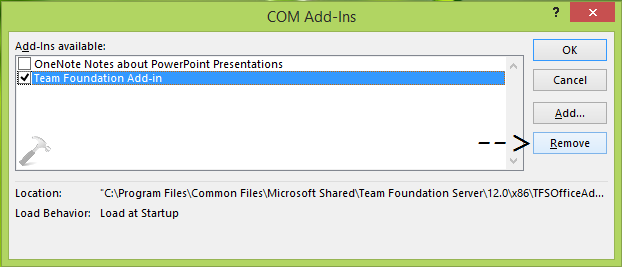
3. Moving on, in the PowerPoint Options window, click Add-ins in the left pane. Then from Manage section, select COM Add-ins and click Go.

4. Finally, in the COM Add-Ins window, select the add-in you wish to erase and click Remove.
So this is all about removing an add-in manually. In some cases, when you remove add-ins manually, their registry configuration may remain intact into the system, which may result in peculiar behavior of Office components. Hence for those scenarios, you need to delete add-ins permanently using registry manipulation.
Permanently Remove Add-ins For PowerPoint 2013
Registry Disclaimer: The further steps will involve registry manipulation. Making mistakes while manipulating registry could affect your system adversely. So be careful while editing registry entries and create a System Restore point first.
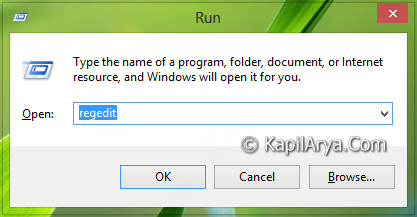
1. Press  + R and put regedit in Run dialog box to open Registry Editor (if you’re not familiar with Registry Editor, then click here). Click OK.
2. In the left pane of Registry Editor, navigate here:
HKEY_LOCAL_MACHINE\SOFTWARE\Microsoft\Office\PowerPoint\Addins
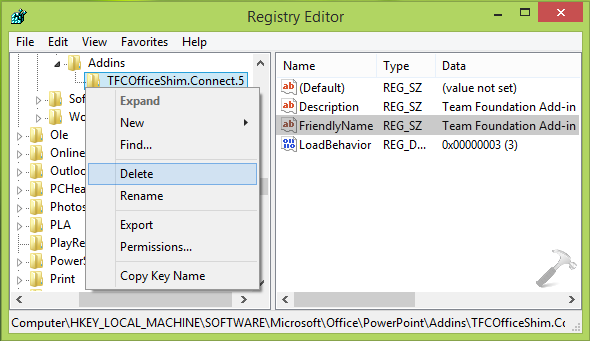
3. At this registry location, the Add-ins registry key have its sub-keys for the various add-ins. Thus all you need to do is to highlight these specific add-ins registry sub-keys and in the right pane, checkout the FriendlyName string’s data. This will help you to confirm, to which add-in the sub-key corresponds. Once you’ve found the exact sub-key to the add-in, you want to remove, right click on the same sub-key and select Delete. Thus, add-in is removed permanently and completely, so you can now close Registry Editor.
That’s it! Also see how to fix various issues regarding PowerPoint with Windows Updates.


Thanks Kapil for this post. I suggest everyone here to backup registry of add on before you delete. In case someone need it later.
Rgds.
Nicholas
^^ Agreed :)
Hi, we need to do this individually for word/excel or do it once n forgot about others….?
^^ No, you need to do it once as we removed common add-ins here.