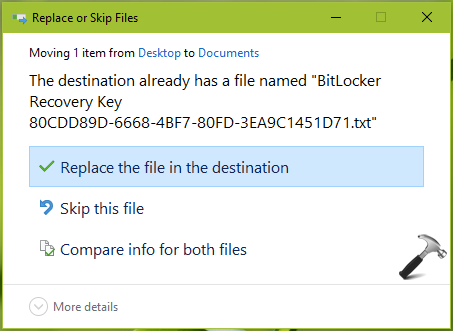
If a folder has an item and you paste same name and type another item to this folder, there occurs a folder merge conflict. This conflict occurs to prevent creation of duplicate items in the same folder that has same name/type. Under such a condition, you’ll be seeing this below shown familiar window in which you’ve to choose an action to what to do next. You can then replace item, or skip it or use compare option and also keep both items, Windows will simply add a number to either item.
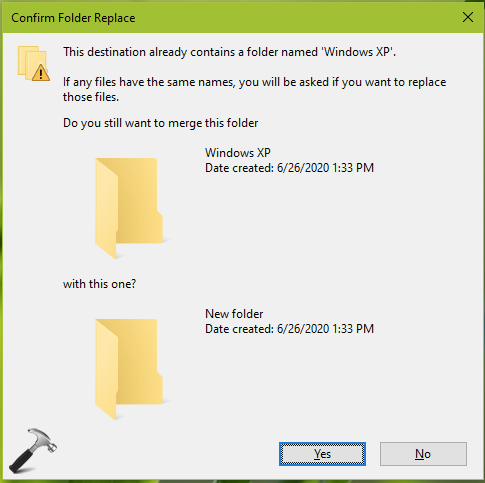
Similarly, when you have an xyz name folder and you create a new folder and put its name same, you’ll be seeing the Confirm Folder Replace dialog as shown below.
The above mentioned events are possible when you’ve hidden folder merge conflicts. In this article, we’ll see how to show/hide folder merge conflicts in your Windows 10.
Page Contents
Show/Hide Folder Merge Conflicts In Windows 10/8.1/7
Method 1 – Using Folder Options
1. Press  + E to open File Explorer.
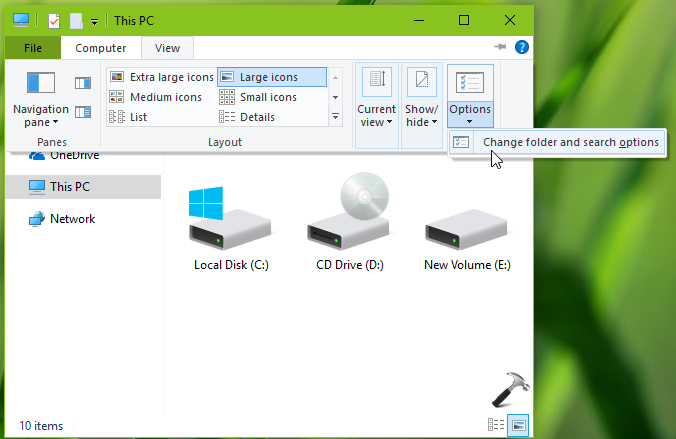
2. Under File Explorer ribbon, click View > Options > Change folder and search options.
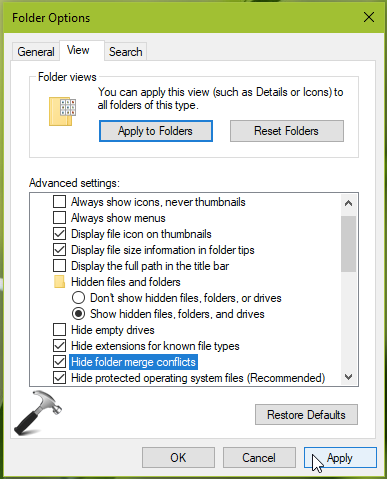
3. In Folder Options window, switch to View tab. Under Advanced settings, check Hide folder merge conflicts option or uncheck this option show folder merge conflicts. Click Apply, OK.
You can also configure same setting using registry, as mentioned in Method 2 next.
Method 2 – Via Registry Editor
1. Press + R and type regedit in Run dialog box to open Registry Editor (if you’re not familiar with Registry Editor, then click here). Click OK.
2. In left pane of Registry Editor window, navigate to following registry key:
HKEY_CURRENT_USER\Software\Microsoft\Windows\CurrentVersion\Explorer\Advanced
3. At this registry location, in the right pane of Advanced registry key, create a new registry DWORD (REG_DWORD) named HideMergeConflicts.
4. Double click and set the registry DWORD to 1 to hide folder merge conflicts or let it set to 0 to show folder merge conflicts.
5. Close Registry Editor and reboot to make changes effective.
That’s it!